


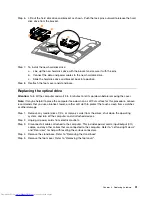


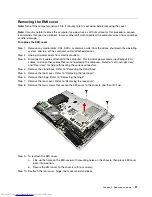

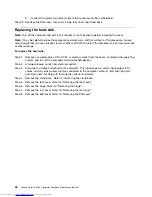


Step 6.
Locate the optical removal notch, and then use a screw driver push the optical drive out.
Step 7.
Push a small iron stick (paper clip) into the small hole on the optical drive cover so that the disk
springs out as shown.
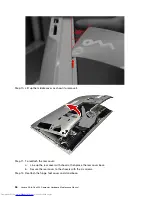
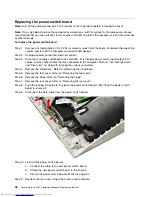
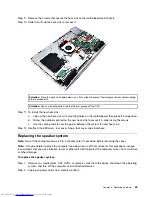
Step 8.
Remove the 2 screws that secure the optical drive to the metal bracket.
1
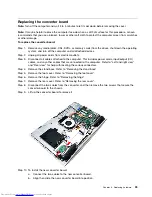
Step 9.
Use a small flat head screwdriver to press and push out the pins that secure the cover to the
disk.
2 3
32
Lenovo All-In-One 300 Computer Hardware Maintenance Manual
Summary of Contents for Thinkpad 300
Page 2: ......
Page 6: ...iv Lenovo All In One 300 Computer Hardware Maintenance Manual ...
Page 8: ...2 Lenovo All In One 300 Computer Hardware Maintenance Manual ...
Page 16: ...10 Lenovo All In One 300 Computer Hardware Maintenance Manual ...
Page 18: ...12 Lenovo All In One 300 Computer Hardware Maintenance Manual ...
Page 24: ...18 Lenovo All In One 300 Computer Hardware Maintenance Manual ...
Page 32: ...26 Lenovo All In One 300 Computer Hardware Maintenance Manual ...