


13. Close the microprocessor retainer and lock it into position with the small handle to secure the new
microprocessor in the socket.
14. Reinstall the heat sink. See “Replacing the heat sink” on page 111.
15. Reinstall the system board shield. See “Replacing the system board shield” on page 98.
16. Reinstall the computer cover. See “Replacing the computer cover” on page 95.
17. Reconnect all cables that were disconnected from the system board.
What to do next:
• To work with another piece of hardware, go to the appropriate section.
• To complete the installation or replacement, go to “Completing the parts replacement” on page 116.
Completing the parts replacement
After completing the installation or replacement for all parts, reinstall the back cover and reconnect cables.
Depending on the parts you installed or replaced, you might need to confirm the updated information in the
Setup Utility program. Refer to “Using the Setup Utility program” on page 63.
To reinstall the back cover and reconnect cables to your computer, do the following:
1. Ensure that all components have been reassembled correctly and that no tools or loose screws are left
inside your computer. See “Computer components” on page 31 for the locations of various components.
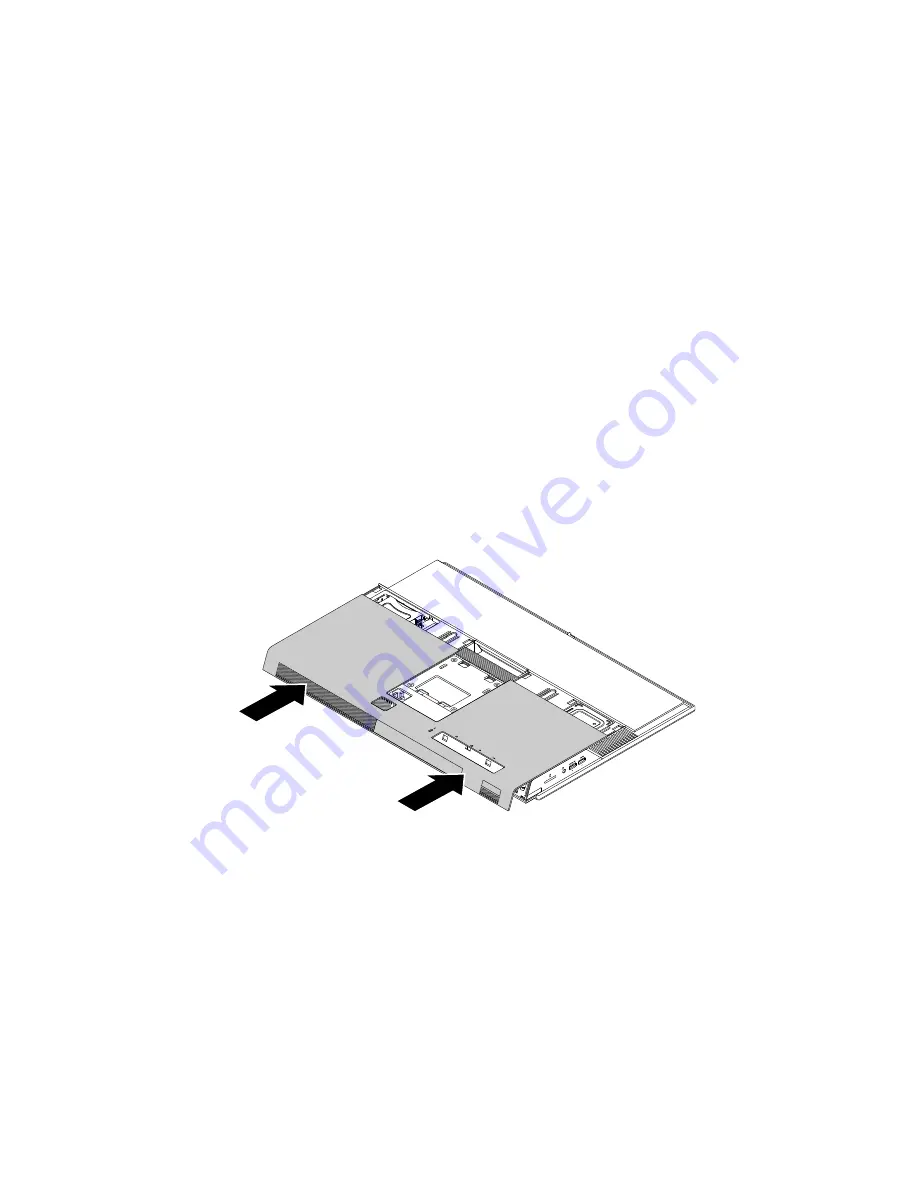
2. Slide the back cover as shown to install it to the chassis.
Figure 54. Installing the back cover
3. Install the computer stand. See “Replacing the computer stand” on page 88.
4. Place the computer in an upright position.
5. If a locking device is available, use it to lock the computer. See “Locking your computer” on page 59.
6. Reconnect the external cables and power cords to the corresponding connectors on the computer.
See “Hardware locations” on page 27.
7. Update your configuration. See “Using the Setup Utility program” on page 63.
8. If a newly installed hardware component does not work normally, update the device driver. See
“Keeping your computer current” on page 56.
116
ThinkCentre M900z Hardware Maintenance Manual
Summary of Contents for ThinkCentre M900z 10F2
Page 1: ...ThinkCentre M900z Hardware Maintenance Manual Machine Types 10F2 10F3 10F4 and 10F5 ...
Page 6: ...iv ThinkCentre M900z Hardware Maintenance Manual ...
Page 8: ...vi ThinkCentre M900z Hardware Maintenance Manual ...
Page 16: ...8 ThinkCentre M900z Hardware Maintenance Manual ...
Page 20: ...12 ThinkCentre M900z Hardware Maintenance Manual ...
Page 21: ...1 2 Chapter 1 Read this first Important safety information 13 ...
Page 22: ...1 2 14 ThinkCentre M900z Hardware Maintenance Manual ...
Page 27: ...1 2 Chapter 1 Read this first Important safety information 19 ...
Page 28: ...1 2 20 ThinkCentre M900z Hardware Maintenance Manual ...
Page 31: ...Chapter 1 Read this first Important safety information 23 ...
Page 40: ...31 32 ThinkCentre M900z Hardware Maintenance Manual ...
Page 50: ...42 ThinkCentre M900z Hardware Maintenance Manual ...
Page 66: ...58 ThinkCentre M900z Hardware Maintenance Manual ...
Page 128: ...120 ThinkCentre M900z Hardware Maintenance Manual ...
Page 136: ...128 ThinkCentre M900z Hardware Maintenance Manual ...
Page 138: ...China RoHS 130 ThinkCentre M900z Hardware Maintenance Manual ...
Page 139: ...Appendix D China Energy Label Copyright Lenovo 2015 131 ...
Page 140: ...132 ThinkCentre M900z Hardware Maintenance Manual ...
Page 142: ...134 ThinkCentre M900z Hardware Maintenance Manual ...
Page 145: ......
Page 146: ......