


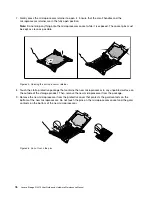

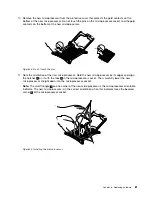


10. Remove the new microprocessor from the protective cover that protects the gold contacts on the
bottom of the new microprocessor. Do not touch the pins on the microprocessor socket and the gold
contacts on the bottom of the new microprocessor.
Figure 53. Do not touch the pins
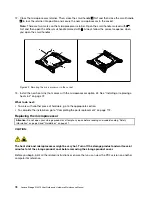
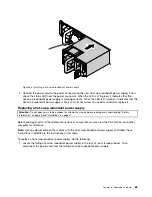
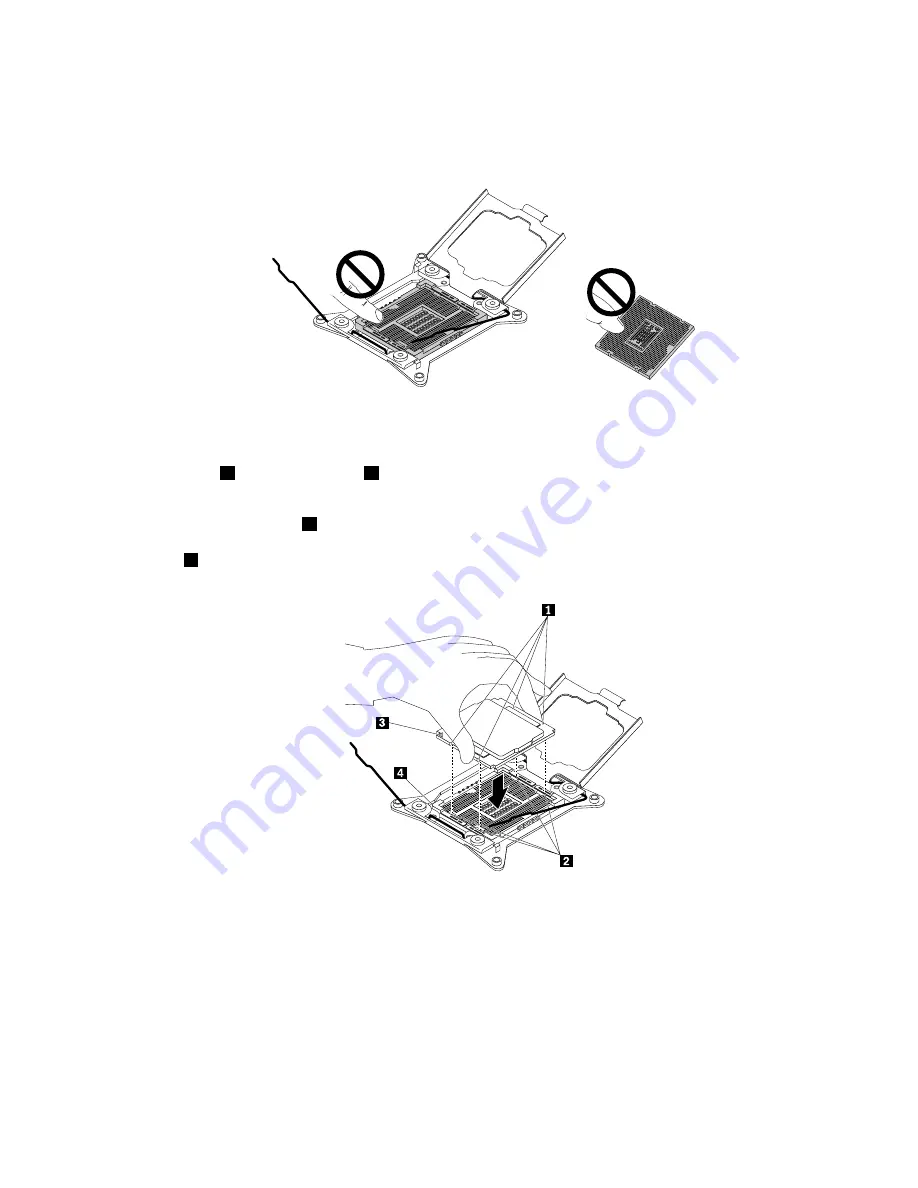
11. Note the orientation of the new microprocessor. Hold the new microprocessor by its edges and align
the notches
1
on it with the tabs
2
in the microprocessor socket. Then, carefully lower the new
microprocessor straight down into the microprocessor socket.
Note:
The small triangle
3
on one corner of the new microprocessor is the microprocessor orientation
indicator. The new microprocessor is in the correct orientation when this indicator faces the beveled
corner
4
of the microprocessor socket.
Figure 54. Installing the microprocessor
.
81
Summary of Contents for Storage N3310
Page 1: ...Lenovo Storage N3310 User Guide and Hardware Maintenance Manual Machine Types 70FX and 70FY ...
Page 14: ...xii Lenovo Storage N3310 User Guide and Hardware Maintenance Manual ...
Page 18: ...4 Lenovo Storage N3310 User Guide and Hardware Maintenance Manual ...
Page 20: ...6 Lenovo Storage N3310 User Guide and Hardware Maintenance Manual ...
Page 138: ...124 Lenovo Storage N3310 User Guide and Hardware Maintenance Manual ...
Page 151: ......
Page 152: ......


