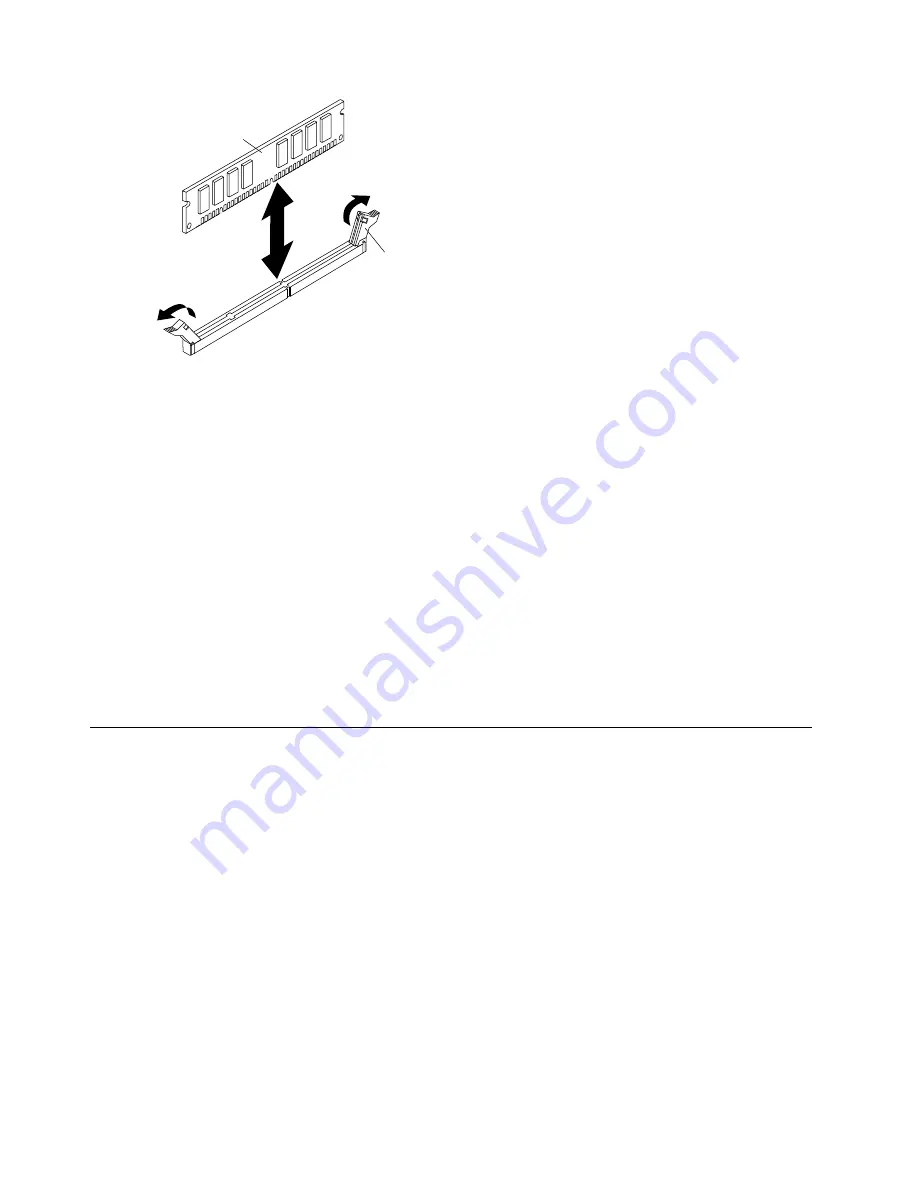
Retaining
clip
DIMM
a.
Make sure that the retaining clips are in the open position, away from the center of the DIMM
connector.
b.
Turn the DIMM so that the DIMM keys align correctly with the DIMM connector on the system
board.
Attention:
To avoid breaking the retaining clips or damaging the DIMM connectors, handle
the clips gently.
c.
Press the DIMM into the DIMM connector. The retaining clips will lock the DIMM into the
connector.
d.
Make sure that the small tabs on the retaining clips are in the notches on the DIMM. If there is
a gap between the DIMM and the retaining clips, the DIMM has not been correctly installed.
Press the DIMM firmly into the connector, and then press the retaining clips toward the DIMM
until the tabs are fully seated. When the DIMM is correctly installed, the retaining clips are
parallel to the sides of the DIMM.
Step 12. If the DIMM access door is open, use your fingers to close it.
Step 13. If you have other devices to install or remove, do so now; otherwise, go to “Completing the
Removing a memory module
Use this information to remove a memory module from the blade server.
The following illustration shows how to remove a DIMM from the blade server. This information also applies
to removing a DIMM filler.
28
BladeCenter HS22 Blade ServerInstallation and User's Guide
Summary of Contents for BladeCenter HS22
Page 1: ...BladeCenter HS22 Blade Server Installation and User s Guide Machine Types 7870 1936 1911 ...
Page 26: ...16 BladeCenter HS22 Blade ServerInstallation and User s Guide ...
Page 62: ...52 BladeCenter HS22 Blade ServerInstallation and User s Guide ...
Page 82: ...72 BladeCenter HS22 Blade ServerInstallation and User s Guide ...
Page 89: ...Taiwan Class A compliance statement Appendix B Notices 79 ...
Page 90: ...80 BladeCenter HS22 Blade ServerInstallation and User s Guide ...
Page 95: ......
Page 96: ...Part Number 00D9283 Printed in China 1P P N 00D9283 1P00D9283 ...


