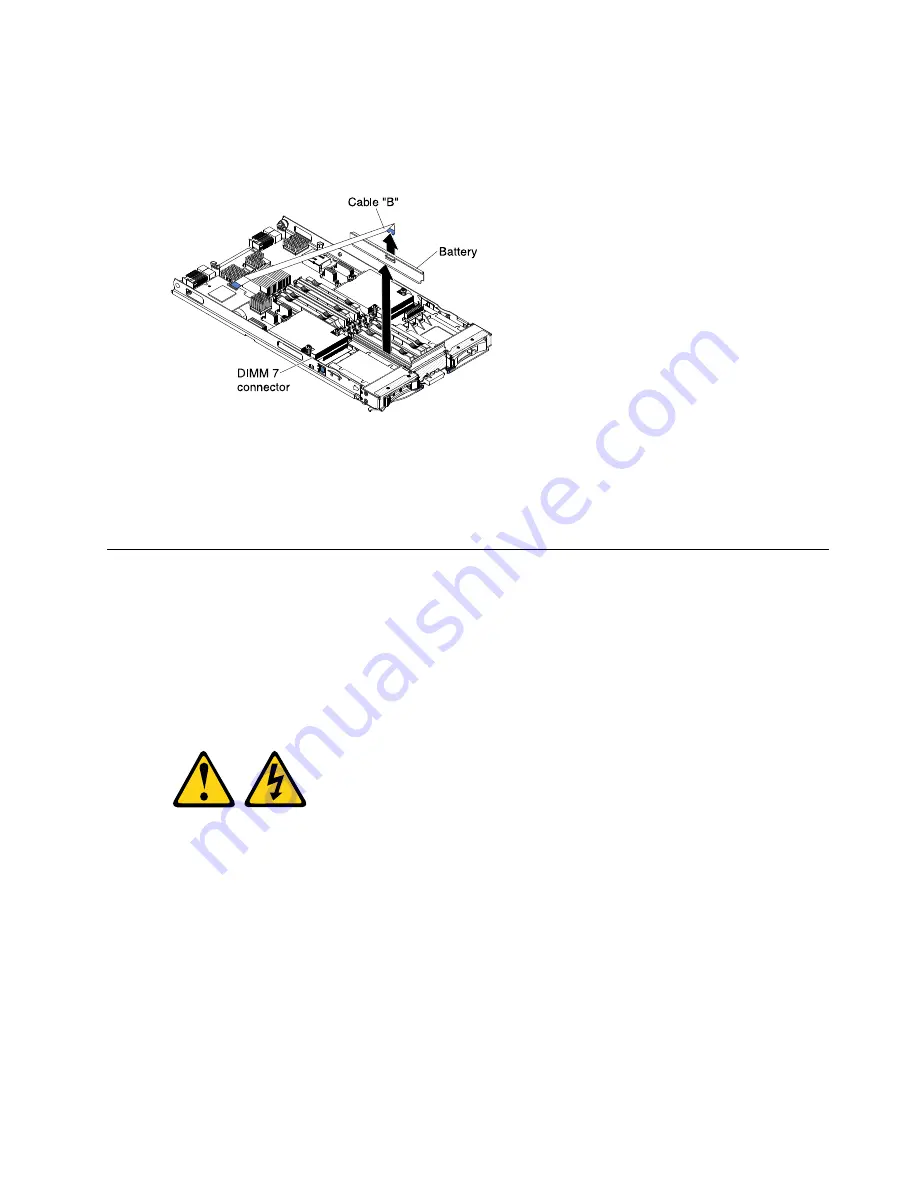
b.
Remove the cable from the backup battery by holding the blue touchpoint on the cable; then,
pull the cable away from the backup battery.
Step 7.
The backup battery is installed in DIMM connector seven. To remove the backup battery, complete
the following steps.
000000
000000
000000
000
000
000
00000
00000
00000
00000
a.
If you have not already done so, remove the backup-battery cable from the backup battery by
holding the blue touchpoint on the cable; then, pull the cable away from the backup battery.
b.
Remove the backup battery from the DIMM connector seven by using the instructions to
remove a memory module (see “Removing a memory module” on page 28).
Step 8.
Remove the backup battery from DIMM connector seven.
Completing the installation
To complete the installation, complete the following tasks.
Step 1.
Reinstall the optional expansion unit, if you removed one to install other devices (see “Installing an
optional expansion unit” on page 21 for information on installing the expansion unit).
Step 2.
Close the blade server cover, unless you installed an optional expansion unit that has its own cover
(see “Closing the blade server cover” on page 48).
Statement 21
CAUTION:
Hazardous energy is present when the blade server is connected to the power source.
Always replace the blade server cover before installing the blade server.
Step 3.
Reinstall the blade server into the BladeCenter unit (see “Installing the blade server in a
BladeCenter unit” on page 48).
Step 4.
Turn on the blade server (see “Turning on the blade server” on page 13).If you have just connected
the power cords of the BladeCenter unit to electrical outlets, you must wait until the power-on LED
on the blade server flashes slowly before you press the power-control button.
Step 5.
For certain optional devices, you might have to run the blade server Setup utility to configure the
blade server (see Chapter 4 “Configuring the blade server” on page 53). See the documentation
that comes with your optional device for additional information.
47
Summary of Contents for BladeCenter HS22
Page 1: ...BladeCenter HS22 Blade Server Installation and User s Guide Machine Types 7870 1936 1911 ...
Page 26: ...16 BladeCenter HS22 Blade ServerInstallation and User s Guide ...
Page 62: ...52 BladeCenter HS22 Blade ServerInstallation and User s Guide ...
Page 82: ...72 BladeCenter HS22 Blade ServerInstallation and User s Guide ...
Page 89: ...Taiwan Class A compliance statement Appendix B Notices 79 ...
Page 90: ...80 BladeCenter HS22 Blade ServerInstallation and User s Guide ...
Page 95: ......
Page 96: ...Part Number 00D9283 Printed in China 1P P N 00D9283 1P00D9283 ...


