Chapter 6. Special keys
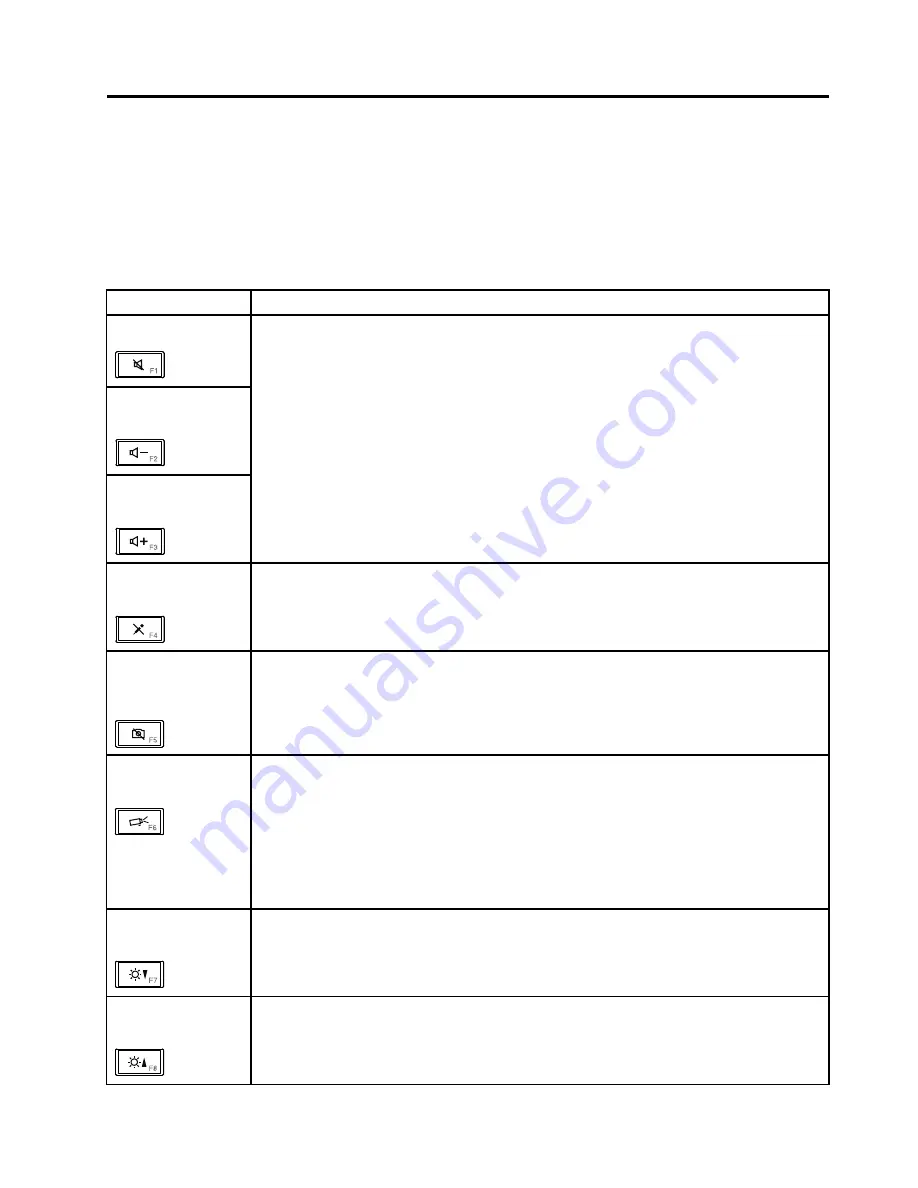
This computer has several special keys at the upper row of the keyboard. To use each function, directly
press the desired key.
The following table shows the function of each special key.
Table 7. Special keys
Special key
Description
Speaker mute (F1)
Speaker volume
down (F2)
Speaker volume up
(F3)
If you mute the sound and then turn off the computer, the sound will remain muted when you
turn on the computer again. To turn on the sound, press the Speaker volume up or Speaker
volume down keys.
Microphone mute
(F4)
When you press the microphone mute key, all of the recording devices are set on mute or
unmute; this is the default setting.
Launching the
camera and audio
settings (F5)
When you press F5, the camera and audio settings window opens and the camera preview
is turned on. From the camera and audio settings window, you can change the camera and
audio settings.
Switching a display
output location (F6)
For Windows 7:
Switch between the computer display and an external monitor. Windows will show these
display options:
• Computer display only (LCD)
• Computer display and external monitor (same image)
• Computer display and external monitor (extended desktop function)
• External monitor only
Note:
To switch between the computer display and an external monitor, the Win+P key
combination is also available.
Display brightness
down (F7)
The computer display becomes dimmer. The purpose of this method is to change the
brightness level temporarily. To change the default brightness level, change the settings of the
Power Option in the Control Panel or use the Power Manager.
Display brightness up
(F8)
The computer display becomes brighter. The purpose of this method is to change the
brightness level temporarily. To change the default brightness level, change the settings of the
Power Option in the Control Panel or use the Power Manager.
© Copyright Lenovo 2011
41
Summary of Contents for 50382NU
Page 1: ...Hardware Maintenance Manual ThinkPad Edge E220s ...
Page 6: ...iv Hardware Maintenance Manual ...
Page 11: ...DANGER DANGER DANGER DANGER DANGER Chapter 1 Safety information 5 ...
Page 12: ...DANGER 6 Hardware Maintenance Manual ...
Page 13: ...PERIGO PERIGO PERIGO Chapter 1 Safety information 7 ...
Page 14: ...PERIGO PERIGO PERIGO PERIGO PERIGO DANGER 8 Hardware Maintenance Manual ...
Page 15: ...DANGER DANGER DANGER DANGER DANGER Chapter 1 Safety information 9 ...
Page 16: ...DANGER DANGER VORSICHT VORSICHT VORSICHT 10 Hardware Maintenance Manual ...
Page 17: ...VORSICHT VORSICHT VORSICHT VORSICHT VORSICHT Chapter 1 Safety information 11 ...
Page 18: ...12 Hardware Maintenance Manual ...
Page 19: ...Chapter 1 Safety information 13 ...
Page 20: ...14 Hardware Maintenance Manual ...
Page 21: ...Chapter 1 Safety information 15 ...
Page 22: ...16 Hardware Maintenance Manual ...
Page 23: ...Chapter 1 Safety information 17 ...
Page 24: ...18 Hardware Maintenance Manual ...
Page 36: ...30 Hardware Maintenance Manual ...
Page 52: ...46 Hardware Maintenance Manual ...
Page 72: ...Table 22 Removal steps of DC in sub card 66 Hardware Maintenance Manual ...
Page 76: ...70 Hardware Maintenance Manual ...
Page 92: ...86 Hardware Maintenance Manual ...
Page 95: ......
Page 96: ...Part Number 0A60575 Printed in China 1P P N 0A60575 0A60575 ...


