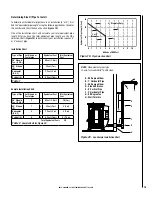


NOTE: DIAGRAMS & ILLUSTRATIONS ARE NOT TO SCALE
29
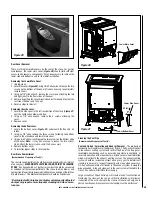
Cleaning the Vent Pipe
(Recommended Frequency of Yearly*)
Soot and Fly-Ash: Formation and Need for Removal - The products of
combustion will contain small particles of fly-ash. The fly-ash will collect
in the exhaust venting system and restrict the flow of the flue gases.
Incomplete combustion, such as occurs during start-up, shutdown, or
incorrect operation of the room heater will lead to some soot formation
which will collect in the exhaust venting system. The exhaust venting
system should be inspected at least once every year to determine if
cleaning is necessary. Inspect frequently and clean when necessary.
Fly-Ash will accumulate at all bends in the exhaust system. Sweep the
pipe as needed. A tee and clean-out in the vent system attached to the
stove’s flue collar will facilitate this cleaning.
Large amounts of fly-ash build-up will create a lack of combustion air.
Removing the clean-out tee cap on vertical installations will allow an
inspection of the ash build-up in the clean-out tee and will help you to
decide how frequently more extensive cleaning must be performed.
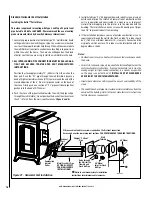
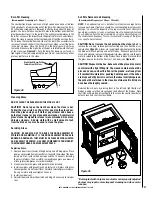
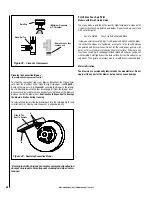
Figure 40
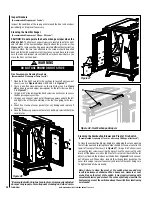
Figure 41
Lower Main Cover
Lower Bottom Cover
Lower Side Cover
Figure 39
Rear Cover Removal
There are three removable covers on the rear of the stove. For normal
maintenance, the lower main cover
(Figure 40)
should yield sufficient
access to all necessary components. It may be necessary to remove the
lower side and bottom covers for the initial installation.
Removing the Lower Main Cover:
1. Unplug stove.
2. Locate the cover
(Figure 40)
, using a 5/32" allen wrench, loosen the two
screws on the bottom of the panel (it is not necessary to completely
remove them).
3. Using an 1/8" allen wrench, remove the six screws attaching the top
and right (next to the flue) sides of the cover.
4. Remove by pulling the cover directly back just far enough to clear the
cast iron side door, and then out.
5. Reverse steps to reinstall.
Removing the side cover:
1. Locate the side cover in the left rear portion of the stove
(Figure 41)
near the combustion blower and flue.
2. Using an 1/8" allen wrench, remove the 3 screws attaching the
cover.
3. Remove cover.
Removing the bottom cover:
1. Locate the bottom cover
(Figure 41)
underneath the flue and air
intake.
2. Using an 1/8" allen remove the three screws fastening the bottom
cover to the stove base and lower main cover.
3. Using a 5/32" allen wrench loosen the two screws on the bottom edge
of the cover.
Note: It may be necessary to loosen the two screws
which attach the lower side cover to the base as well.
4. Remove bottom cover.
5. To reinstall, repeat steps in reverse order.
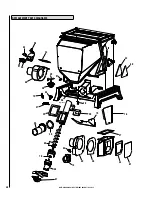
Rear Stove Compartment
(Recommended Frequency of Yearly*)
The rear stove compartment should be cleaned periodically (a minimum
of once a year). DISCONNECT ELECTRICAL CORD PRIOR TO CLEANING
STOVE. Any household dust, pet hair or sawdust should be vacuumed
or wiped out of the rear compartment of the stove, room air blower, and
combustion blower (paying special attention to vacuuming out the intakes
of both blowers). The electrical components should be wiped clean.
*Burning fuel with a high ash content or an improperly adjusted
damper may require more frequent cleaning and stove main-
tenance.
Summary of Contents for BELLA
Page 43: ...43 NOTES ...