background image

STEP 4.  
Carrying out of the update 
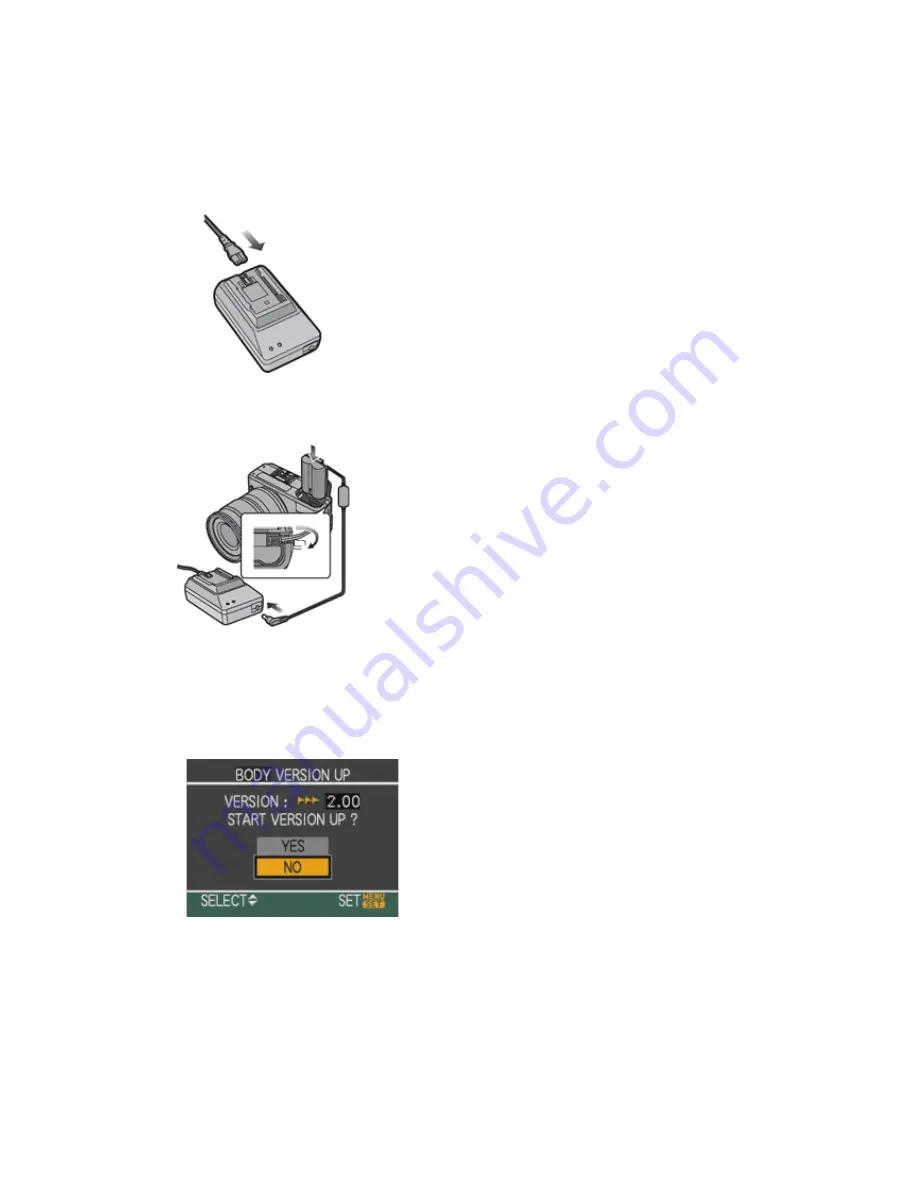
1.


Make sure to turn off the camera’s power switch.  

2.


Connect the AC adaptor's power cord to a mains outlet. 


3.


Using the DC cord, connect the DC output on the adaptor with the DC input terminal on the LEICA 
DIGILUX 3. 


4.


Insert the memory card prepared as described in STEP 3 into the camera.  

5.


Turn on the camera’s power switch.  

6.


Press the Play button to enter the Play mode.  

7.


After the message of "PLEASE WAIT ..." is displayed, the following display will continuously be shown on 
the LCD (Fig.1). 


Version number varies according 
to the updated firmware used. 


Note 

If a newer version than the downloaded firmware is already installed in the LEICA DIGILUX 3, the 
firmware update process will not start and the camera will display that no update file can be found. 
Please turn off your camera in such a case.  


Leica Camera AG  / Page 5 of 6  /  As at June 2007  


Summary of Contents for Digilux 3

Page 1: ... color temperature or set the ISO sensitivity or flash mode The time restriction for making changes was removed 6 Addition of a HOLD option to Auto Review mode enabling continuous viewing 7 Addition of a feature to playback mode It is now possible to select the preceding or the next images while the image is still enlarged zoom function 8 Addition of the AUTO option for setting the ISO sensitivity...

Page 2: ... Confirming the current firmware version Leica recommends that you update the firmware in your camera if either of the following conditions exists A If the firmware version is not displayed on the LCD using the following procedure B If the firmware version indicated is older than the version being offered The firmware updating is not necessary if the firmware version on your camera is newer than l...

Page 3: ...loaded file please ignore it and just click Run and move to the next step 4 The self extracted file DL3_200 bin will appear The file size should be 4 665 412 Bytes approx 4 45 MB If the file size is not the same please download and double click the file again The file size can be checked by right clicking on the file and selecting Properties For Macintosh 1 Make a temporary folder on your PC for d...

Page 4: ...ded file onto the card 1 Connect your LEICA DIGILUX 3 and your PC with the USB cord and set the camera to PC mode by selecting the option in the menu Press the Menu button to enter USB mode Press the Up button and then press Menu again 2 Copy the file into the Root directory of the memory card 3 When copying is finished unplug the USB cable to release the PC from USB Mode the Windows Explorer will...

Page 5: ...e camera s power switch 6 Press the Play button to enter the Play mode 7 After the message of PLEASE WAIT is displayed the following display will continuously be shown on the LCD Fig 1 Version number varies according to the updated firmware used Note If a newer version than the downloaded firmware is already installed in the LEICA DIGILUX 3 the firmware update process will not start and the camera...

Page 6: ...0 Once the firmware update process is completed the LEICA DIGILUX 3 will turn the power off and back on After that it will be in the initial mode automatically 11 To verify the version number follow Step1 at the beginning the camera body version number indicates 2 0 the process is completed 12 Turn the camera off with power switch 13 Remove the memory card About the memory card after it has been u...

Reviews: