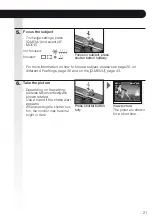
t .FNPSZTJ[F"QQSPY.#
t 3FDPSEBCMFNPUJPOQJDUVSFT27(" YQJYFMTPOMZ
t 5IFCVJMUJONFNPSZDBOCFVTFEBTBUFNQPSBSZTUPSBHFEFWJDF
t :PVDBODPQZUIFSFDPSEFEQJDUVSFTUPBDBSE
t 5IFBDDFTTUJNFGPSUIFCVJMUJONFNPSZNBZCFMPOHFSUIBOUIFBDDFTTUJNFGPSB
card.
Built-in memory
t .BLFTVSFUIFDBNFSBJTOPU
JO<1-":#"$,>NPEF
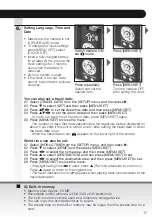
t 5PDIBOHFUIFDMPDLTFUUJOHT
QSFTT<.&/64&5>TFMFDU
[CLOCK SET].
t *OTFSUBGVMMZDIBSHFECBUUFSZ
for at least 24 hrs to store the
clock settings for 3 months,
even when the battery is
removed.
t IPVSTZTUFNJTVTFE
t *GUIFDMPDLJTOPUTFUEBUF
cannot be printed on pictures
correctly.
Press repeatedly
Select and set the
desired item
Press [MENU/SET]
Turn the camera OFF
after setting the clock
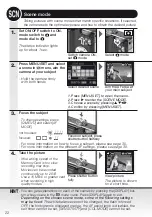
World time can also be set:
01 Select [WORLD TIME] from the [SETUP] menu, and then press
.
02 Press
to select [HOME] and then press [MENU/SET].
03 Press
to select the home area, and then press [MENU/SET].
04 Press
to select [DESTINATION] and then press [MENU/SET] to set.
05 Press
to select the destination area, and then press [MENU/SET] to set.
06 Press [MENU/SET] to close the menu.
- If daylight saving time
is used, press
. (The time advances by one hour.)
Press
again to return to the original time.
- The travel destination icon
appears when playing back pictures taken at the
travel destination.
Setting Language, Time and
Date
6.
Press [MENU/SET]
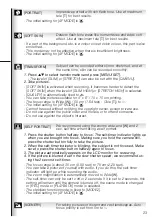
You can also set a travel date:
01 Select [TRAVEL DATE] from the [SETUP] menu, and then press
.
02 Press
to select [SET] and then press [MENU/SET].
03 Press
to set the departure date and then press [MENU/SET].
04 Press
to set the return date and then press [MENU/SET].
*GZPVEPOPUXBOUUPTFUUIFSFUVSOEBUFQSFTT<.&/64&5>BHBJO
05 Press [MENU/SET] to close the menu.
- The number of days that have passed since the departure date is displayed for
about 5 seconds if this unit is turned on etc. after setting the travel date or when
the travel date is set.
- When the travel date is set,
appears on the lower right of the screen.
Switch camera ON,
set
mode
17


