background image

11

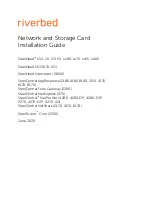
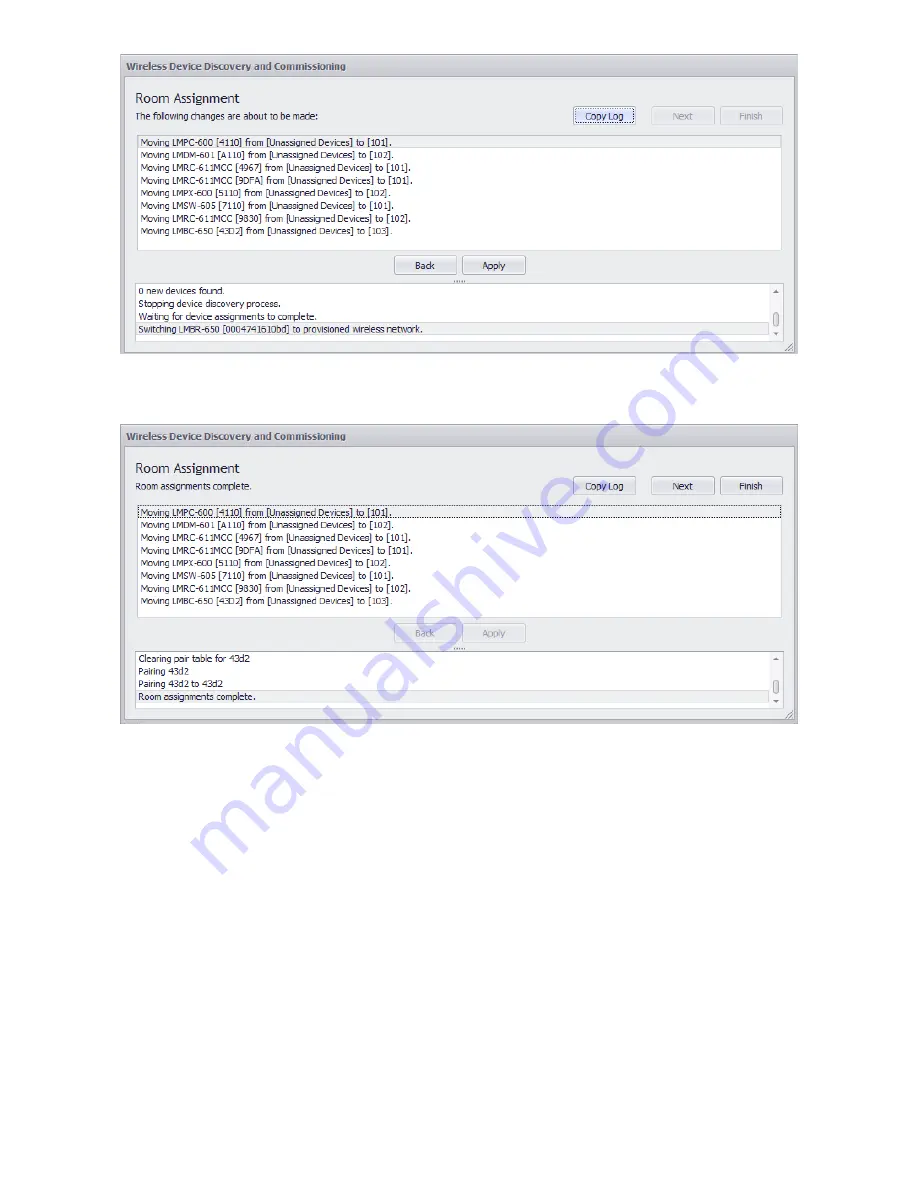
22. The status bar at the bottom shows the pairing process. Once the process completes, click 

Next

 or 

Finish.

IMPORTANT:

 If there is more than one LMBR and you still need to assign, click 

Next

Do not click Finish until all LMBRs and 

devices have been configured and assigned.

 Clicking 

Finish

 ends the configuration wizard.

23. If you clicked 

Next 

in the previous step

you return to the 

LMBR Selection

 dialog (step 7), where you can repeat the process 

for additional LMBRs—selecting a specific LMBR and then selecting the specific devices you want to assign to that LMBR. The 

devices you assigned to previous LMBRs will 

not

 show up in the list of devices on the 

Uncommissioned Device Discovery and 

Network Assignment 

dialog, because they have already been moved off of the default Network ID Channel.

NOTE: 

You may need to wake up any unconfigured battery devices again, if too much time passed from the last time you woke 

them up.

24. Once all LMBRs have been configured and you click 

Finish

, the final step in the Discovery process occurs. You return to the 

Discover Networks

 dialog. Click 

Close. 

The 

Read Devices

 dialog opens. LMCS reads various information from the LMBR. For 

a new site, this information will always be empty—this only applies in the case of an existing site in which discovery is being run 

again to capture new devices. Click 

Close

 to finish Discovery.

Summary of Contents for Wattstopper LMBR-650

Page 1: ...ith the LMBR 650 see the DLM Dashboard User Guide CONNECTING LMCS 100 TO A NETWORK AND CREATING A SITE Connecting to a wireless network requires creating a site so that the network is secure and acces...

Page 2: ...word Once logged in the lock in the Account icon will change from red to green NOTE You must be connected to the Internet the first time you log in to your account on a specific PC This will download...

Page 3: ...the project to the site click Save To Cloud Connecting to a Network with both Wired and Wireless Rooms In the case of a network with both wired and wireless rooms the wired rooms will include an LMBC...

Page 4: ...first log in to your cloud account and create a site or open a site previously created for the project as described in the first section of this document 2 Once this is complete click Discover on eith...

Page 5: ...ry LMBR and the others will be considered secondary LMBRs The primary LMBR will be enabled while the others are disabled Although the first LMBR is picked as primary by default it is likely that a spe...

Page 6: ...atic IP address return to step 2 and begin discovery again This time instead of showing up in the list as Uncommissioned the networks are displayed Select all the LMBRs and click Add After the wizard...

Page 7: ...eturn here to configure the next one LMBR Selection NOTE It is Wattstopper best practice that the Primary LMBR be used only for communication with other LMBRs and not have any wireless devices assigne...

Page 8: ...vices are being discovered clicking on the checkbox next to that device that has not been fully discovered will move it to the top of the list to prioritize discovery of that device So in situations i...

Page 9: ...ected devices If you click Next that will stop the move process Click the checkbox for each device you want to add to the LMBR s network When the box turns blue it has been added 18 Once all of the se...

Page 10: ...an LMBC 650 wireless bridge You can however have multiple room controllers in a room If you select a room controller for a room and then select an LMBC 650 while on that same room the room controller...

Page 11: ...ou assigned to previous LMBRs will not show up in the list of devices on the Uncommissioned Device Discovery and Network Assignment dialog because they have already been moved off of the default Netwo...

Page 12: ...ions dialog opens Leave all checkboxes selected Read Options 26 Click OK The Read Devices dialog displays the progress of the read and a log provides information When the read is complete click Close...

Page 13: ...ices 3 If any devices are not paired and the status displays as yellow or red click Re pair The status of the controllers will turn yellow then red as they are unpaired and then pairing process starts...

Page 14: ...tree LMBR 650 Information You can enter a Description and it will display in the tree The IP Address can be edited but if you do so it would need to be changed on the LMBR so it is recommended you do...

Page 15: ...here It is possible to manually add wireless devices to a network with the Add Bridge and Add Device buttons However at this time there is no practical use for this function because wireless devices...

Page 16: ...ING OR REPLACING AN LMBR 650 IN AN ALREADY COMMISSIONED NETWORK NOTE Resetting an LMBR 650 that has already been discovered using LMCS 100 software has important ramifications described below Wattstop...

Page 17: ...ith more than one LMBR you do not have to create a new site However you will need to 1 Open the LMCS site file and delete the LMBR from the tree If it was the Primary LMBR one of the others will autom...

Reviews: