


PXC_PXO Quick Setup Guide
3
PXC_PXO_QSG_A1_4.0.10
255-80-0059-00 RoHS
4.
Repeat the same steps to install the other button onto the PDU's rear side.
5.
Properly install the PDU by fitting the attached rear buttons into position of the rack.
a.
Press the PDU toward the rack.
b.
Push the mounting buttons through the mounting holes.
c.
Let the PDU drop slightly.
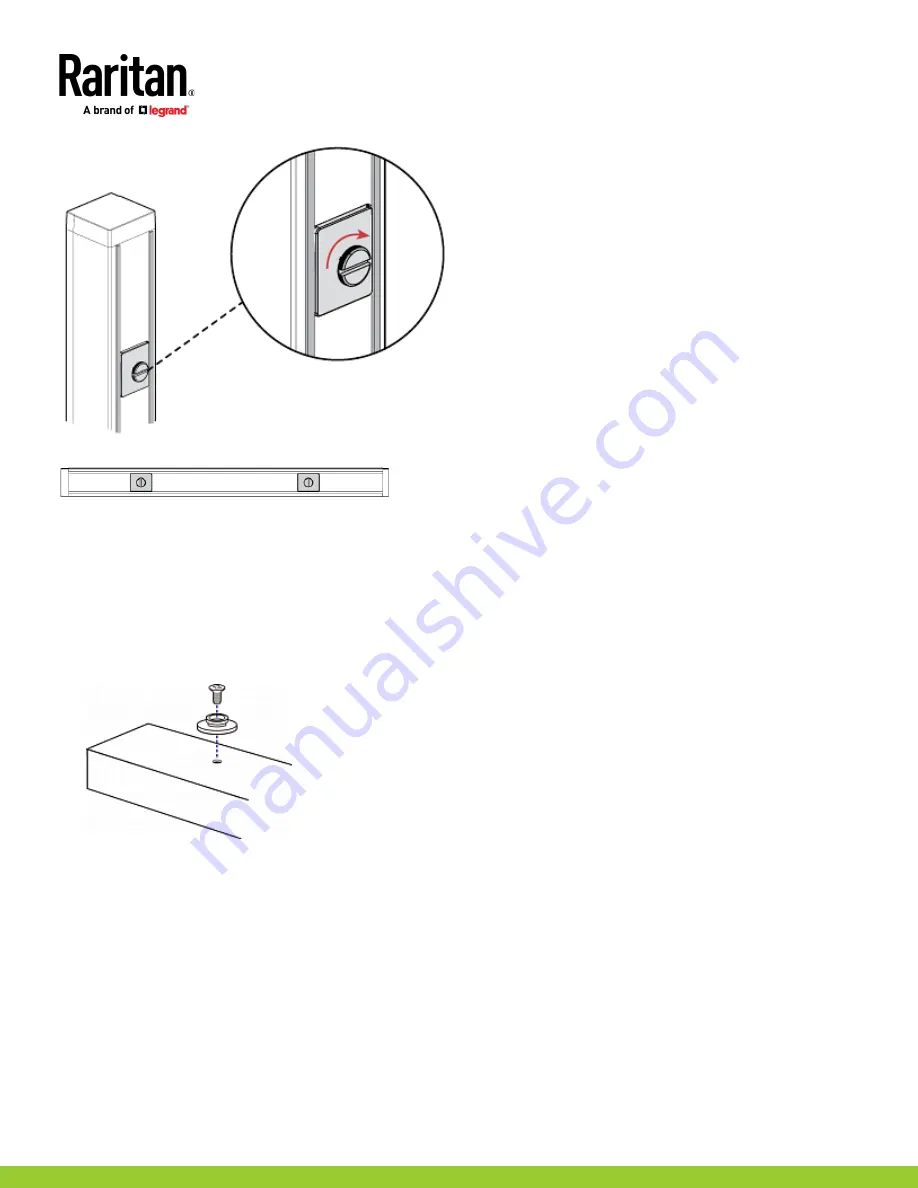
Mounting Zero U Models with Screw Buttons
1.
Turn to the rear of the PXC.
2.
Locate the two screw holes on the rear panel.
3.
Screw a button in each screw hole. The recommended torque for the button is 1.96 N·m (20 kgf·cm).
4.
Press the PDU forward, pushing the mounting buttons through the mounting holes, then letting the PDU drop slightly.
Mounting 1U or 2U Models
Using the appropriate brackets and tools, fasten the 1U or 2U PXC PDUs to the rack or cabinet.


