background image

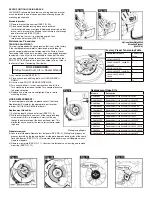
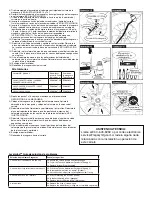
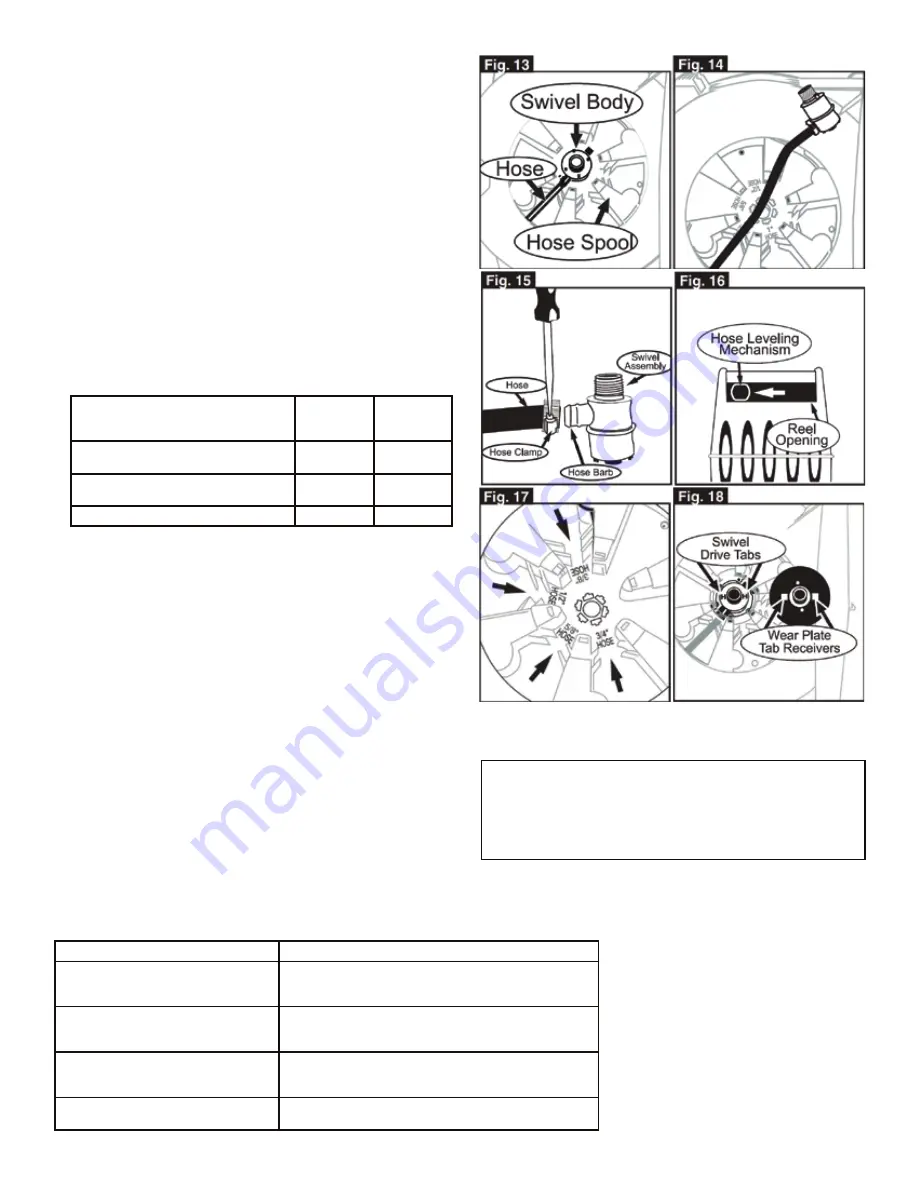
5) Pull swivel assembly firmly from hose spool (SEE FIG. 13 and 14).
6) Unscrew Hose Clamp and pull hose off hose barb on swivel

(SEE FIG. 15).

7) Pull remaining length of hose out reel opening located at the reel front.
8) Take replacement hose through opening located at the front of reel. 

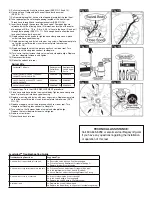
Thread hose through hose leveling mechanism (SEE FIG. 16).

9) Insert hose through the center of the hose spool. Four openings are

referenced with the following hose I.D. dimensions located at the center
of hose spool: 3/8 in., 1/2 in., 5/8 in. & 3/4 in.. Locate the hose I.D. and pull
through that opening

10) Replace hose onto hose barb, tighten hose clamp onto hose & place

swivel into hose spool housing.

11) Replace wear ring and fasten with wear ring screws. Replace wear plate

so that the swivel drive tabs insert into wear plate tab receivers
(SEE FIG. 18).

12) Replace sideplate so that the plate snaps flush to side of reel. Turn

sideplate until locking tabs connect to sideplate.

13) Turn swivel so that fastener holes of swivel and sideplate align. Replace

the four sideplate fasteners and tighten.

14) Remove screw driver.
15) Retract hose back into reel.

Replacement 
Swivel Body 
Part #

Replacement 
Hose Stopper 
Part #

L8305 / L8305FZ / L8306 / L8306-EU 
L8306FZ / L8310 / L8310-EU

RP005007-38

RP005026

RP005007-12

RP005027

L8344 / L8346 / L8349

RP005007-58

RP005028

Swivel Kits

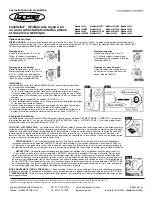
1) Repeat steps 1-6 in the HOSE REPLACEMENT procedure.
2) Place hose onto hose barb of new swivel body. Tighten hose clamp onto

hose & place swivel into hose spool housing.

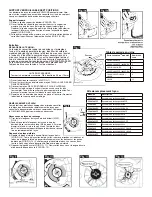
3) Replace wear ring and fasten with wear ring screws. Replace wear plate

so that the swivel drive tabs insert into wear plate tab receivers  (SEE
FIG. 18).

4) Replace sideplate so that the plate snaps flush to side of reel. Turn

sideplate until locking tabs connect to sideplate.

5) Turn swivel so that fastener holes of swivel and sideplate align.

Replace the four sideplate fasteners and tighten.

6) Remove screw driver.
7) Retract hose back into reel.

Troubleshooting Questions

Suggested Tips

1. Hose will not retract back into the unit.

1a. Ensure the Latch Spring & Pawl isn't engaged
1b. Follow the Tension Adjustment Procedure (See pg 2)
1c. Replace Internal Drum Assembly

2. Hose will not fully retract back into the unit.

2a. Follow the Tension Adjustment Procedure (See pg 2)
2b. Is the replacement hose too heavy? (Rubber?)
2c. If hose bunches, adjust the Layering Mechanism Timing

3. Hose will not lock in 3' intervals.

3a. Are you releasing the hose too quickly?
3b. Is the Latch Spring & Pawl engaged?
3c. Replace the Latch Spring & Pawl Mechanism

4. Internal leak.

4a. Replace the hose if it is damaged.
4b. Replace the Swivel Body (a-rings are not available separately)

Levelwind

TM

 Troubleshooting Guide

TECHNICAL ASSISTANCE:

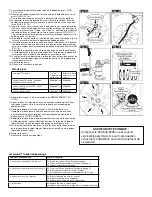
 (SEE FIG. 17). Pull enough hose to allow the hose

to connect to hose barb on swivel. 

Call 800-645-8258 or email [email protected]
if you have any questions regarding the installation
or operation of this reel.

Levelwind™ Model #

L8335 / L8335-EU / L8335FZ / L8345
L8350 / L8340FZ 

Summary of Contents for Levelwind L8305

Page 1: ...s over the latching zone The latching zone flips the latch so that the latch goes into or by passes the latching position Pulling hose straight out off the reel flips the latch so it can go into the latching position Retracting the hose into the reel keeps the latch flipped so that the latch by passes the latching position LATCHING Pull out the desired length of hose As you are pulling out hose fr...

Page 2: ...tension Turn counterclockwise to decrease tension 5 Replace hub plate screws and tighten Return reel to mounting bracket Factory Preset Tensioning Table HOSE REPLACEMENT To ensure proper performance please consult the Hose Replacement Kit table for the appropriate part number to order Call 1 800 645 8258 to order kit Replacement Hose Kits 1 Pull entire length of hose out of reel SEE FIG 8 2 While ...

Page 3: ... 2 Place hose onto hose barb of new swivel body Tighten hose clamp onto hose place swivel into hose spool housing 3 Replace wear ring and fasten with wear ring screws Replace wear plate so that the swivel drive tabs insert into wear plate tab receivers SEE FIG 18 4 Replace sideplate so that the plate snaps flush to side of reel Turn sideplate until locking tabs connect to sideplate 5 Turn swivel s...

Page 4: ... L8346 L8347 L8349 6c RP005010 18 Layering Device Assembly The layering mechanism doesn t operate L8340FZ 7b RP005012 140 Layering Device Drive Belt The layering mechanism doesn t operate L8305 All Models L8306 All Models L8310 All Models I L8345 I L8350 8a RP005004BK Latch Switch Side Plate w Latch Spring Pawl Mechanism Black The hose does not lock the desired length All LevelwindTM Models 7c RP0...

Page 5: ...l tirar de la manguera directamente del carrete coloca el fiador por su lado contrario de manera que se bloquee Al retraer la manguera en el carrete se mantiene el fiador en su posición inversa de manera que el pestillo no se bloquee LATCHING posición de bloqueo Tire de la manguera a la longitud deseada Mientras tira de la manguera en el car rete escuche un chasquido DETÉNGASE No tire más de la ma...

Page 6: ...la tensión Gírela en el sentido opuesto de las manecillas del reloj para dis minuir la tensión 5 Reinstale los tornillos de la placa y apriételos Reinstale el carrete en el portacarrete Series LevelwindTM Modelo Núm de Giros Tabla de la Fuerza de Tensión REPOSICIÓN DE LA MANGUERA Con el fin de garantizarle el rendimiento funcional adecuado por favor consulte la tabla que indica el número apropiado...

Page 7: ...e del ensamble del columpio y extráigalo del carrete de la manguera VER ILUSTRACIONES 13 y 14 6 Destornille la abrazadera de la manguera y extraiga la espiga de la manguera en el columpio VER ILUSTRACIÓN 15 7 Tire de la longitud restante de la manguera hacia fuera de la abertura del carrete en la parte del frente 8 Inserte la manguera a través de la abertura ubicada al frente del carrete Guíe la m...

Page 8: ...aca lateral del columpio negra RP005002BK Todos los modelos de Levelwind Conjunto de cuerpo giratorio basado en el diámetro interior RP005007 xx Consulte Diagrama de tope de manguera y pivote de repuesto Ensamble del tambor para mangueras RP005015 Modelos 50 Levelwind RP005004GRNT Lengüeta lateral del interruptor de cierre con muelle de retención y mecanismo de trinquete Granito Todos los modelos ...

Page 9: ...n de verrouillage ou évite cette position Une traction sur le tuyau directement hors du dévidoir fait basculer le verrou de manière à ce qu il puisse passer en position de verrouillage La rétraction du tuyau dans le dévidoir garde le verrou basculé de manière à ce que le verrou évite VERROUILLAGE Tirer la longueur désirée de tuyau Pendant la traction du tuyau dès que le déclic correspondant à la l...

Page 10: ...é dans le sens anti horaire 5 Remettre les vis du plateau de moyeu en place et les serrer Remonter le dévidoir sur son support de montage Série LevelwindTM modèle Nombre de tours Table de serrage en usine REMPLACEMENT DU TUYAU Pour obtenir des prestations appropriées prière de consulter le tableau de nécessaires de remplacement de tuyau pour connaître le bon numéro des pièces à commander Composer ...

Page 11: ...tionnement de ce dévidoir 5 Tirer l ensemble de pivot fermement hors de la bobine de tuyau VOIR FIG 13 et 14 6 Dévisser la bride de tuyau et tirer le tuyau hors de la barbe de tuyau sur le pivot VOIR FIG 15 7 Tirer la longueur restante de tuyau hors de l ouverture avant du dévidoir 8 Faire passer le tuyau de rechange à travers l ouverture située à l avant du dévidoir Faire passer le tuyau à traver...

Page 12: ...evelwind L8300 B Support de fixation de banc haut mur Tous les modèles Levelwind RP005000BK Tous les modèles Levelwind RP005002BK Tous les modèles Levelwind Ensemble de corps pivotant basé sur le diamètre intérieur RP005007 xx Voir pièces d arrêt Schéma de tuyau et pivot Ensemble de tambour pour tuyau RP005015 Les modèles 50 Levelwind RP005004GRNT Plaque latérale de verrouillage avec ressort de ve...

Reviews: