background image

 8 
 

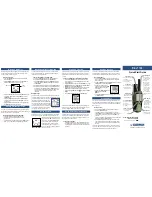
Screw the antenna into the connector on the top of the radio by holding the antenna at 

its base and turning it clockwise  

until seated. Do not overtighten. 
 
The antenna should never be used to carry your radio, or as a base to clip radio 

accessories. Misuse of the antenna  

can cause damage, and reduce your radio’s performance.   


Installing the Belt Clip


We recommend that the belt clip is installed on the radio. It keeps the radio from coming 
in contact with hot surfaces, and away from your body if heat build-up occurs with excess 
transmissions.  
 
Use the two supplied screws to install the belt clip. If a replacement is needed, use a 

screw designed to the exact 

specifications as the original, to prevent accidental contact with internal circuitry, or 

possible personal injury. Never use  

glue in conjunction with the provided screws. Some of the glue’s components may crack the 
radio back panel, causing radio damage and possible personal injury.


Installing the Speaker Microphone Jack Cover


If you are not using an accessory, install the provided cover over the speaker microphone 

jack using the screw  

supplied. This will keep the radio water resistant.  
 

Attaching the Optional Speaker Microphone


1. Insert the speaker microphone jack into the radio.  
2.  Use the thumbscrew attachment on the speaker microphone to make connection to the 
radio.  
 

NOTE:

 The radio is not fully water resistant while the speaker microphone is attached. 


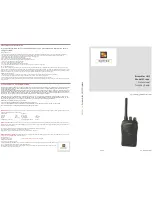
VII.  Radio Operation


Power On / Transmit


Power on the radio by turning the power / volume control clockwise out of detent. You 
will hear a confirmation tone on power-up. To check the radio volume, press and hold the 
monitor button then rotate the control to desired volume level.  


Use the channel switch to choose the desired channel. Press the monitor button to check 
the channel for activity. To avoid interrupting another user, make sure the channel is 
clear before you begin transmitting. 
 
To transmit, place the radio microphone approximately 2 ”  (5 cm) from your mouth. Press 
and hold the PTT bar while speaking in a normal tone. Release the PTT bar when you are 
finished speaking; the radio will be placed into receive mode.  
 
When the battery pack voltage becomes too low for operation to continue, a tone will 
sound, LOW Batt will show in the display, the LED will blink red and the battery icon 
located in the lower left corner of the display will flash empty. The radio will allow 


Summary of Contents for ProLine PL5151

Page 1: ...equirements for Occupational Use Only 2 II About Topaz3 3 III About Your Legacy ProLine Radios 3 IV Unpacking and Checking Equipment 4 V Radio Control Buttons Operation Features 5 VI Getting Started 6...

Page 2: ...Priority Look Back Scan 9 Priority Select Scan 9 Vacant Channel Scan 9 Nuisance Delete 9 Busy Channel Lockout 9 Marked Idle 9 TX Delay 9 Time Out Timer T O T 10 Time Out Timer Penalty TX Inhibit 10 B...

Page 3: ...mation 36 Service 36 XI Maintenance 36 XII Software Copyrights 37 XIII Topaz3 Legacy Product Warranty 37 I FCC RF Exposure Compliance Requirements for Occupational Use Only The Federal Communications...

Page 4: ...s MURS Multi User Radio Service radios Citizen s Band radios and weather monitors Available accessory items include a variety of carrying cases spare batteries desktop and mobile chargers ear bud spea...

Page 5: ...uipment Carefully unpack the radio and its accessories Use the item list below to identify the components included in the product packaging to ensure that no items are discarded in the packing materia...

Page 6: ...ress and hold to turn radio squelch off Release to turn squelch back on C Microphone front of radio D Speaker front of radio E Channel switch top panel of radio F LED Indicator top panel of radio Iden...

Page 7: ...ing slot 3 Ensure that the metal contacts on the battery pack come in contact with the charging terminals 4 When charging the NiMH battery pack alone insert the provided plastic spacer stored in charg...

Page 8: ...ew supplied This will keep the radio water resistant Attaching the Optional Speaker Microphone 1 Insert the speaker microphone jack into the radio 2 Use the thumbscrew attachment on the speaker microp...

Page 9: ...onitor this channel while scanning and when stopped on an active channel If a call is detected on the priority channel the radio will automatically move to and remain on the priority channel Priority...

Page 10: ...d battery save is disabled Low Battery Warning When the battery power goes below a pre determined value the LED will blink red and a tone sounds The radio will then allow only one more transmission Af...

Page 11: ...cated by display icons When VOX option is set and voice is input the radio transmits the signal If voice input stops the radio maintains TX for around 2 sec if there is no voice input the radio return...

Page 12: ...one Optio n Rx Tx No CTCSS DCS Invert 1 49 023 754 023 754 No CTCSS DCS Invert 1 49 023 754 023 754 Tx Output Power Normal Scan List Priority Scan List Two Tone Option Power High Low Normal Scan Prior...

Page 13: ...Mode Normal Priority Priority Look Back Scan Priority Vacant Channel Scan Scan Speed Scan Delay Look Back Priority Tx Power Clear To Roger Beep 50 500 1 30 sec 1 10 sec On Off Priority On On Off P S...

Page 14: ...utton press Up Down buttons to move in an up or down direction in the displayed Sub menu setting To turn on or off a Sub menu setting press and release the mode button The radio will save the setting...

Page 15: ...ng Each Channel Option Menu Setting Rx Tone Menu Setting Tx Tone Menu Setting Mode BEEP H BEEP H BEEP H BEEP H BEEP H Mode BEEP H BEEP H BEEP H Mode BEEP H BEEP H Up Down buttons Up Down buttons Up Do...

Page 16: ...SS Tone Select Under the above mode press Up Down buttons to select desired CTCSS Tone and then press Mode button or PTT button to set RX or TX tone option The radio will then save selection and exit...

Page 17: ...nd then press Mode button or PTT button to set RX or TX tone option The radio will then save selection and exit to receiving stand by mode Tx Output Power High Low Setting Under the above mode press U...

Page 18: ...s which are set On Priority Scan List On Off Setting Under the above mode press Up Down buttons to select On or Off and then press Mode button or PTT button to set the priority scan option On or Off f...

Page 19: ...for the current channel The radio will then save selection and exit to receiving stand by mode Individual Group Super Group Tone A and Tone B frequency and timing are dealer programmed System Option...

Page 20: ...Off Setting Under the above mode press Up Down buttons to select On or Off and then press Mode button or BEEP H BEEP H BEEP H BEEP H BEEP H BEEP H BEEP H BEEP H BEEP H BEEP H BEEP H Mode BEEP H BEEP H...

Page 21: ...TT button to set VOX Option On or Off The radio will then save selection and exit to receiving stand by mode VOX Sensitivity Setting Under the above mode press Up Down buttons to select desired level...

Page 22: ...ll then save selection and exit to receiving stand by mode TOT Penalty If the radio transmits over a set time it will beep an T O T error tone and the radio will only receive a signal for the penalty...

Page 23: ...ts transmission Marked Idle Out On Off Setting Under the above mode press Up Down buttons to select On or Off and then press Mode button or PTT button to set Marked Idle Out The radio will then save s...

Page 24: ...Down buttons to select the desired Scan operation Press Mode button or PTT button to set a scan mode The radio will then save selection and exit to receiving stand by mode BEEP H BEEP BEEP H Mode H BE...

Page 25: ...e moving to another channel when there is no signal Scan Delay Time Setting Under the above mode press Up Down buttons to select desired time and then press Mode button or PTT button to set The radio...

Page 26: ...a signal on a non priority channel Priority Scan Setting Under the above mode press Up Down buttons to select desired priority channel and then press Mode button or PTT button to set The radio will th...

Page 27: ...one during 180msec after TX is completed if TX tone option is set by CTCSS Option Power Save Setting Power Save On Time Setting Under the above mode press Up Down buttons to select the desired time an...

Page 28: ...then save selection and exit to receiving stand by mode Power Save Delay Time Setting Under the above mode press Up Down buttons to select the desired time and then press Mode button or PTT button to...

Page 29: ...ger Beep On Off Setting Under the above mode press Up Down buttons to select On or Off and then press Mode button or PTT button to set The radio will then save selection and exit to receiving stand by...

Page 30: ...iving stand by mode Display Slide If the radio is not in TX or RX and no button is pressed and time passes over 1 min a slide message programmed by your dealer scrolls X Licensing Safety and Service I...

Page 31: ...estoppel or otherwise any license under the copyrights patents or patent applications of Topaz3 LLC except for normal non exclusive royalty free license to use that arises by operation of law in the s...

Page 32: ...VENT WILL TOPAZ3 BE LIABLE TO THE BUYER OR ITS CUSTOMERS FOR ANY DAMAGES INCLUDING ANY SPECIAL INCIDENTAL INDIRECT OR CONSEQUENTIAL DAMAGES OR FOR THE LOSS OF PROFIT REVENUE OR DATA ARISING OUT OF THE...

Reviews: