LEAB Automotive -CPC
LEAB Automotive GmbH
Page - 19 -
4.4
Conversion of charging cable (CPC 600W and 800W only)
Depending on the application, it can be necessary to replace the charging cable fitted to the LEAB CPC.
This can be due to cable damage or in order to fit a cable of a different length than the one already
fitted. Standard electric cables of the corresponding cross-section can be used as replacement cables.
To remove the charging cable, disconnect the LEAB CPC from the mains and from the battery. Use a slim
screwdriver to carefully release the two clamp locking mechanisms on the cable terminals which are
used to attach the charging cables to the charging output and pull the old charging cables out.
Push the stripped ends of the new charging cables completely into the terminal guides. To do this, twist
the ends of the wires slightly and release the locking mechanism using a screwdriver before pushing the
ends in. Pull the screwdriver out when the cables have been pushed in completely so that the locking
mechanism can grip tightly. Pull the new charging cable firmly a few times to check whether the locking
mechanism holds.
Note the polarity specifications on the label next to the charging output. Connect the red charging cable
to the left-hand output and the blue or black charging cable to the right-hand output marked
–.
4.5
Connection and conversion of the mains connection cable
When the LEAB CPC is mounted on the wall or used as a transportable battery charger, the 1.5 m mains
connection cable delivered with the device may not always be sufficient and may need replacement. To
make this modification easier for you, the mains connection cable is connected to a Neutrik connector
system. See Annex A of this manual for instructions on fitting the Neutrik connector.
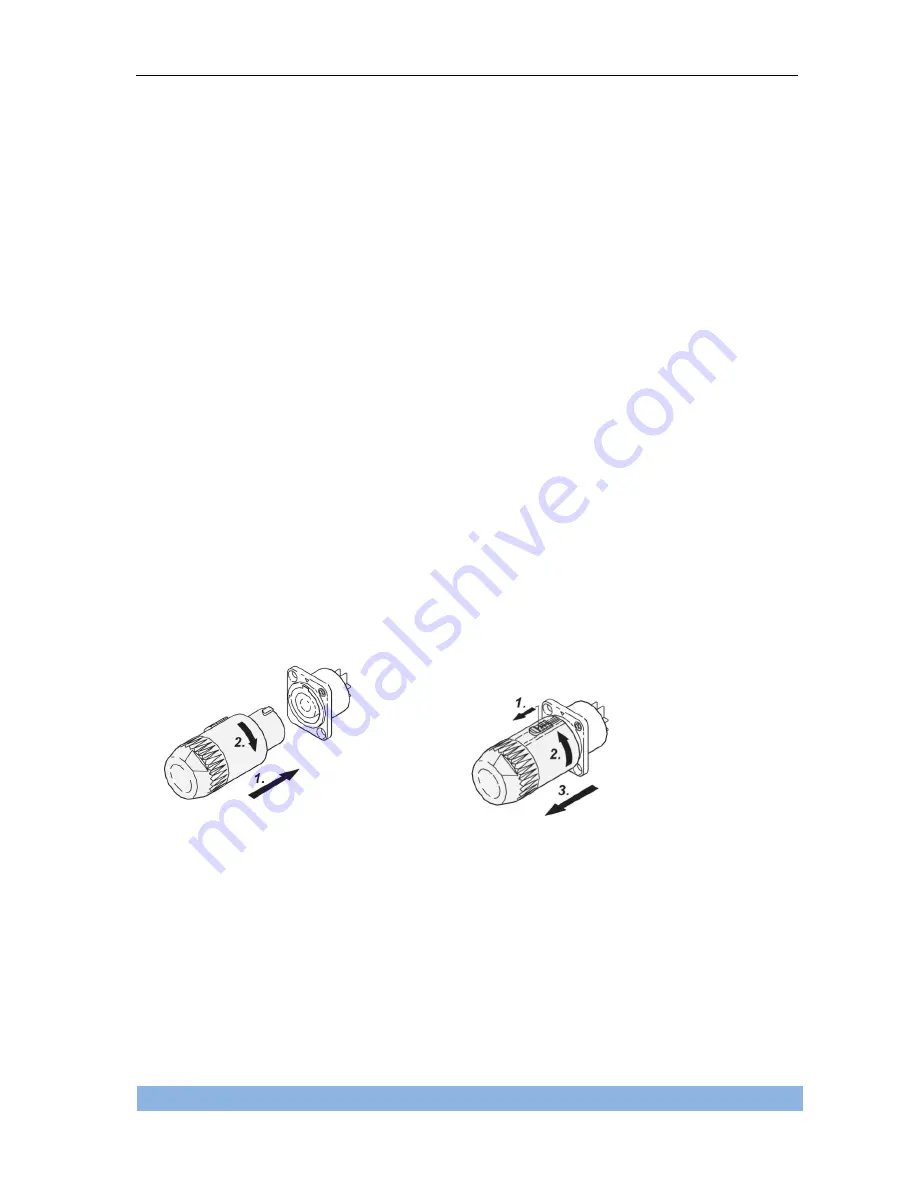
To insert and remove the mains connection cable to and from the battery charger, please proceed as
follows:
Engagement
Insert the blue Neutrik connector on the mains cable
into the jack on the back (connection side) of the
LEAB CPC (1) and turn the connector clockwise (2)
until you hear a quiet click indicating successful
locking.
Separation
Pull the silver locking lever (1) towards you and turn
the connector anti-clockwise (2) as far as it will go
until you can pull the connector out of the jack (3).
engagement
separation
All manuals and user guides at all-guides.com


