LDL TECHNOLOGY Tire Watch User Manual Download Page 5


LDL TECHNOLOGY COPYRIGHTS 

www.aimshop.com 

5

 /

8


– SET UP YOUR VALUES – UNROLLING MENUS 


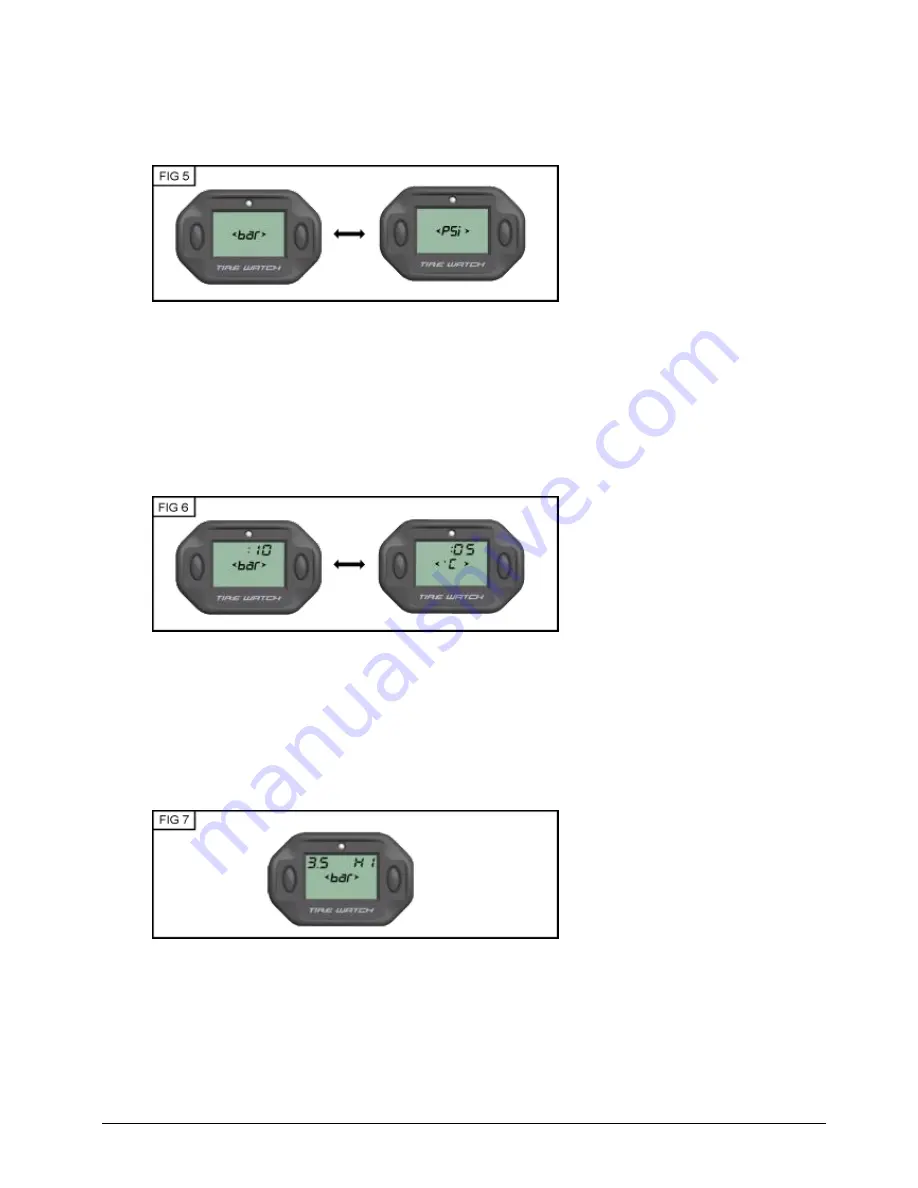
FIG 5 - MENU 01 : CHOOSE THE PRESSURE AND TEMPERATURE UNIT 


By default the pressure is in Bar. To display en PSI 

 short push on  Bt2 

To return in Bar 

 push again on Bt2 

To validate pressure unit 

 short push on Bt1 

Same operation to change °C in °F.  


FIG 6 

– MENU 02 : SET UP THE PRESSURE/TEMPERATURE SEQUENCE 


Setting range  : from 00 to 60 seconds. A sequence programmed with the value 00 deactivate the sequence .For 
exemple, if you don’t want to see the tires temperature, you have to set 00 at the temperature sequence.  
Pressure sequence : pre programmed at 10 seconds. 
Temperature sequence : pre programmed at 05 seconds. 


FIG 7  

– MENU 03 : HIGH PRESSURE THRESHOLD SETTING FOR FRONT TIRES 


Setting range for front and rear wheels :  from 0,1 à 3,5 bar (or 01 to 51 PSI) 
Maximum pressure alert : Pmax (HI) pre-programmed at  3,5 bar 
 

Summary of Contents for Tire Watch

Page 1: ...d the maximal temperature that every tire achieved during the race or the session Tire Watch Sport enables you to pre equip up to 32 wheel rims You can then change your wheels at any time of the race while keeping the information of pressures and temperatures of the 4 wheels on the vehicle The display recognizes automatically after an initial phase of learning the wheel which was changed 1 SYNOPTI...

Page 2: ...ransmitting mode Force frame mode the sensor will send a RF frame with this identifying code ID You will need this function to learn all your sensors on the display and allocate a position or when you have to replace a damaged sensor Sleeping mode no acceleration and no LF transmission Paddock mode the sensors have been wake up by the ON button of the LF Trigger to force data transmission Then the...

Page 3: ...OFF long push on Bt2 or automatically turn off after 15mn caused by engine stop or no wheel unit sensor reception NB Always turn the display on before driving FIG 3 CHANGE FROM PRESSURE TO TEMPERATURE DISPLAY The pressure is the display by default A sequence enables the display to show automatically the pressure towards the temperature see the chapter C set your values To display the T even in the...

Page 4: ...turn back automatically to the main display after 8 seconds if no button is pressed during this lapse of time C SET YOUR VALUES Accede to the rolling menu long push on Bt1 Once the wanted menu is reached the first digit is blinking to inform you that you enter the menu to set the 1st digit short push on Bt2 until the wanted value is reached To validate the 1st digit and set the 2nd digit short pus...

Page 5: ...ET UP THE PRESSURE TEMPERATURE SEQUENCE Setting range from 00 to 60 seconds A sequence programmed with the value 00 deactivate the sequence For exemple if you don t want to see the tires temperature you have to set 00 at the temperature sequence Pressure sequence pre programmed at 10 seconds Temperature sequence pre programmed at 05 seconds FIG 7 MENU 03 HIGH PRESSURE THRESHOLD SETTING FOR FRONT T...

Page 6: ...ESSURE THRESHOLD SETTING FOR ALL THE WHEELS Setting range for front and rear values from 0 1 à 3 5 bar or 01 to 51 PSI Minimum alert pressure Pmin LO pre programmed at 0 1 bar This threshold will be registered for all the wheels FIG 10 MENU 06 HIGH TEMPERATURE THRESHOLD SETTING FOR ALL THE WHEELS Setting range from 19 C to 99 C 000 to 210 F Maximum temperature threshold alert Tmax HI preprogrammed...

Page 7: ... stop pushing on the button If no frame is received within 4 minutes the display returns to FIG 11 You have to trig again the sensor The ID is received You have to validate or cancel the ID learning in case you have trigged a sensor already leraned To validate the ID learning you have to validate first the value y YES default value short push on Bt1 To cancel the ID learning push shortly on Bt2 to...

Page 8: ...2 Repeat this procedure for all sensors you have up to 32 Once you have learned all ID sensors a short push on Bt1 enables you to see all ID learned their position and their set number To see the set 2 short push on Bt2 and so on for all sets To come back to the main menu long push on Bt1 SUMMARY 1 Note all your identifiers and attribute them a position on the vehicle 2 Trig the sensor with force ...

Reviews: