background image


                                                                 +1.800.867.4580                      [email protected]                          www.laundryjet.com


19 


Slide Port Installation 

5.4


Step 3 - Slide Port Assembly 


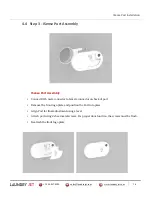
ISlide Port Assembly 


Connect RJ45 male connector to female connector on back of port 


Remove the front logo plate and position the Port into place 


Align Port for final adjustment using a level 


Attach port using 2 Sheet metal screws. For proper door function, the screws must be flush. 


Reattach the front logo plate 


Summary of Contents for ISense

Page 1: ...00 867 4580 sales laundryjet com www laundryjet com 1 INSTALLATION GUIDE ISense Slide Lift March 2023 Version 1 0 Revision 0 0 ISense Slide Lift Ports Laundry Jet 2001 Challenger Avenue Oroville CA 95...

Page 2: ...laundryjet com www laundryjet com 2 INSTALLATION GUIDE Document Revisions Date Version Number Document Changes 3 13 2023 1 0 Rev 0 0 Laundry Jet Installation Guide Ports FOR ADDITIONAL HELP INCLUDING...

Page 3: ...ation 10 14 4 Components Tools 10 4 1 Port 90 Mount Bracket Port Mount Bracket 11 12 4 2 ISense Port Sheetrock Template 13 4 3 ISense Port Installation 14 5 Slide Port Installation 15 19 5 Components...

Page 4: ...s that connect the ports to the laundry room through the attic space Vacuum Laundry Pipe Laundry Jet specifies 6 SDR35 White Solvent Weld PVC pipe and fittings This piping is light weight to make inst...

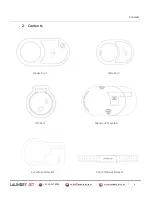
Page 5: ...1 800 867 4580 sales laundryjet com www laundryjet com 5 Contents 2 Contents ISense Port Slide Port Lift Port Sheetrock Template Lift Port Sheetrock Template Port Mount Bracket Port 90 Mount Bracket...

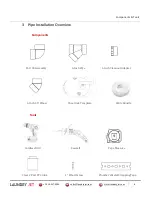
Page 6: ...ponents Tools 3 Pipe Installation Overview Components Port 90 Assembly 6 Inch Wye 6 Inch Cleanout Adapter 6 Inch 45 Elbow Sheetrock Template Cable Bundle Tools Cordless Drill Sawzall Tape Measure Clea...

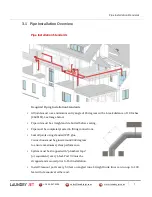
Page 7: ...low Pipe cuts must be straight and de burred before seating Pipe must be completely seated in fitting connections Seal all joints using standard PVC glue Connections must be glued around 360 degrees t...

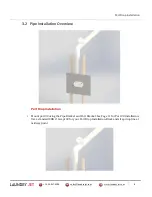
Page 8: ...op Installation 3 2 Pipe Installation Overview Port Drop Installation Mount port 90 using the Pipe Bracket and Port Bracket See Page 11 for Port 90 Installation Use a standard SDR 6 Swept 90 for your...

Page 9: ...Overview Port 90 Installation Port 90 must be installed with front face of Port 90 flush with the finished face of interior wall Port 90 must be installed on a plum horizontal port drop line Use the...

Page 10: ...et com www laundryjet com 10 ISense Components Tools 4 ISense Port Installation Components ISense Port Sheetrock Template Port 90 Mount Bracket Port 90 Port Mount Bracket Mount Bracket Screws 1 1 2 Sh...

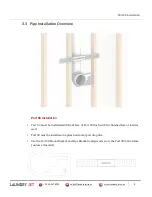
Page 11: ...om 11 ISense Port Installation 4 1 Step 1 Port 90 Mount Bracket Port 90 Mount Bracket Use the Port 90 Mount Bracket to align and secure the Port 90 to the frame Set Port height Attach 2 pipe clamps Se...

Page 12: ...rt Installation 4 2 Step 1 Port Mount Bracket Port Mount Bracket Mount the Port Mount Bracket around the Port 90 Make sure the front face of the Port Mount Bracket is flush with the front face of the...

Page 13: ...outside edge of the Port 90 and remove material Cut the Port 90 so that it is flush with the sheetrock Remove the section for ISense ports from the Sheetrock Template Position the round portion on th...

Page 14: ...ly ISense Port Assembly Connect RJ45 male connector to female connector on back of port Remove the front logo plate and position the Port into place Align Port for final adjustment using a level Attac...

Page 15: ...w laundryjet com 15 Slide Port Components Tools 5 Slide Port Installation Components Slide Port Sheetrock Template Port 90 Mount Bracket Port 90 Port Mount Bracket Port Mount Bracket Mount Bracket Scr...

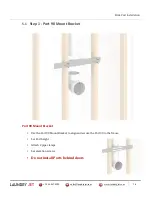
Page 16: ...com 16 Slide Port Installation 5 1 Step 1 Port 90 Mount Bracket Port 90 Mount Bracket Use the Port 90 Mount Bracket to align and secure the Port 90 to the frame Set Port height Attach 2 pipe clamps Se...

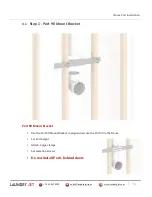
Page 17: ...rt Installation 5 2 Step 1 Port Mount Bracket Port Mount Bracket Mount the Port Mount Bracket around the Port 90 Make sure the front face of the Port Mount Bracket is flush with the front face of the...

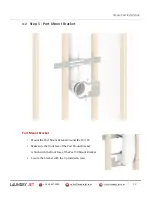
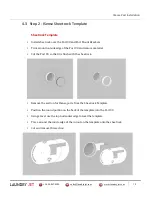
Page 18: ...ide edge of the Port 90 and remove material Cut the Port 90 so that it is flush with the sheetrock Remove the section for Slide ports from the Sheetrock Template Position the round portion on the back...

Page 19: ...y ISlide Port Assembly Connect RJ45 male connector to female connector on back of port Remove the front logo plate and position the Port into place Align Port for final adjustment using a level Attach...

Page 20: ...1 800 867 4580 sales laundryjet com www laundryjet com 20 Lift Port Components Tools 6 Lift Port Installation Components ISense Port Sheetrock Template Port 90 Mount Bracket Port 90 1 Wood Screws...

Page 21: ...com 21 Lift Port Installation 6 1 Step 1 Port 90 Mount Bracket Port 90 Mount Bracket Use the Port 90 Mount Bracket to align and secure the Port 90 to the frame Set Port height Attach 2 pipe clamps Set...

Page 22: ...tside edge of the Port 90 and remove material Cut the Port 90 so that it is flush with the sheetrock Remove the section for Lift ports from the Sheetrock Template Position the round portion on the bac...

Page 23: ...m www laundryjet com 23 Lift Port Installation 6 3 Step 3 Lift Port Assembly Lift Port Assembly Connect RJ45 male connector to female connector on back of port Position the Port into place Align Port...

Page 24: ...ove Lifeflow LLC Laundry Jet shall not be responsible for such service unless provided by an authorized Laundry Jet Dealer utilizing authentic Laundry Jet replacement parts This warranty does not appl...

Reviews: