15 of 49
June 2012
Auto-Range
The ADM-1000 has an auto-range capability in the digital display mode. In
this mode, the meter will automatically switch to a higher (less sensitive)
range when the measurement exceeds the present range.
Similarly the meter will switch to a more sensitive range when the
measurement is less than about 9% of full scale.
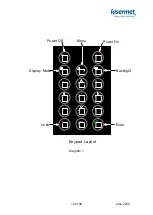
To turn on the auto-range function, press
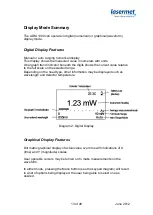
the ‘5’ button. The word ‘Auto’
appears at the bottom right corner of the display. Alternatively, auto mode
may be selected through the menus. Press Menu, scroll down to Range,
press
,
select ‘Auto’ and press
.
To turn off the auto-range function, press
the ‘5’ button again. The ‘Auto’
indication is removed from the display and the range can now be selected
manually using the up and down arrow keys. To turn off the auto-ranging
function using the menus, press Menu, scroll down to Range, press
, scroll
down to select the desired range and press
.
The ‘Auto’ indication will flash if an attempt is made to manually change the
range while in auto-range mode.
Note that auto-range facility is not available in the graphical display mode.
Wavelength
Photodiode heads do not have a linear response and the wavelength of the
incident radiation must be entered by the operator for meaningful
measurements to be made. The wavelength response of each detector head
is stored in the head at calibration and the correction factor is automatically
applied once the wavelength has been entered.
To enter the wavelength of incident radiation, press Menu, scroll to
Wavelength using the up arrow (8) or down arrow (2) buttons, press
and
use the numeric keypad to type in the wavelength in nanometres (nm). The
entered value must be within the displayed range.
Press
when done. Press
X
instead of
and the data entry is removed
ready for re-entry. Press
X
again and the display reverts to the main display
with the previous value being retained.
Note that for thermal detector heads the wavelength is not required to be
known and this menu option is not available.


