background image

7

•  The warning triangle indicates all instructions which are important for safety. Always follow these otherwise 

you could injure yourself or damage the device.

•  Children may not play with the device.
•  Cleaning and user maintenance may not be carried out by children without supervision.
•  Do not leave the packaging material lying around. It can be a dangerous toy for children!
•  Only use this product for its intended purpose!
•  Do not tamper with or disassemble the device!
•  For your own safety, only use accessories or replacement parts that are listed in the instructions or the usage 

of which is recommended by the manufacturer!

•  Do not manipulate or dismantle the strap and ratchet!
•  The tie-down system may only be used to secure loads. The tie-down system may not be used for lifting or 

towing.

•  The tensioning straps may not be knotted.
•  The tensioning straps may not be twisted, they should always take the load with the full width of the strap.
•  Check the tensioning straps before each use. A tensioning strap with tears, cuts or abrasion damage may not 

be used. Dispose of such tensioning straps immediately.

•  The tensioning straps may not be positioned over sharp edges and rough surfaces.
•  No loads may be placed on top of the tensioning strap during transportation.
•  Store the tie-down system away from heat sources and protect it from prolonged exposure to sunlight.
•  Use the existing lashing eyes to secure the tie-down system. Make sure that other vehicle parts to which you 

secure straps are suitable for such and display sufficient stability.

•  At least 1.5 wraps must be placed around the ratchet to ensure sufficient attachment.
•  The permitted lashing capacity may not be exceeded.
•  Remember that starting and braking manoeuvres, and wind action may result in increased loads.
•  Check the secure lashing of the load at regular intervals during travel.

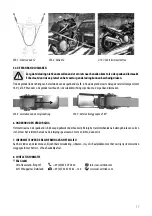
4.1 MONITORING

4.2 WITHDRAWAL FROM USE

•  Before using, check the tensioning strap for potential damages. In the event of damage to the strap or the metal parts, 

immediately cease to use the tie-down system.

•  Lashing straps contaminated with aggressive or other substances must be examined carefully and checked as required. The 

use of such can be dangerous.

4. SAFETY PRECAUTIONS

The tensioning strap may no longer be used in the event of:
• 

Thread breaks and cuts, especially when caused by sharp edges

• 

Damage to the connection

• 

Damage or deformation due to the effects of heat

• 

Damages caused by aggressive substances

The connecting and tensioning elements may no longer be used in the event of:
• 

Cracks, breaks or signs of considerable corrosion 

• 

Opening > 0.05 – x in hook mouth or other deformations 

• 

Visible, lasting deformation on carrying parts

Summary of Contents for 10323

Page 1: ...mber 10323 MotorbikeLashingSystemSet Operating instructions 6 Réf 10323 Jeudesystèmed arrimagepourmotos Manuel de l opérateur 10 Cod art 10323 Setdisistemidiaggancioper motociclette Istruzioni per l uso 18 Art nr 10323 Vastsjorsysteemsetvoormotorfietsen Gebruiksaanwijzing 14 ...

Page 2: ...tionen in dieser Anleitung insbesondere die Beachtung der Sicherheitshinweise Jede andere Verwendung gilt als nicht bestimmungsgemäß und kann zu Sach oder Personenschäden führen Die EAL GmbH übernimmt keine Haftung für Schäden die durch nicht bestimmungsgemäßen Gebrauch entstehen INHALT 2 LIEFERUMFANG 1 x Spanngurt mit Klemmschloss bereits vormontiert 2 x Spanngurt mit Lenkerschlaufe Ratsche mit J...

Page 3: ...m Spanngurt abgelegt werden Bewahren Sie das Verzurrsystem entfernt von Wärmequellen auf und schützen Sie es vor dauerhafter Sonneneinstrahlung Benutzen Sie zum Befestigen des Verzurrsystems vorhandene Zurrösen Stellen Sie sicher dass andere Fahrzeugteile an denen Sie Gurte befestigen geeignet sind und eine ausreichende Stabilität aufweisen Es müssen immer mindesten 1 5 Wicklungen um die Ratsche l...

Page 4: ...ählen Sie die für Ihr Motorrad passende Befestigungsvariante aus Bilder 3 6 Legen Sie das Verzurrsystem wie auf den Bildern dargestellt an Ziehen Sie die Spanngurte mit Hilfe der Ratschen leicht und gleichmäßig an Mit dem Spanngurt mit KlemmschlossfixierenSiedasHinterradIhresMotorradesanderRadschienedesTransportanhängers Bild7 ZiehenSiejetztdie Spanngurt fest und verschließen Sie die Ratsche Bild1...

Page 5: ...riante2 Bild8 LösenderVerriegelung Bild9 Ratscheganzgeöffnet180 Bild6 Variante2 Bild7 FixierungHinterrad 5 4 LÖSEN DES SPANNGURTS Ziehen Sie dieVerriegelung in Richtung des Endes des Spannhebels Bild 8 Halten Sie dieVerriegelung fest und klappen Sie die Ratsche ganz auf 180 Bild 9 Bei gehaltenerVerriegelung ist dieWickelvorrichtung frei und Sie können den Spanngurt lösen Stellen Sie sicher dass bei...

Page 6: ...observance of the safety notes Any other usage is considered improper and can lead to property damage and personal injury EAL GmbH is not liable for damages that occur due to improper usage 2 SCOPE OF SUPPLY 1 xTensioning strap with clamping lock already pre mounted 2 xTensioning strap with handlebar loops ratchet with J hooks and tank protector 1 x Operating instructions 3 SPECIFICATIONS Tensioni...

Page 7: ... transportation Store the tie down system away from heat sources and protect it from prolonged exposure to sunlight Usetheexistinglashingeyestosecurethetie downsystem Makesurethatothervehiclepartstowhichyou secure straps are suitable for such and display sufficient stability At least 1 5 wraps must be placed around the ratchet to ensure sufficient attachment The permitted lashing capacity may not ...

Page 8: ... in the holder Select the suitable fixing method for your motorcycle Images 3 6 Set up the tie down system as shown in the images Tighten the tensioning straps gently and evenly with the help of the ratchets Using the tensioning strap with clamp lock affix the back tire of your motorcycle to the wheel rail of the transport trailer Image 7 Now tighten the tensioning strap and lock the ratchet Image...

Page 9: ...n out of service in the event of tears cuts or abrasion wear Image8 Releasingthelockingmechanism Image9 Ratchetfullyopened180 5 4 RELEASING THE TENSIONING STRAP Pull the lock towards the end of the tensioning lever Figure 8 Hold the locking mechanism firmly and unfold the ratchet completely 180 Image 8 With the locking mechanism held the wrapping mechanism is free and you are able to release the t...

Page 10: ...tilisation en particulier le respect des consignes de sécurité Toute autre utilisation est considérée comme non conforme et peut entraîner des dommages matériels ou corporels La société EAL GmbH décline toute responsabilité en cas de dommages découlant d une utilisation non conforme à l emploi prévu 2 MATÉRIEL FOURNI 1 x Sangle de serrage avec boucle de serrage prémonté 2 x Sangle de serrage avec ...

Page 11: ...harge sur la sangle de serrage Tenez le système d arrimage à l écart des sources de chaleur et protégez le d une exposition prolongée au soleil Lors de la fixation du système d arrimage utilisez les œillets d arrimage fournis Assurez vous que les autres parties du véhicule sur lesquelles les sangles sont fixées soient adaptées et suffisamment stables Il doit toujours y avoir un enroulement d au mo...

Page 12: ...trouvecorrectementplacéedans lafixation Sélectionnezlavariantedefixationadaptéeàvotremoto fig 3 6 Fixezlesystèmed arrimagecommedécritsurles figures Serrez légèrement et uniformément les sangles de serrage à l aide des cliquets Fixez la roue arrière de la moto avec la sangle dotée d une boucle de serrage sur le rail porte roue de la remorque de transport fig 7 Serrez maintenant la sangle de serrage...

Page 13: ... résiduels lorsqu il est usé qu il est visiblement vieillissant qu il présente des fissures des coupures ou des traces de frottements Figure8 Débloquerleverrouillage Figure9 Cliquetcomplètementouvert180 5 4 DÉFAIRE LA SANGLE DE SERRAGE Tirezleverrouillagedanslesensdel extrémitédulevierdeserrage figure8 Maintenezleverrouillageetouvrezcomplètement lecliquet 180 figure9 Lorsquevousmaintenezleverrouil...

Page 14: ...rt ook het in acht nemen van alle informatie in deze gebruiksaanwijzing in het bijzonder van de veiligheidsvoorschriften Elk ander gebruik geldt als niet reglementair en kan materiële schade of persoonlijk letsel veroorzaken EAL GmbH is niet aansprakelijk voor schade als gevolg van niet reglementair gebruik 2 LEVERINGSOMVANG 1 x spanband met klemvergrendeling Reeds voorgemonteerd 2 x spanband met ...

Page 15: ... transport mogen geen lasten op de spanbanden worden gelegd Bewaarhetsjorsysteemuitdebuurtvanwarmtebronnenenbeschermhettegenpermanentezonnestraling Gebruik de beschikbare sjorogen voor het bevestigen van het sjorsysteem Zorg ervoor dat ook de andere delen van het voertuig waaraan de spanbanden worden bevestigd geschikt zijn en stevig genoeg Om een stevige bevestiging te waarborgen moet altijd mins...

Page 16: ... houder staat Kies de juiste variant voor uw motorfiets afbeeldingen 3 6 Pas het sjorsysteem toe zoals getoond in de afbeeldingen Span de banden licht en gelijkmatig aan met behulp van de ratels Met de spanband met de klemvergrendeling zet u het achterwiel van uw motorfiets vast op de wielrail van de aanhanger afb 7 Trek nu de spanband vast en vergrendel de ratel Afb 1 Overzicht Afb 3 Schetsvarian...

Page 17: ...stsjorsysteem worden weggegooid met het rest of huishoudelijk afval Afb 8 Losmakenvandevergrendeling Afb 9 Ratelvollediggeopend180 5 4 DE SPANBAND LOSMAKEN Trekdegrendelinderichtingvanhetuiteindevandespanhendel afb 8 Houddegrendelvastenklapderatelvolledigom met 180 afb 9 Wanneer u de grendel vasthoudt is de wikkelinrichting vrij en kunt u de spanband losmaken Zorgdatdeladingnietkanomvallenendatern...

Page 18: ...e sulla sicurezza Ogni altro utilizzo viene considerato improprio e può causare danni a persone o cose EAL GmbH non risponde dei danni derivanti da un uso improprio 2 VOLUME DI CONSEGNA 1 x cinghia di fissaggio con bloccaggio già premontati 2 x cinghia di fissaggio con passante per manubrio cricchetto con gancio J e protezione serbatoio 1 x manuale d uso 3 SPECIFICHE Cinghia di fissaggio con blocc...

Page 19: ...neprolungataairaggi solari Per bloccare il sistema di fissaggio utilizzare gli appositi anelli di fissaggio forniti in dotazione Accertarsi che le altre parti del veicolo alle quali si fissano le cinghie siano adeguate e presentino una sufficiente stabilità Intorno al cricchetto si deve sempre effettuare almeno un avvolgimento e mezzo al fine di garantire un fissaggio che sia sufficiente Non è con...

Page 20: ...ziona correttamente nel supporto Sceglierelavariantedifissaggiopiùadeguataperlapropriamoto vederelefigure3 6 Applicareilsistemadifissag gio come illustrato nelle figure Serrare le cinghie leggermente e uniformemente tramite i cricchetti Tramite la cinghia dotata di bloccaggio si fissa la ruota posteriore della motocicletta al binario del rimorchio figura 7 A questo punto stringere la cinghia e chi...

Page 21: ...vidente invecchiamento incrinature tagli o sfregamenti smaltire il sistema di fissaggio tra i rifiuti domestici o non riciclabili Figura8 Allentareilbloccaggio Figura9 Cricchettocompletamenteapertoa180 5 4 SBLOCCAGGIO DELLA CINGHIA DI FISSAGGIO Tirare il bloccaggio verso l estremità della leva figura 8 Tenere il bloccaggio fermo e aprire il cricchetto completamente 180 figura 9 Con il bloccaggio t...

Page 22: ... EAL GmbH 10323 10 2020 EAL GmbH Otto Hausmann Ring 107 42115Wuppertal Deutschland 49 0 202 42 92 83 0 49 0 202 42 92 83 160 info eal vertrieb com www eal vertrieb com ...

Reviews: