


2
www.larsonelectronics.com
Step 2. Install the
Tool
Tool is a software utility used to “discover” cameras and NVRs/DVRs installed on the physical
Ethernet network (LAN) and change their network settings.
Tool is provided
To use Discovery Tool:
1.
on Microsoft Windows computer you will use to access
your camera on the LAN.
2.
the folder that contains the
.
3.
Install
Tool.
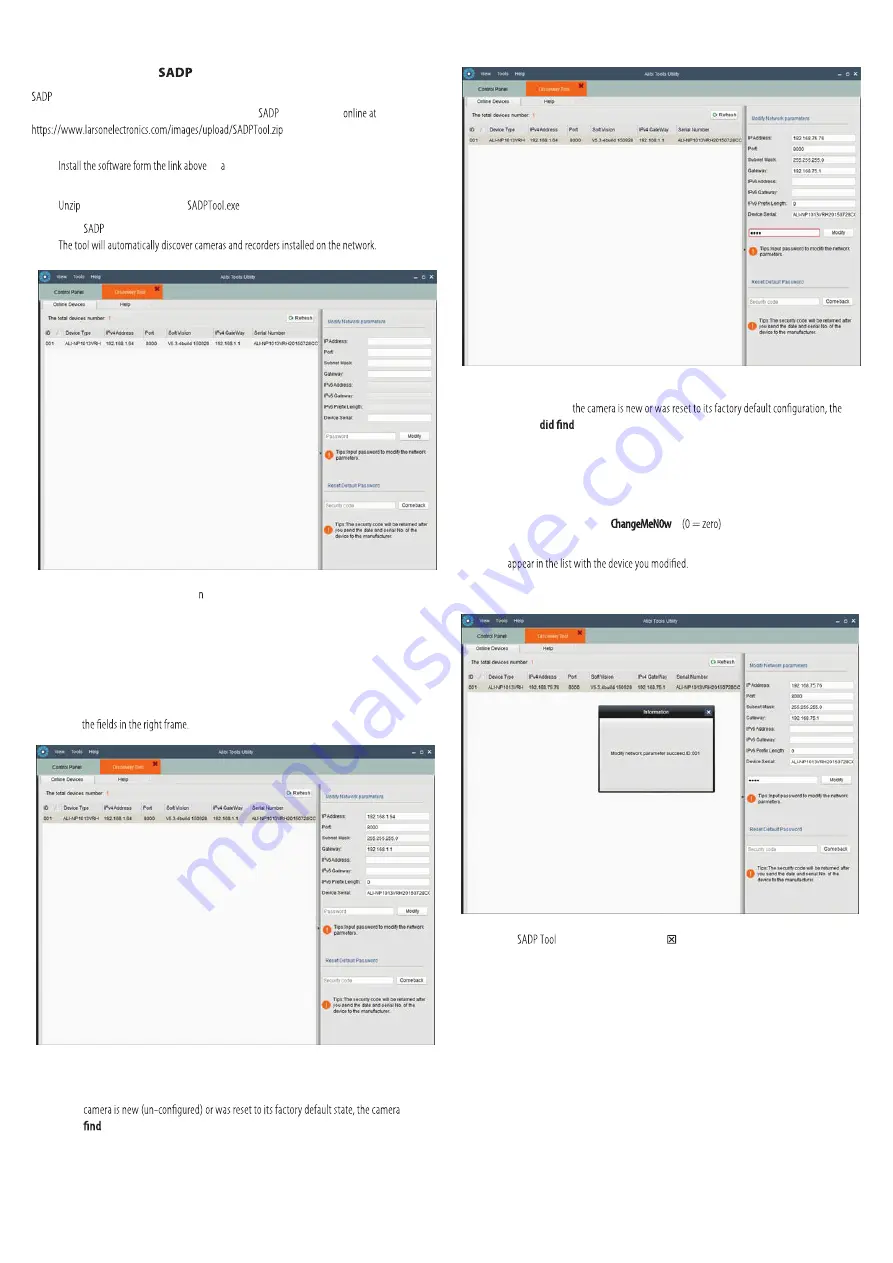
In the example screen shown above, otice that the IP address of the camera is 192.168.1.64
(default IP address). This camera, although configured for a subnet that is probably foreign to the
network it is installed on, is still found by the tool.
5.
To change the network settings of the camera to be compatible with the subnet where it is installed,
do the following:
a.
Click on the device to highlight it. Notice that the network parameters for the device populate
b.
Modify the network settings to values compatible with the subnet where it is installed:
»
If the
IPv4 Address
shown for the camera is 192.168.1.64 (default IP address) and the
did not
a DHCP server on the network. Modify the parameters in the right pane to values you
prefer and are compatible with the network. An example is shown in the screen below.
»
If the
IPv4 Address
shown for the camera is
something other than
192.168.1.64 (default
IP address)
and
camera
a DHCP server on the network and acquired new network parameters that
are compatible with the network. If necessary, change the parameters in the right pane to
values that you prefer and are compatible with the network. An example is shown in the
screen above.
c.
Enter the
admin
password for the camera in the
Password
field. The default
admin
user
password for cameras is
d.
Click the
Modify
button. The new IP address, port, and other settings will change and
6.
Close the
by clicking the
Close
icon ( ) in the upper-right corner of the screen.


