


2.
Verify that video from the camera can be seen on the HD-TVI DVR (HVR) monitor.
3.
While observing video from the camera, loosen the mounting bracket pan, elevation and horizontal
line adjustment lock screws, point the camera at your surveillance target, and then tighten
adjustment lock screws and lock nut to hold the camera in position.
The mounting bracket pan adjustment can be made after loosening the lock nut. Use a Phillips #1
screwdriver for the elevation and horizontal line adjustment lock screws.
Step 3. Open the OSD menu
system from either the HVR Live View display or through remote login to the HVR.
Opening the OSD Menu through the HVR
To open the OSD menu on the HVR monitor:
1.
Open the HVR Live View screen, and then click inside the screen where the PTZ camera video image
is displayed. See below.
2.
Click the
PTZ Control
icon in the Quick Setting Toolbar. The PTZ camera Live View window will
expand to full screen and the pop-up window shown below will open.
Menu
icon
3.
In the
PTZ Control
panel pop-up window, click the
Menu
icon on the
line.
4.
Drag the PTZ Control window to a position where it doesn’t cover the OSD menu (such as the lower-
right corner.
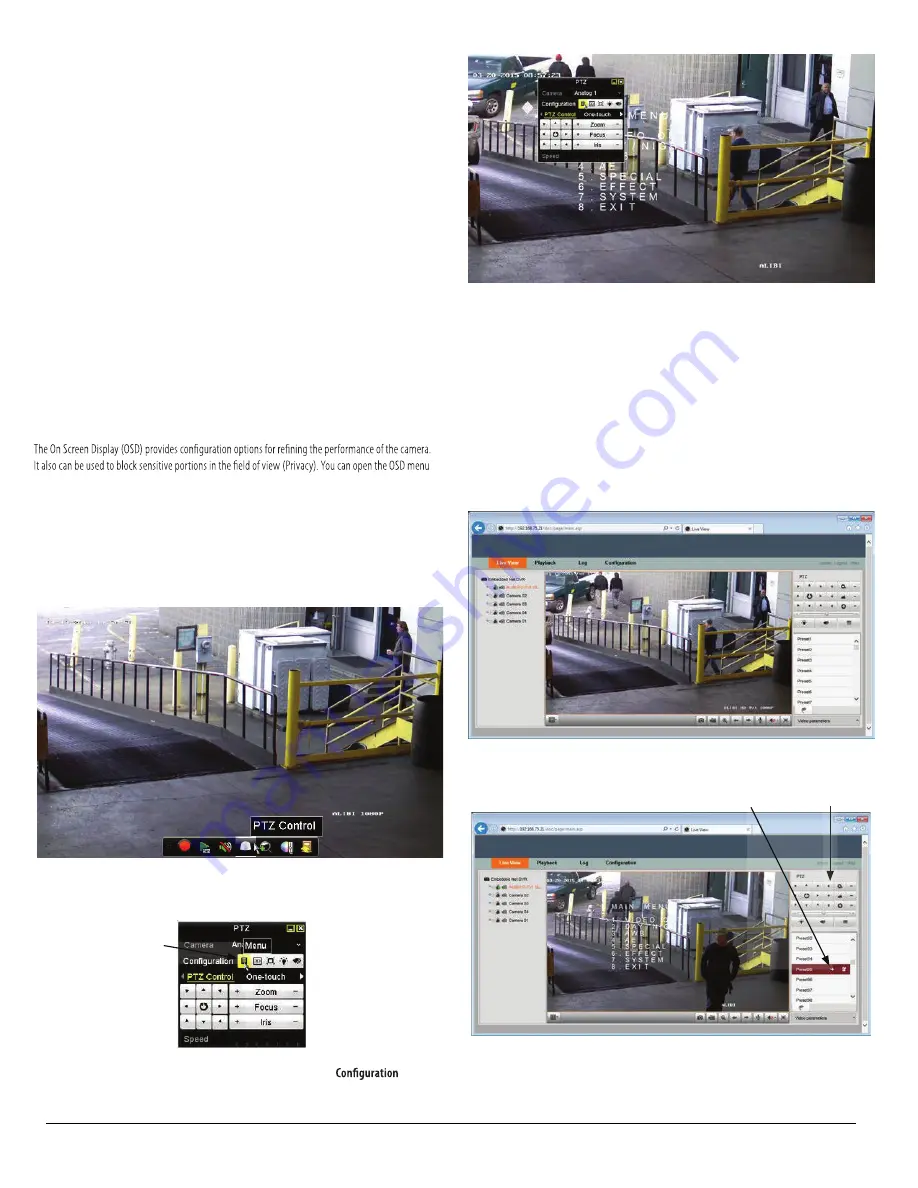
Opening the OSD Menu through remote login to the HVR
To open the OSD menu during a remote login to the HVR:
1.
After logging into the HVR, open the PTZ camera in a single Live View window.
2.
In the PTZ control panel, scroll down the Preset list to
Preset95
, click the entry to highlight it, and
then click the
Call
icon. See below. The OSD
MAIN MENUS
screen will open.
PTZ control panel
Preset95
Call
icon
Larson Electronics, LLC
Phone:
Fax: (903) 498-3364
www.larsonelectronics.com
3
of
6
(877) 348-9680


