


4: Configuration
Lantronix® xPrintServer® User Guide
39
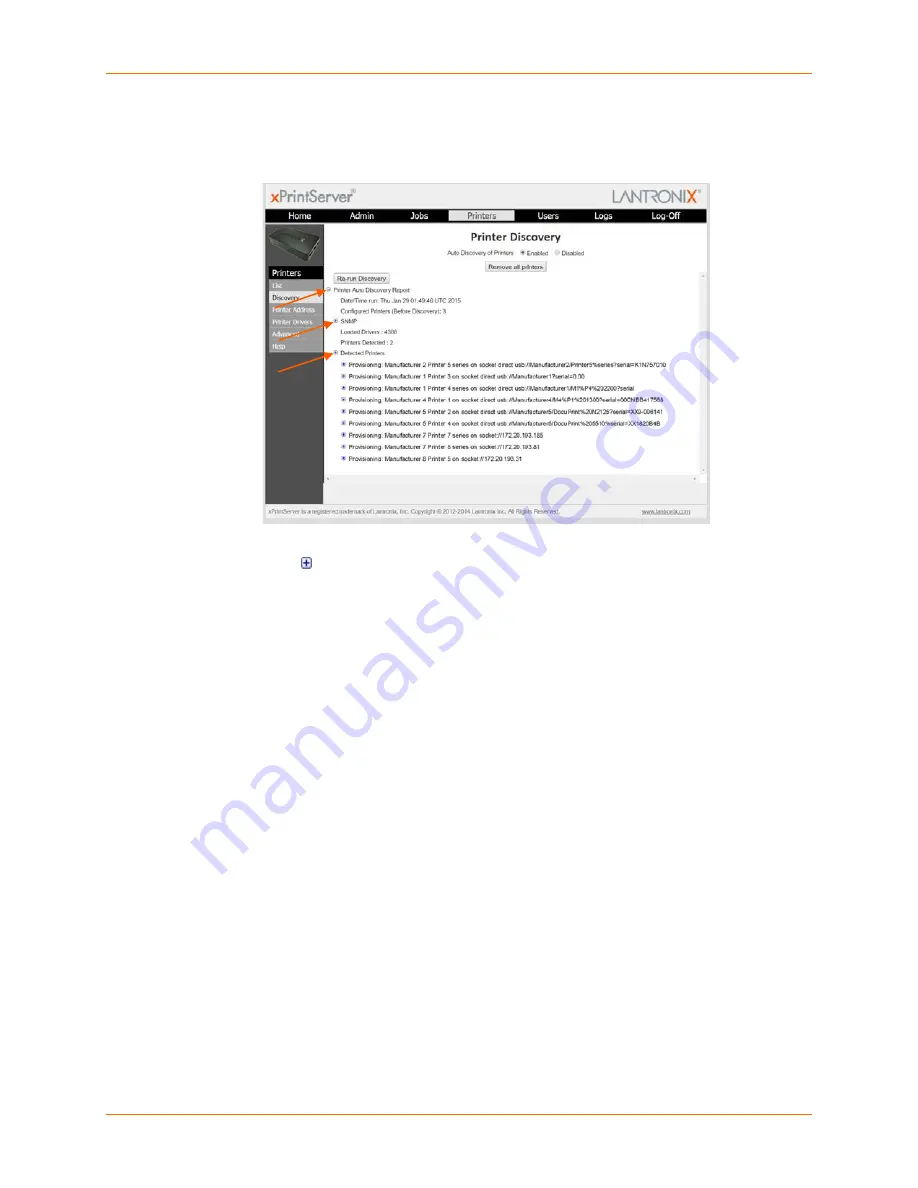
5. Expand the
SNMP
field to see configuration information about the discovered printer(s). An
example of what you may see in the SNMP field:
Figure 4-4 Expanding Detected Printers Information
6. Expand the
Detected Printers
field and further expand additional available subcategories
(indicated with a icon to the left) to see a list of discovered printers and the status of the
provisioning results.
Note:
If you expand the Printer Auto Discovery Report, you may need to use the left-right and
up-down scroll bar to see the entire contents of your report.
Deleting All Configured Printers
The auto discovery utility of the xPrintServer device is enabled by default so that whenever you
turn on your xPrintServer device, auto discovery will automatically run one time.
1. Login to the xPrintServer device’s Admin interface (see
Logging In
.)
2. Click the
Printer
tab to access the
Printers > List
page (see
Figure 4-1
.)
3. Click the
Discovery
link to the left of the page to reach the
Printer Discovery
page.
4. Click the
Remove all printers
button to remove all configured printers, as desired.
5. Click
Yes
in the confirmation popup that appears.
6. Log-off (see
Logging Off
) and close your browser. All printers are deleted.
7. Click the
Home
tab to access the
System Status
page (see
Figure 3-3 IP System Status
Information on the Home Page
.)
8. Click
From Google’s Website
to access the Google Cloud Print management page (see
Supplementary Google Cloud Print Administrative Features
.)
9. Verify all printers have been de-registered by going into the Google Cloud Print management
page and deleting any leftover printers from the previous xPrintServer device registration.


