


2: Installation
Lantronix® xPrintServer® User Guide
16
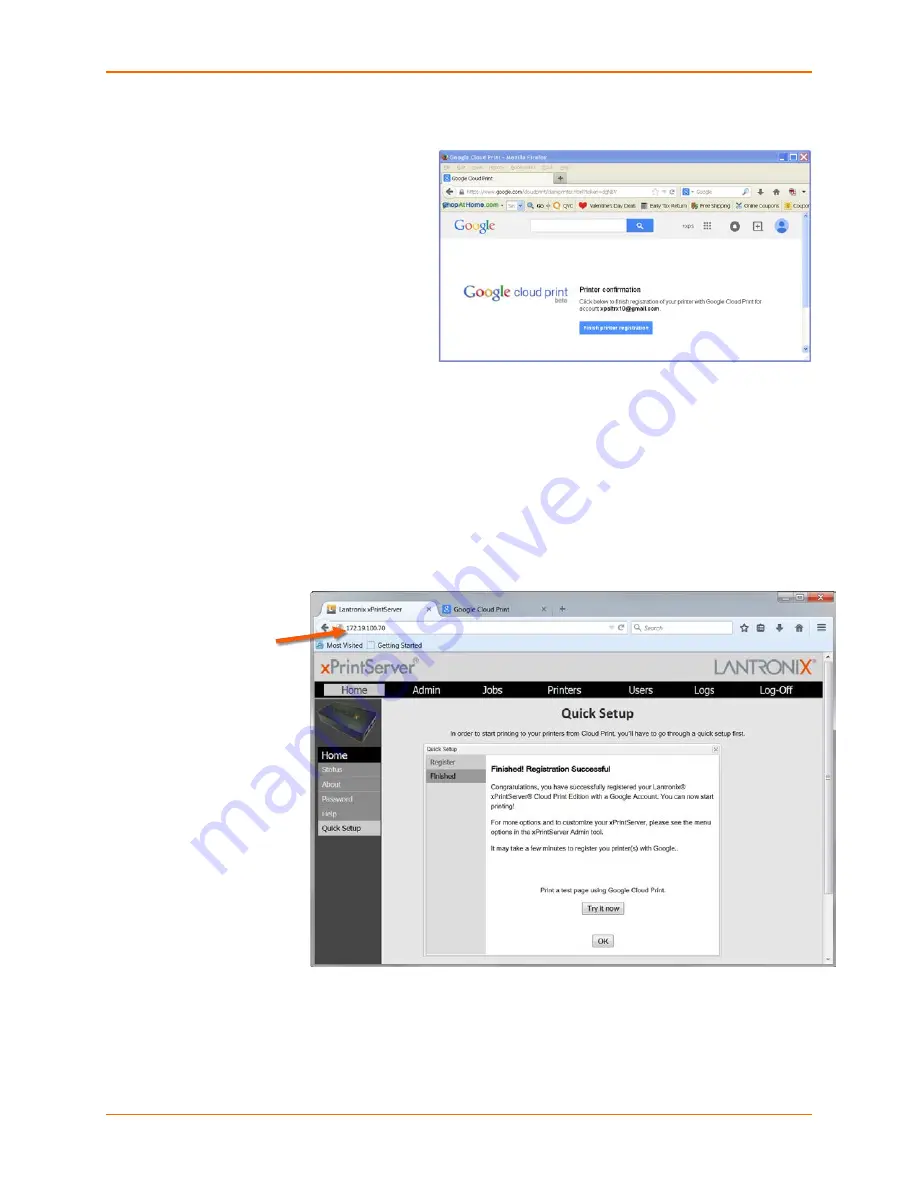
6. Confirmation of your registration
with Google Cloud Print appears
upon login.
7. Click
Finish printer registration
.
8. Return to the Quick Setup page at the xPrintServer device Admin interface. You will also see
“Finished! Registration Successful” message on the Quick Setup window. From here you
may:
Click
Try it now
to initiate printing a test page and to explore. The xPrintServer web
interface provides a wide range of
printer management features
and there are also some
management capabilities on the
Google Cloud Print management page
.
Click
OK
to finish registration and to return to the xPrintServer device Admin interface (see
System Status on the Home Page
.)
Figure 2-6 Quick Setup Complete
The IP address
assigned to your
xPrintServer unit is
listed at the browser
address bar (up top)
and can be used to
access this Admin
interface for future
logins.
Note:
IP address may
change if set to DHCP.
Rediscover your
xPrintServer IP
address by following
the directions in
Finding the
xPrintServer IP
Address
, as
necessary.
Figure 2-5 Google Cloud Print
Printer Confirmation


