Lang Manufacturing Company
6500 Merrill Creek Parkway
Everett, WA 98203
Part Number: 60850-32
Phone: 425-349-2400
Fax: 425-349-2483
Product ManualLang "Purple" Computer
OperationServiceTroubleshooting
Page 1: ...Lang Manufacturing Company 6500 Merrill Creek Parkway Everett WA 98203 Part Number 60850 32 Phone 425 349 2400 Fax 425 349 2483 Product Manual Lang Purple Computer Operation Service Troubleshooting ...
Page 2: ...GIN PROGRAMMING 3 DISPLAY READOUTS 3 PROGRAMMING 4 PROGRAMMING SEQUENCE 4 PROGRAMMING 5 PROGRAMMING 6 OPTIONAL PROGRAMMING CODES 6 PROGRAMMING 7 PROGRAMMING CODES 7 SERVICE 8 MODEL STRAPPING INSTRUCTIONS 8 SERVICE 9 CIRCUIT BOARD IDENTIFICATION 9 TROUBLESHOOTING 10 TROUBLE SHOOTING 10 TEMPERATURE SENSOR VALUES 11 SENSOR RESISTANCE 11 SENSOR VOLTAGE DROP 11 TROUBLESHOOTING 12 OPERATIONAL SEQUENCE 1...
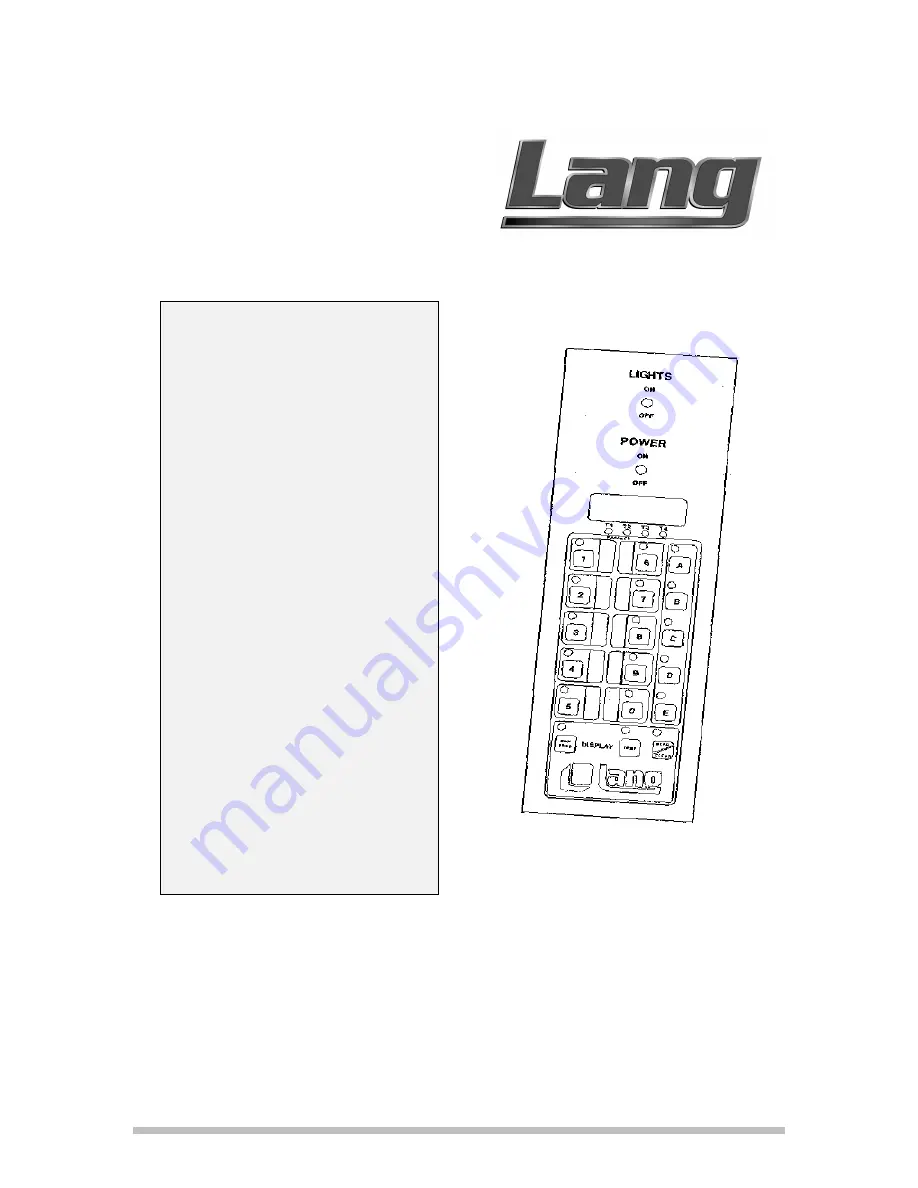
Page 3: ...1 CONTROL PANEL 1 Light Switch 2 Power Switch 3 Display 4 Tier Lamps 5 Product Buttons 1 0 6 Manual Program Button 7 Shelf Buttons A E 8 Read Clear Button 9 Temperature Recall Button ...
Page 4: ...sed when entering programming codes Pressing it twice then pressing a Product Button will read back the program in that product button Pressing and holding the button down until 88888 appears in the display will cancel the current mode of the control and return the display to Enter TEMP When the Temperature Recall Button is pressed the display will indicate the internal oven temperature When relea...
Page 5: ...r lamps located below the display labeled T1 T2 T3 T4 will illuminate to indicate which Tier is being programmed or which Tier the program is in during the cooking cycle BEFORE YOU BEGIN PROGRAMMING The readout must display ENTER before the computer will accept any programming If the readout displays any other word turn the oven Off then back On before beginning any programming sequence The Contro...
Page 6: ...an Function refer to the DEFINITIONS section Enter a Cooking Time Hours Minutes Seconds up to 9 59 59 This prompt is the beginning of the Tier 2 portion of the programming For a definition of Tiers refer to the DEFINITIONS section If during the cooking cycle the program calls for a change in the Cooking Temperature or Fan Function that change can be entered at this time The Tier being programmed i...
Page 7: ...the Read Clear button to Lock the new program s into memory and exit the programming mode End of programming sequence PROGRAMMING HINT After inputing a program entry press Shelf Button A to advance to the next prompt This will eliminate the need to wait for the readout to advance to the next question on its own 000 F Prod EntEr ...
Page 8: ...etween each button push if a delay of longer than 3 seconds has occurred the programming code must be re entered The instructions call for pressing exactly what is shown under PRESS The following abbreviations are used to indicate which buttons are to be pressed ABBREVIATION MEANING 1 through 0 Product Buttons A through E Shelf Buttons P Any particular Product Button Shelf Any particular Shelf But...
Page 9: ...e display R C 0 9 0 9 0 9 Internal oven temperature display R C 8 7 8 7 8 7 PROGRAMMING Enter programming mode R C 1 6 2 7 3 8 Recall an existing product program R C R C P Erase a product program R C 1 6 2 7 3 8 P 000 Model identification R C D C D C D C Program download Contact Factory R C A B C D E P MAINTENANCE Actual oven temperature R C 3 4 5 6 7 8 Disable program code requirements 1st genera...
Page 10: ... is being installed in To configure the control panel change the arrangement of the Strapping Bars located at the bottom of the circuit board just above the ribbon connection Each model has its own strapping configuration which must be set by the installer of the control Follow the diagram below for the proper strapping configuration ...
Page 11: ...9 SERVICE CIRCUIT BOARD IDENTIFICATION ...
Page 12: ...g On Fan running 1 Failed control panel 2 Broken or loose ribbon connector 1 Check across 2 pads on right end of edge connector on microprocessor for 5 volts DC 2 Check across temperature sensor pins on control panel for 5 volts DC see page 9 If Yes Replace board No Replace ribbon connector Display On No heat 1 Program temperature lower than oven temperature 2 Failed temperature sensor 3 Failed he...
Page 13: ...320 340 360 380 400 420 440 460 SENSOR VOLTAGE DROP This voltage is measured at the Temperature Sensor connection located on the back of the control panel see page 9 Leave the sensor pluged onto the control panel and measure the voltage drop across the connector pins while the oven is operating at temperature Once a measurement is taken remove the plug from the connector pin and measure across the...
Page 14: ...nfirmed by spark module 12 to 13 micro amps on pin 4 of spark module 24 volts from pin 3 Brn 34A on spark module to center connector of Back up toggle switch 4a Back up toggle switch Off Circuit 1 24 volts to line terminal of control panel 24 volts from switch panel Blu 13 through door switch to motor contactor coil Motor contactor closes door switch closed motor starts Motor centrifugal switch cl...
Page 15: ... D of 24 pin terminal block 24 volts through door switch to terminal 1 on coil of motor contactor 24 volts to common connectors on Back up relay 12 volts to terminal 1 on microprocessor 12 volts to center connector 1 of Back up toggle switch 208 240 volts to center connector 2 of Back up toggle switch Reset circuit between power toggle switch and bottom of control panel closed see page 9 2A Back u...
Page 16: ... Motor contactor closes Motor starts 24 volts through motor contactor points from jumper on coil to terminal 1 on coil of heat contactor Temperature set on Back up Thermostat 24 volts from Back up Thermostat through Hi limit thermostat to terminal 2 on coil of heat contactor Heat contactor closes 208 240 volts to elements ...
Page 17: ...ch 4 M MANUAL PROGRAM 2 Manual Program Button 4 6 P Power Switch 4 Product Button 4 2 4 5 6 programming 3 6 programming code 3 programming codes 6 R Read Clear 4 READ CLEAR button 2 5 6 Read Clear Button 4 Recall time 7 S Shelf Button 4 2 6 Strapping Bars 8 T Temp Button 6 Temperature Recall Button 4 2 TIER 3 4 Tier Lamp 4 Tier lamps 3 Tier Light 4 ...