background image

20

Maintenance

Troubleshooting

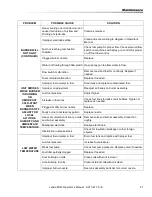
PROBLEM

POSSIBLE CAUSE

SOLUTION

LOW OPERATING 

PRESSURE

Faulty pressure gauge

Test with 2nd gauge. If bad, install new gauge.

Insufficient water supply

Use larger garden hose; clean water filter at inlet. 

Clean screen inside float tank.

Old, worn or incorrect nozzle

Match nozzle number to machine and/or replace with 

new nozzle.

Belt slippage

Tighten or replace; use correct belt.

Plumbing or hose leak

Check plumbing system for leaks. Retape leaks with 

teflon tape.

Faulty or mis-adjusted unloader valve

Adjust unloader for proper pressure. Install repair kit 

when needed. Test PSI with unloader removed, 

taking pressure directly off the pump.

Worn packing in pump

Install new packing kit.

Fouled or dirty inlet or discharge 

valves in pump

Clean inlet and discharge valves.

Worn inlet or discharge valves

Replace with valve kit.

Obstruction in spray nozzle

Remove obstruction.

Low power supply

Check voltage of building and compare with require

-

ments. Obtain a different power source.

Detergent metering valve left open 

sucking air, or faulty metering valve

Close and/or replace metering valve.

BURNER WILL 

NOT LIGHT

Little or no fuel

Fill tank with fuel.

Improper fuel or water in fuel

Drain fuel tank and fill with proper fuel.

Plugged fuel filter

Replace as needed.

Mis-adjusted burner air bands

Readjust air bands for clean burn.

Little or no fuel pressure from fuel 

pump

Increase fuel pressure to specifications and/or 

replace fuel pump.

Faulty burner transformer

Test transformer for proper arc between contacts. 

Replace as needed.

Disconnected or short in electrical 

wiring

All wire contacts should be clean and tight. No 

breaks in wire.

Burner motor thermal protector 

tripped

If tripped, check voltage, connections and exten

-

sions for cause. Check fuel pump shaft rotation for 

binding causing motor to overheat.

Flex-Coupling slipping on fuel pump 

shaft or burner motor shaft

Replace if needed.

ON-OFF switch defective

Check burner switch for continuity.

Landa PHW Operator’s Manual   8.917-417.0 - E

Summary of Contents for PHW

Page 1: ...t les parti es isol es des poig n e pisto lets et lance s RIES GO DE ASF IXIA Use el prod uc to en un area de venti laci n adec uada RISQ UE D AS PHY XIE Utilis er dans un endr oit bien a r RISK OF A...

Page 2: ...2 Landa PHW Operator s Manual 8 917 417 0 E Machine Data Label...

Page 3: ...nce 14 Maintenance And Service 14 Pump Lubrication 14 Fuel 14 Electrode Setting 14 Transformer Check 14 Fuel Control System 14 Fuel Pressure Adjustment 14 Wayne Oil Burner 15 Fuel Pressure Adjustment...

Page 4: ...ion They are listed in this general order Preventative Maintenance Maintenance And Service Pump Lubrication Fuel Burner Air Adjustment Cleaning of Coils Spray Nozzles Unloader Valves Winterizing Proce...

Page 5: ...he operator in the operator s native language by the purchaser owner making sure that the operator comprehends its contents Owner and or user must study and maintain for future reference the manufactu...

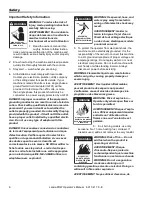
Page 6: ...fi NE JAMAIS utiliser un adaptateur avec ce produit WARNING Keep wand hose and water spray away from electric wiring or fatal electric shock may result AVERTISSEMENT Garder la lance le boyau et le jet...

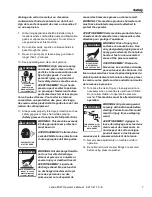
Page 7: ...nes ou des animaux car cela risquerait de causer des blessures graves ou m me la mort WARNING This machine produces hot water and must have insulated components attached to protect the operator AVERTI...

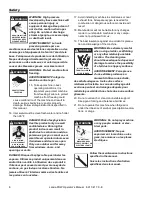
Page 8: ...utiliser l int rieur m me si les fen tres et les portes sont ouvertes 17 Avoid installing machines in small areas or near exhaust fans Adequate oxygen is needed for combustion or dangerous carbon mono...

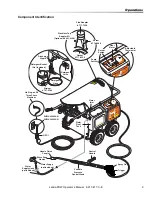
Page 9: ...t unit turn switc h on gr ip wan d se curel y and trigg er spra y gun 7 To hea t wate r turn burn er switc h on 8 To app ly dete rgen t see Ope rator s Man ual 9 To shut dow n mac hine turn burn er of...

Page 10: ...must be used refrain from using 90 bends If the pipe can not go straight up then use only 45 bends and go to the next larger size pipe The overall pipe length must not exceed 6 feet in length Air adju...

Page 11: ...e op en am e ch is pe rm it t sp ray ids ARNING AV ER TISS EM EN T RIE SG O DE EX PL OS IO N Us e el pro du cto en re as do nd e el fue go llam a se an pe rm itid os No roc ie liqu i do s in am ab les...

Page 12: ...ater Place detergent suction tube directly into cleaning solution and apply to surface at low pressure for best results limit your work area to sections approximately 6 feet square and always apply de...

Page 13: ...f frozen FREEZE DAMAGE IS NOT COVERED BY WARRANTY ATTENTION Toujours entreposer la laveuse pression dans un endroit o la temp rature ne sera pas inf rieure X C X F La pompe sur cette machine est susce...

Page 14: ...uel tank and replace fuel filter every 100 hours of opera tion Electrode Setting Ignition Circuit Periodically inspect wires spring contact and elec trodes for condition security and proper spacing Tr...

Page 15: ...et can impact fuel flow In more extreme tempera tures this local site adjustment may also require different fuel nozzles for fuel inlet temperatures that are at seasonal extremes higher or lower in lo...

Page 16: ...mage due to freezing is not covered by warranty Adhere to the following cold weather procedures whenever the washer must be stored or operated outdoors under freezing conditions During the winter mont...

Page 17: ...valve is installed next to the inlet side of the pump that will open in the event the water tempera ture exceeds 140 F Therefore while operating the machine do not leave the spray gun closed for an e...

Page 18: ...e more often under severe conditions Maintenance Schedule Replace Fuel Lines Annually Pump Oil 10W 40 Non Foaming Inspect Daily inspect the oil level Change After first 50 hours then every 500 hours o...

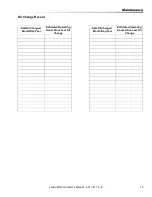
Page 19: ...Oil Change Record DateOilChanged Month Day Year Estimated Operating Hours Since Last Oil Change DateOilChanged Month Day Year Estimated Operating Hours Since Last Oil Change Landa PHW Operator s Manua...

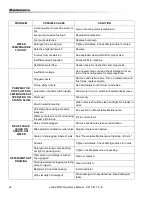
Page 20: ...supply Check voltage of building and compare with require ments Obtain a different power source Detergent metering valve left open sucking air or faulty metering valve Close and or replace metering va...

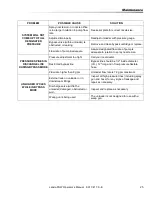
Page 21: ...in fuel Drain tank and replace contaminated fuel Improper air adjustment Readjust air bands on burner assembly Low fuel pressure Adjust higher Air leaks in fuel lines Check fuel lines for leaks or ai...

Page 22: ...itch tripped Allow motor to cool switch will automatically reset Motor wet Allow to dry Short in electrical wiring Wire contacts should be clean and tight No breaks in wires Coil liming up causing exc...

Page 23: ...Relief valve defective Replace valve Particle next to poppet Remove internal parts and clean BURNER STAYS ON WHEN SPRAY GUN IS IN OFF POSITION Fuel pump pressure too high Readjust fuel pressure Pressu...

Page 24: ...retainer worn Check and replace if necessary Cracked ceramics Check and replace if necessary OIL DRIPPING Oil seal worn Check and replace if necessary Cracked manifold Check and replace if necessary...

Page 25: ...URE SPIKES IN DISCHARGE LINE DURING BYPASS MODE Pressure adjustment too tight Call your local dealer Restricted bypass line Bypass line should be 1 2 inside diameter I D 12 long and of low pressure fl...

Page 26: ...S 8 917 417 0 Printed in U S A...

Reviews: