Lanberg © 2015-2021
18
EN
3.
The default form of connecting recorder with the application is scanning the QR
code (in the recorder software, it is stored under the name “cloud ID”, you can
find it in the system settings, then Network and IP).
NOTE: DEPENDING ON THE MONITOR RESOLUTION AND IMAGE QUALITY,
YOU MAY EXPERIENCE ISSUES WITH QR CODE SCANNING. IN SUCH A SITU-
ATION, PLEASE SELECT THE “OTHER WAYS OF ADDING” OPTION.
4.
Choose the “set” option, the
application also allows to
connect single cameras (not
available in the offer).
6.
The device will appear on
the main screen where you
can see a quick preview of
the cameras. By selecting
a specific device you can
access a detailed preview.
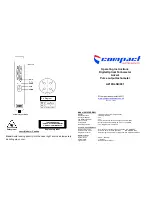
7.
a.
Allows you to review your saved recordings.
b.
Allows you to determine how many came-
ras should be displayed simultaneously.
c.
With this button you can decide on the
quality of the camera image. This function
applies only to the preview of cameras in the
application, it does not affect the camera re-
solution settings in the NVR itself.
The following functions always apply to
the currently selected camera (marked
with a blue border).
d.
Recording Mode (Infrared, Full Color,
Intelligent).
e.
Intercom function (The cameras included
in the set do not support this function).
f.
PTZ management (The cameras in the
set do not support this function).
g.
Allows you to save the current image as
a photo.
h.
Enable or disable audio from cameras.
i.
Make a recording directly to the pho-
ne’s memory.
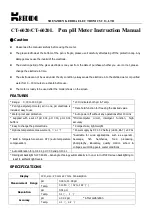
5.
Enter the recorder data manually:
Cloud ID
– you can find it in system
settings, then Network and IP.
Device name
– here you can give the
device a name of your choice.
User name
– enter the login used to log in
to the recorder (default is “admin”).
Password
– enter the password used to log
in. By default this field is empty.
a
e
g
c
b
d
i
h
f