Page
7
of
23
Cha
p
ter:
4
Qu
ick
Sta
rt
Se
ctio
n
7
a.
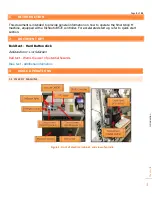
The tool changer needs
6-6.5bar or 87psi-95psi.
b.
Use the pressure regulator (figure 2) on the back of the machine to adjust air pressure.
4.
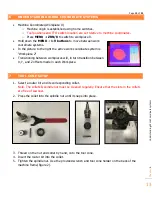
Set up a tool cone with the router bit you intend to use (Section 7).
a.
Use the manual tool release button located on the tool head to load the tool cone
into the spindle.
b.
It is important that the spindle releases and engages the tool cone repeatedly.
This quick check will prevent an error condition.
Figure 3. Tool cone with locking nut, collet, and router bit
5.
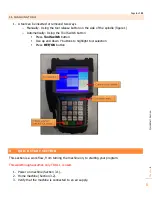
Transfer your g-code program onto a USB and transfer into the controller's internal memory.
When running a program directly from a USB, memory transfer is less reliable.
It is recommended to store the program in the controller's internal memory.
a.
MENU
-->
Menu Function User Interface -->
REF/OK
b.
Machine Configuration -->
REF/OK
c.
Scroll down to
Operate File, then Press
REF/OK
d.
Select
Copy File, press
REF/OK
e.
Select the
UDisk File you want to copy press
REF/OK
f.
Press
STOP/CANCEL
a few times to return to the controller home screen.
6.
Load Program into viewer
a.
Press
FILE
-->
Internal File -->
REF/OK
--> select your program -->
REF/OK
7.
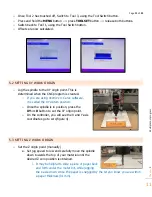
Mount workpiece to the table top.
a.
This can be done with the supplied table clamps (Figure 3).
b.
There exist a multitude of ways to secure your workpiece.
Find what method works best for your application before proceeding.
c.
Always consider clearance between the router bit and table clamps.


