background image

La Crosse Technology, Ltd.  

Page 9 


12-HOUR TIME FORMAT 


Time display: 12-hour or 24-hour format.  


Default is 12-hour time. 


Use the Program Menu to switch time formats. 


POWER REQUIREMENTS 


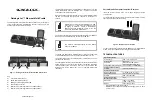
3-AAA Alkaline batteries power the Professional weather station. 


MANUALLY SET TIME: PROGRAM MENU  


The TIME SET button will move through the program menu. 


The 

/

 buttons will adjust values. 


Press the LIGHT button at any time to exit. 


Program Menu:  


Beep On/Off  


Atomic time signal (On/Off)  


Time Zone  


DST (Daylight Saving Time On/Off)  


12/24 Hour time format 


Hour  


Minutes  


Year  


Month  


Date 


Mph/Kph 


Fahrenheit/Celsius 


The TIME SET button will move through the program menu. To change a value use 

the 

/

 buttons. 

1.


Hold the TIME SET button five seconds so that BEEP and the word ON will 

flash.  Press and release the 

/

 buttons to turn this to OFF to avoid beep 

sounds when pressing a button. Confirm with the TIME SET button and move to 

atomic time (WWVB ON/OFF). 

2.


WWVB and the word ON will flash.  Press and release the 

/

 buttons to turn 

this to OFF if you do not wish WWVB time reception. Confirm with the TIME SET 

button and move to time zone. 

Note: If OFF is selected, you will skip #3 & #4 and move next to 12/24 hour 

time format. 

3.


EST will flash. Press and release the 

/

 buttons to select a different Time 

Zone: AST=Atlantic, EST= Eastern, CST= Central, MST= Mountain, PST= 

Pacific, AKT= Alaska, HAT=Hawaiian time zone. Confirm with the TIME SET 

button and move to DST. 

4.


DST will flash and the word ON. Press and release the 

/

 buttons to turn this 

to OFF if you do not observe DST. Confirm with the TIME SET button and move 

to the 12/24 hour time. 

5.


12HR will flash. Press and release the 

/

 buttons to select the correct hour. 

Confirm with the TIME SET button and move to the hour 

Summary of Contents for 327-1414W

Page 1: ...Windspeed 3 Inaccurate outdoor temperature humidity 4 Outdoor Readings are stuck or OFL 4 Intermittent Sensor Readings 4 sensor drains batteries quickly 4 Humidity shows OFL but temperature works 5 F...

Page 2: ...ment A minimum voltage of 1 48V for each battery is necessary for proper performance WEATHER STATION FACTORY RESTART The factory reset will return the Professional weather station to its default setti...

Page 3: ...he DOWN arrow button to view channels 1 2 or 3 on the wind station when multiple sensors are used Note If only one sensor is connected the other channels will show dashes for temperature and humidity...

Page 4: ...ease be patience these stations can reconnect on after many hours out RF radio frequency communication is not always 100 on Certain temporary conditions can cause it to go out for a time e g 100 humid...

Page 5: ...LS LIKE HEAT INDEX DEW POINT Press the HEAT DEW button repeatedly to toggle between o Feels Like temperature channel 1 only o Heat Index outdoor o Dew Point outdoor Note Feels Like Temperature is the...

Page 6: ...d flow to the cups Check mounting In most cases the wind sensor needs to be 6 feet or more above the highest point on the roof in order to clear nearby obstructions and read accurately A 50 foot clear...

Page 7: ...ert set mode 2 The high wind speed alert value will blink in set mode 3 Press the ARROW buttons to adjust the values 4 Press the ALERTS button to confirm and move to the next alert The alert setting o...

Page 8: ...r electronics in the home Resistance Obstacles such as walls windows stucco concrete and large metal objects can reduce the range When considering the distance between the sensor and the Professional...

Page 9: ...ss and release the buttons to turn this to OFF to avoid beep sounds when pressing a button Confirm with the TIME SET button and move to atomic time WWVB ON OFF 2 WWVB and the word ON will flash Press...

Page 10: ...the Atomic Time Signal WWVB from Fort Collins Colorado The station will search for WWVB signal up to 5 minutes then return to receiving the outdoor sensor The first search is 2 hours after startup Th...

Page 11: ...correctly to the Professional weather station and the outlet 2 Remove the batteries 3 Press the LIGHT button If the backlight comes on and the display is active your AC cord works 4 Wait 15 seconds to...

Page 12: ...reased accuracy The longer the Professional weather station operates in one location the more accurate the forecast icons will be Install fresh alkaline batteries with correct polarity WEATHER STATION...

Reviews: