


LaCinema Mini HD Bridge
Setting Up: Transferring Files
User Manual
page 19
3.1.2. Option B: Install Internal Hard Disk
When installing an internal hard drive, select a 2.5” SATA hard disk
that turns at 5400 RPM. Check
www.lacie.com
for a list of compat-
ible drives. LaCie cannot guarantee that all drives will be compatible
with the LaCinema Mini HD Bridge.
The LaCinema Mini HD Bridge is compatible with three disk formats:
HFS+ (non-journaled)
,
NTFS
, and
FAT32
. Refer to section
8. Refor-
matting the LaCinema Mini HD Bridge
for formatting information.
In addition to installing an internal hard disk, you can also connect
an external USB hard drive as described in
3.1.1. Option A: Connect
External Hard Drive
.
CAUTION:
If you are replacing a drive, make certain that it has
cooled before touching it.
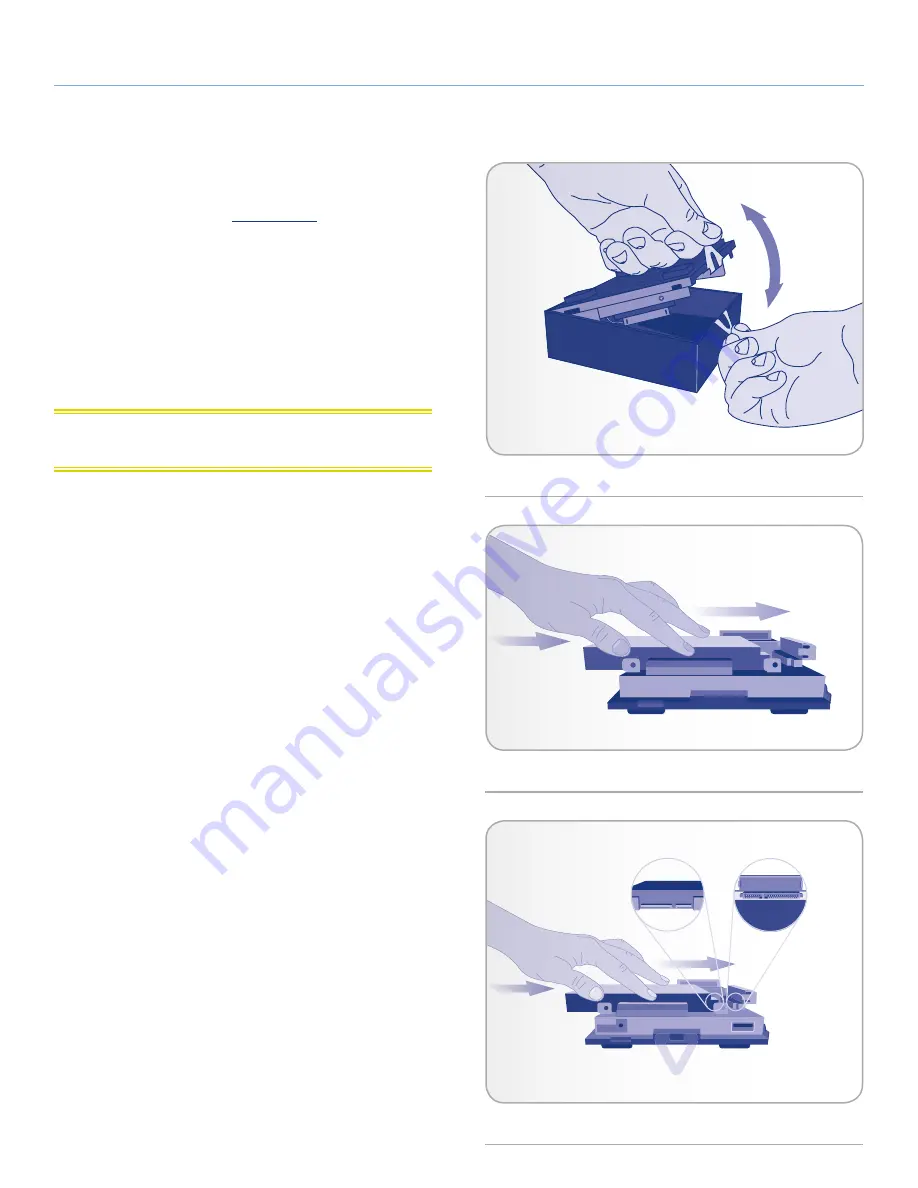
STEP 1: Install Drive
1. Make certain the power and USB 2.0 cables are disconnected
from the LaCinema Mini HD Bridge casing.
2. Turn the casing over so the rubber feet are pointing up. Note the
two plastic bands for prying the bottom plate from the top shell.
3. Open the casing by taking one plastic band in each hand, be-
tween the thumb and index finger, and pull gently until the bot-
tom plate and the top shell have come apart (
Fig. 18
).
4. Slide the drive, label facing up, onto the bottom plate rails (
Fig.
19
) until the drive’s SATA connector plugs into the LaCinema
Mini HD Bridge’s internal SATA port (
Fig. 20
).
continued on the next page >>
Fig. 18
Fig. 19
Fig. 20


