4. Using Your LaCie Drive
page 23
LaCie d2 Hard Drive Serial ATA
User’s Manual
4.2.2. Windows NT 4.0
Caution!
Following these steps will erase anything that is on the hard drive. Therefore, if you have information
that you want to protect or continue to use, backup this information before performing these steps.
Tech Note:
Windows NT 4.0 does not support the hot-plug functionality of the Serial ATA specification. Therefore
you will need to restart your computer with the LaCie d2 Hard Drive Serial ATA connected and powered on in
order for it to mount properly.
1) From the
Start
menu, go to
Programs
and then select
Administrative Tools (Common)
and select
Disk Administrator
.
2) Once
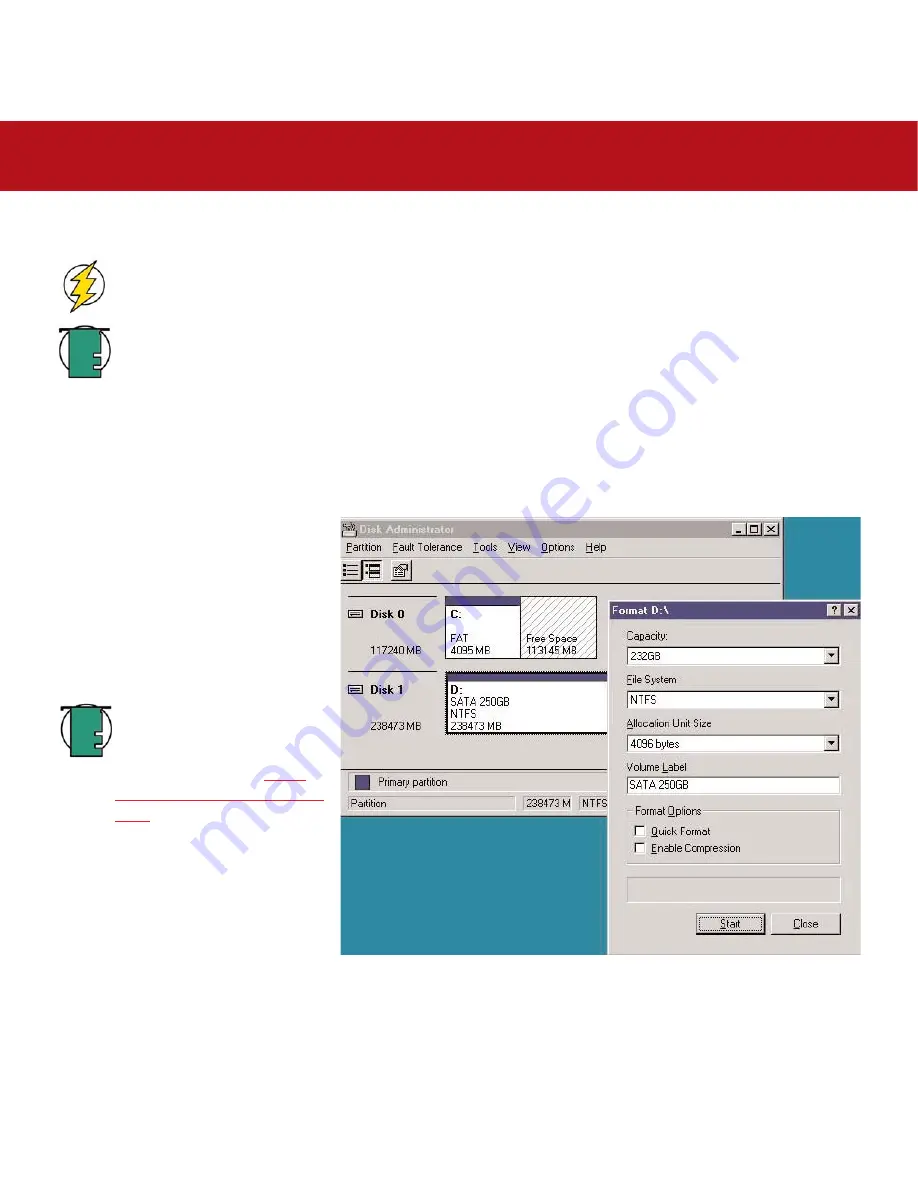
Disk Administrator
has been launched, select your LaCie hard drive from the list of disks.
3) Right-click the listed LaCie disk and select
Format...
from the list.
4) From this screen you will be able to
modify the disk’s capacity, file system,
allocation unit size and volume label.
LaCie recommends that you leave the these
at their default setting unless you have a
specific reason for altering them. Click
Start
to begin formatting the drive.
Tech Note:
For a more detailed
discussion on the various file
system formats and partitioning,
please refer to section
5.1.2.
File System Formats – Windows
Users
.
5) Once the formatting has been
completed, close
Disk Administrator
and
your new drive will be ready for use.


