3. Installing Your LaCie Drive
page 14
LaCie d2 Hard Drive Serial ATA
User’s Manual
3.2. Connecting The Drive To Your Computer
3.2.1. Mac Users
SA
TA
1
3
2
4
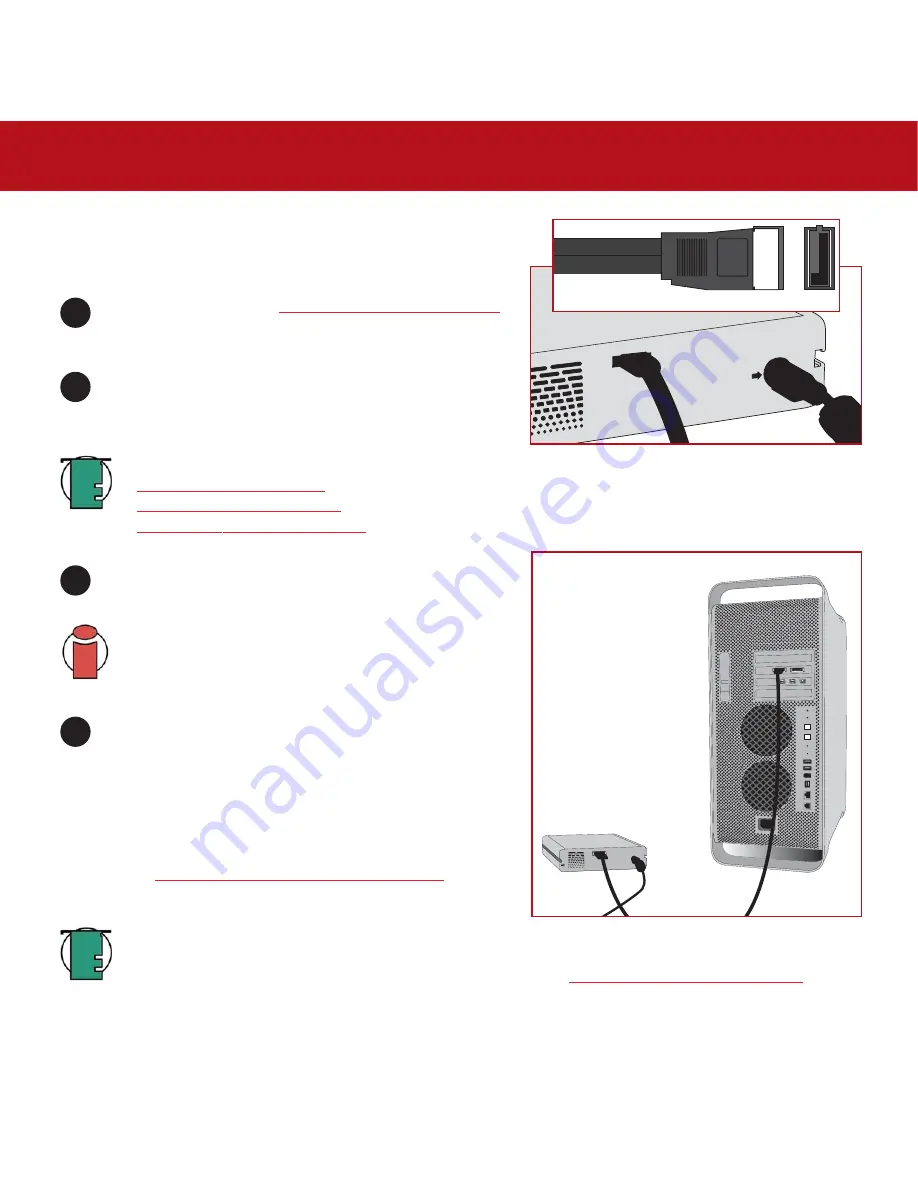
Serial ATA Cable
After following the steps in
3.1. Connecting The Power Supply
,
power on the drive by pressing the On/Off button on the front
of the drive.
Connect the Serial ATA cable into the Serial ATA port on the
back of the LaCie d2 Hard Drive.
Connect the other end of the Serial ATA cable into an available
Serial ATA port* on your computer.
Important Info:
In order to have external Serial ATA
functionality, your computer must be equipped with a third-
party or built-in Serial ATA PCI card with external connectors,
such as the LaCie Serial ATA PCI Card.
Tech Note:
For more information about Serial ATA, please see sections:
•
2.4. Cables And Connectors
•
5.3. Optimizing Data Transfers
•
7. Serial ATA Questions & Answers
Your drive should appear on your desktop. It may take a few
seconds for your computer to recognize the drive and for it to
appear on the desktop.
Your LaCie d2 Hard Drive will now be ready for use. You can
then use the formatting and partitioning capabilities in the
Apple Disk Utility to configure your hard drive system. Please
refer to
4.1. Formatting Your LaCie Drive –Mac Users
for more
information.
Tech Note:
If your drive does not appear on the desktop, you may need to restart your computer, with your
LaCie drive still turned on, to mount the drive. Serial ATA is a new technology, and you must be running 10.3.x
or later to have hot-plug support (please see the Tech Note in section
2.1. Minimum System Requirements
for
more information).


