4. Setting Up Your LaCie Biggest F800
page 29
LaCie Biggest F800
User’s Manual
4.3.2. Hi-Speed USB 2.0
1) Follow steps
4.1. Setting The RAID Level
and
4.2. Creating An Array
to establish
a RAID array.
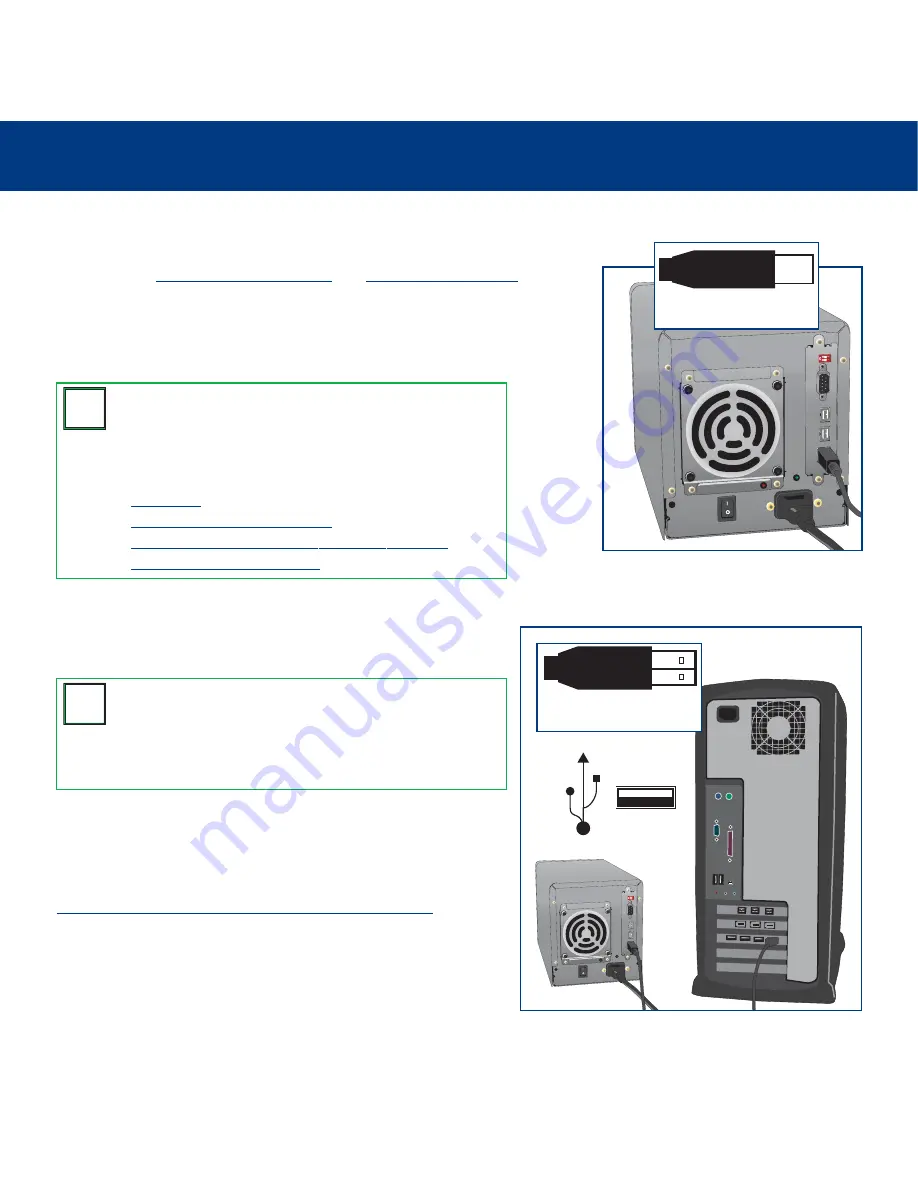
2) Connect the Hi-Speed USB 2.0 cable into the Hi-Speed USB 2.0 port on the back
of the LaCie Biggest F800.
3) Connect the other end of the Hi-Speed USB 2.0 cable into an
available USB port* on your computer.
It will take a few seconds for your computer to recognize the drive and
for it to appear on the desktop or in
My Computer
.
Your LaCie Biggest F800 will now need to be formatted. Go to section
4.5. Formatting And Partitioning Your LaCie Biggest F800
, for more
information.
Tech Note:
To achieve Hi-Speed USB 2.0 transfer rates, you
have to be connected to a Hi-Speed USB 2.0 port on your
computer. Otherwise, you will be limited to USB 1.1 data
transfer rates. For more information about USB, please see
sections:
•
2.4.2. USB
•
7.3. Optimizing Data Transfers
•
7.3.2. Hi-Speed USB 2.0 Ports And Performance
•
9. USB Questions & Answers
T
T
N
N
Tech Note:
Windows Users!
After the first connection of a
USB-based peripheral, Windows detects the drive, and will
install it automatically as a new peripheral, even if you have
previously installed it on another port on the same USB bus.
Let Windows install the USB drivers of your LaCie drive.
T
T
N
N
Device End
Computer End


