background image

page 4 

Manual MK2 V 1_05       


Contents


F

IRST 

S

TEPS


Read enclosed safety instructions carefully. 

SPECIAL MESSAGE SECTION

 Page 21 

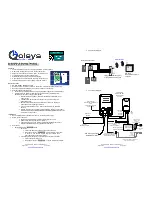
Place the instrument in a stable position. The surface has to be as even as possible to ensure a stable 
position for all legs to touch the ground. We recommend using a high quality keyboard stand. Find a 
position where all legs or the bottom of the keyboard rest in a secure stable position. Incorrect 
positioning can result in damage of your keyboard as well as production of unwanted secondary 
noises. Tilted positions are possible but reduce the weightage of the keys and change the mechanical 
touch when playing. 


Connect the

 FLK

 power supply  

We highly recommend using only the original 

FLK 

power supply. Damages caused by using other 

forms of power supply are not included in your warranty.  


Midi connection 

 
If required plug in pedals.  

The MK2 is preprogramed to work with the separately purchasable FLK double pedal, but works just 
fine with any conventional damper pedal. Pedal contact type (Open / Close) is automatically detected 
when your keyboard is turned on.  

(For more detailed information see page 13: pedal and page 17: technical details) 


Push 

ON

 to turn your 

MK2 

keyboard on 

Key 1 lights up and the display shows  





Your 

MK2 

receives data on all channels (Omni Mode ON).  

Panic Reset

 flashes when keys are pressed or controllers are used (for further details go to page 12: 

MIDI activity) 


To turn off your keyboard hold the 

ON

 button down till the display changes from 



to



For detailed factory settings refer to technical details on page 

.  

The delay in switching off prevents accidental turn off while in use.  

19 

Summary of Contents for MK2 Studio 88

Page 1: ...l musicians and artists but our products are also suitable for students especially as they give you the freedom to practice anytime anywhere Many thoughts were spent to make operating the keyboard as...

Page 2: ...t 6 Keys 1 2 3 4 program selection 8 Aftertouch sensibility adjustable with CONTR 9 SECONDARY PIANO KEY FUNCTIONS 10 Activate Secondary Piano Key Function Mode 10 Reset to factory settings 10 User Rec...

Page 3: ...5 MIDI Channel Selection 1 16 15 Display Brightness 15 Examples secondary key functions 16 TECHNICAL DETAILS 17 Pedals 17 Sympathetic resonance 18 USB connection FLK driver 18 Power Supply 18 Factory...

Page 4: ...LK power supply Damages caused by using other forms of power supply are not included in your warranty Midi connection If required plug in pedals The MK2 is preprogramed to work with the separately pur...

Page 5: ...key LED lights up if in use bank selection 1 4 5 8 9 12 13 16 Contr user defined controller min max 0 127 Dynamics Knob with detent to regulate key dynamics Velocity Curve Edit 2 knobs with detent to...

Page 6: ...n your dynamic play will be allocated correspondent midi values from 1 to 127 Read more on page 12 Piano Modus on off For detailed technical information go to page 17 VELOCITY CURVE EDIT These two con...

Page 7: ...the controller in question doesn t light up If you twist a controller the recalled settings are changed and the LEDs as well as the display behave again as mentioned above The stored settings stay in...

Page 8: ...on program 9 is active display push key 2 green LED on program 10 is active display KEY PANIC RESET The LED flashes green twice to confirm input the display shows Sends to all connected MIDI devices...

Page 9: ...ent position of the dynamics knob If you want to adjust the aftertouch sensitivity manually whilst playing assign the controller number 0 to CONTR using secondary function keys In this state the displ...

Page 10: ...ey function input is confirmed with a brief acoustic signal Black keys selection keys select the setting you want to change white keys input keys allow you to choose the desired parameter of the selec...

Page 11: ...nfigurations except dynamics velocity curve edit and pedal settings USER STORE can be recalled whilst playing by pushing Mode and Panic Reset for one second The last saved settings can be recalled Sto...

Page 12: ...ey function mode with the key Mode PIANO MODE Push Mode and ON Display shows please refer to note on Sympathetic Resonance page Push and hold the black key Piano Mode Change settings by using the whit...

Page 13: ...se is automatically detected when your keyboard is turned on It can be changed with Pedal Invers f 4 see page 15 For more details see technical details page 17 CONTROLLER SETTINGS PEDALS EXPR KNOB MOD...

Page 14: ...mber 1 Exit secondary piano key function mode with the key Mode Push and hold the correspondent black key Change settings by using the white keys AFTERTOUCH Push Mode and ON Display shows The aftertou...

Page 15: ...his key you are able to calibrate your pedals More details see page Pedals MIDI CHANNEL SELECTION 1 16 Push Mode and ON Display shows Channel Push and hold the black key Midi Ch b4 and use the white n...

Page 16: ...white key for 0 f2 If you press a key you will hear an acoustic signal After releasing the key Knob d 3 you will hear an acoustic confirmation ascending melody Display shows following with To assign a...

Page 17: ...as or Using secondary piano key function mode every pedal can be inverted To support pedals from other manufacturers you are able to calibrate the internal parameters to use the whole range of your pe...

Page 18: ...he longest travel range within a calibration session is stored Calibrating the pedal again overrides previous stored values Almost any conventional pedal can be used with your FLK It may be necessary...

Page 19: ...per switch On 64 yes Pedal mid sostenuto switch On 66 yes Pedal left soft pedal switch On 67 yes Expression Ped continuous On 11 yes Knob Contr continuous On 91 yes Mod Wheel continuous On 1 yes After...

Page 20: ...stenuto 67 O O Soft Pedal 91 O O Reverb 0 127 O O Customized Controller 3 Program Change 2 True O 0 15 O 0 127 0 15 16 0 17 1 System Exclusive X X Common Song Position Song Select Tune X X X X X X Sys...

Page 21: ...include but are not limited to the following Power supply Do not place the power cord near heat sources such as heaters or radiators and do not excessively bend or otherwise damage the cord place hea...

Page 22: ...e instrument to set the desired listening level This product in combination with sound software an amplifier and headphones or speaker s may be capable of producing sound levels that could cause perma...

Page 23: ...page 23 owner s manual MK2 V1_04...

Reviews: