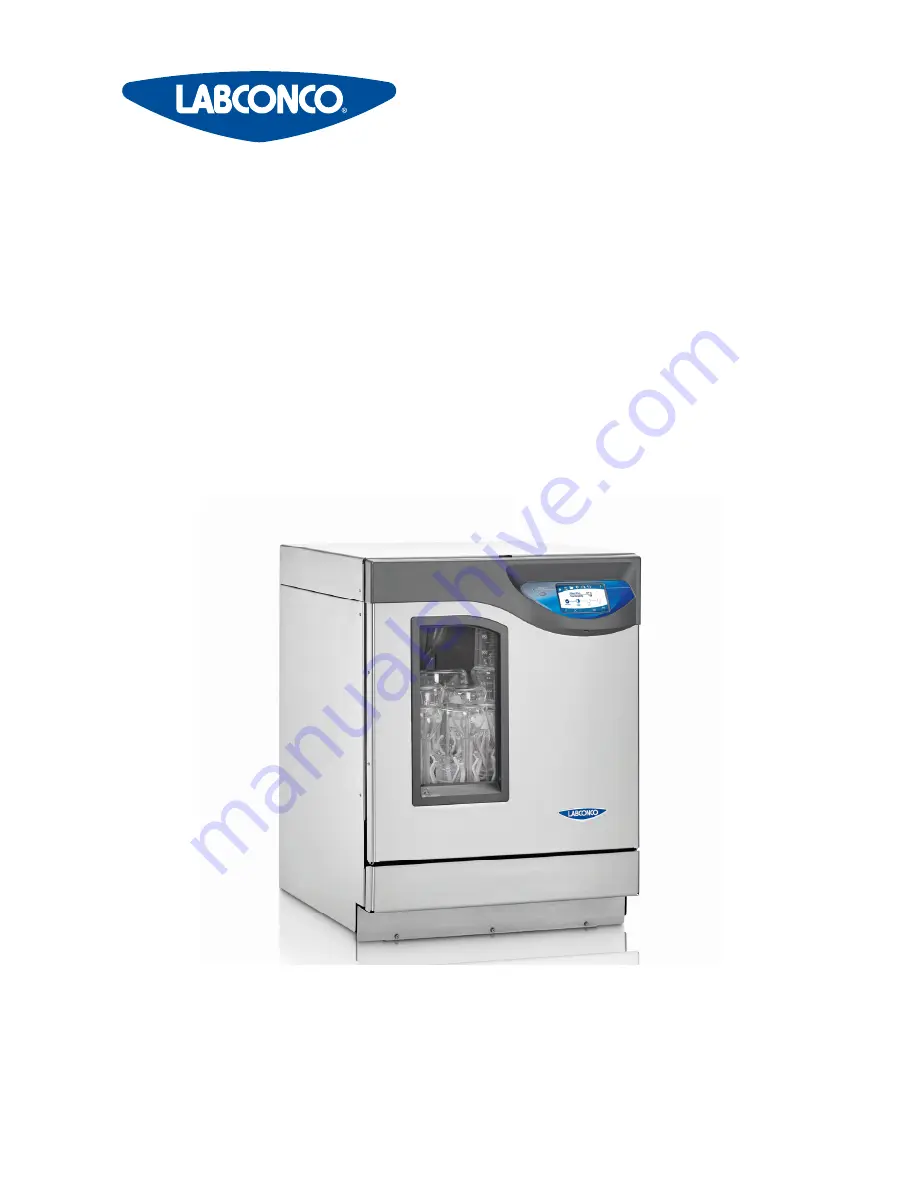
background image


SteamScrubber

®

 & FlaskScrubber

®


Glassware Washers 


Register this product 

LABCONCO CORPORATION 

8811 Prospect Avenue 

Kansas City, MO 64132 

(800) 821-5525  I  +1 (816) 333-8811 

Please read user’s manual 

before operating equipment 

Original Instructions


User’s Manual

Summary of Contents for FlaskScrubber 4110010 Series

Page 1: ...er Glassware Washers Register this product LABCONCO CORPORATION 8811 Prospect Avenue Kansas City MO 64132 800 821 5525 I 1 816 333 8811 Please read user s manual before operating equipment Original In...

Page 2: ...2 SteamScrubber Glassware Washers 2021 Present 4010010xx 4020010xx 4011010xx 4021010xx FlaskScrubber Glassware Washers 2021 Present 4110010xx 4120010xx 4111010xx 4121010xx...

Page 3: ...all defective parts to restore the unit to operation Repairs may be completed by 3rd party service agents approved by Labconco Corporation Labconco Corporation reserves the rights to limit this warran...

Page 4: ...11 Electrical Requirements 11 Hot Water Requirements 12 Purified Water Requirements 12 Cold Water Requirements 13 Drain Requirements 14 3 SAFETY PRECAUTIONS 15 Typographical Conventions 15 General Sa...

Page 5: ...ountertop 33 Testing Your Washer 33 Running Diagnostics 33 Verification 34 High Elevation Installations 35 5 PERFORMANCE FEATURES 36 FlaskScrubber 36 SteamScrubber 37 6 CLEANWORKS OPERATING SYSTEM 38...

Page 6: ...5 Create a new program 46 Copy and Edit a Program 47 Delete a Program 47 Sorting Programs 47 Log Data 48 View Data File 49 Chart Data File 50 Export Data File 51 Delete Data File 51 Settings 52 Langua...

Page 7: ...SteamScrubber Racks 72 Removing or Adjusting the Upper Rack 73 Remove the upper rack 73 Replace the upper rack 73 Raise the upper rack height 73 Lower the upper rack height 73 FlaskScrubber Spindle R...

Page 8: ...the Air Gap in Drain 83 Maintaining the Water Fill Valve 83 Cleaning the Sump Filter Screen 84 Recommended Maintenance Schedule 86 9 ACCESSORIES CONSUMABLES 87 Rack Inserts for Labware 87 Racks 89 Ra...

Page 9: ...B DIMENSIONS 103 Undercounter Exterior Dimensions 103 Freestanding Exterior Dimensions 103 SteamScrubber Interior Dimensions 104 FlaskScrubber Interior Dimensions 104 APPENDIX C SPECIFICATIONS 105 Pr...

Page 10: ...ol such as the INFO symbol to the left pay close attention to the information provided Before installing or operating this product you must read Section 3 Safety Precautions Contents Included The foll...

Page 11: ...her is to be mounted undercounter model you must ensure the undercounter opening is the proper size to accommodate the washer The location should provide adequate clearance for the door to lay down wi...

Page 12: ...ctivate powdered detergents and raise the glassware temperature to achieve fast and complete drying Hotter water will typically produce better washing results Water pressure must be between 20 120 psi...

Page 13: ...ailable for each rinse If all the purified water is not available at the start of a wash cycle but instead is produced concurrently with the wash cycle the production rate must permit at least 0 9 gal...

Page 14: ...se clamp A band hose clamp is provided with the washer Tubing or pipe 5 8 1 6 cm ID or larger should be provided for the building drain The use of an air gap is strongly recommended to prevent siphoni...

Page 15: ...renvoie une mise en garde d taill e dans ce manuel Typographical Conventions DANGER An imminently hazardous situation which if not avoided will result in death or serious injury DANGER Situation dang...

Page 16: ...r es voire graves PINCH POINT Areas or components that can pinch or cut Take care not to touch these defined areas POINT DE PINCEMENT Zones ou composants pr sentant un risque de pincement ou de coupur...

Page 17: ...nsitive and will suffer damage if touched Take care not to touch these defined components or areas Failure to avoid these areas will result in damage to the product NE PAS TOUCHER Les composants ou le...

Page 18: ...iter les pi ces mobiles peut entra ner des blessures graves la mort ou des dommages mat riels Never misuse this product Never disable override or otherwise bypass safety guards panels switches sensors...

Page 19: ...inimum this includes eye protection breathing protection skin protection Do not wear loose fitting clothes that can catch on internal surfaces N endomm Portez tous les quipements de protection du pers...

Page 20: ...r cleaning agents contact Labconco s Product Service Department En cas de doute sur la compatibilit des agents de d contamination ou de nettoyage contactez le service apr s vente des produits de Labco...

Page 21: ...cette laveuse Il y a risqu incendie ou explosion si la verrerie n est pas vid e ni rinc e LIFTING HAZARD Do not lift or move this equipment without assistance DANGER DE LEVAGE Ne pas soulever ou d pla...

Page 22: ...ollowing tools are required to unpack and install the equipment Box knife 9 16 wrench Flat blade screwdriver Phillips screwdriver 5 16 nut driver Carpenter level The following safety precautions must...

Page 23: ...in transit you must file a claim directly with the freight carrier Labconco Corporation and its dealers are not responsible for shipping damages Do not discard the carton or packing material for the...

Page 24: ...instructions After the washer components are verified shut the door and move the washer near the installation site Follow the steps listed below to remove the shipping skid from your washer Retain the...

Page 25: ...mate desired finished height A final adjustment may be required after the washer is placed in its final position Additional accessories including Automatic Detergent Dispense Rinse Aid Dispense or Col...

Page 26: ...access the valve The washer pure water inlet valve is equipped with a male 11 GHT fitting Connect the pure water supply coming from the customer supplied shut off valve using an appliance style hose...

Page 27: ...ify the carboy is vented to permit proper flow from the carboy to the washer Verify that all of the connections on the purified water system are air tight Drain Connection Before continuing with this...

Page 28: ...VATED ABOVE THE WATER LEVEL OF THE SINK P TRAP DISHWASHER BRANCH TAILPIECE FOR 5 8 HOSE HOSE CLAMP DO NOT REMOVE DRAIN HOSE FROM HIGH LOOP Figure 4 5 AIR GAP P TRAP DISHWASHER BRANCH TAILPIECE HOSE CL...

Page 29: ...uit for the 6 0kW 3 phase units require at least 10 AWG 3 wire grounded cable and must be connected to a dedicated service with 30 amp circuit breakers or fuses If converting the 230 volt 6 0kW 3 phas...

Page 30: ...am for the voltage of the washer being installed Reference Fig 4 7 Connect the ground wire from the supply cable to the 20 ground stud on the electrical box using a lug or ring terminal ROUTE WIRING T...

Page 31: ...igure 4 7 120 208 230v 1 PHASE SERVICE CONNECT TO WIRE NUTS SERVICE GROUND BOND SERVICE L2 SERVICE L1 208 230v 3 PHASE SERVICE CONNECT DIRECTLY TO TERMIAL BLOCK SERVICE GROUND BOND SERVICE PHASE 1 1 2...

Page 32: ...tions are not kinked or pinched Once in place verify the unit is level in both directions The final height adjustment can be made at this time Undercounter models must then be attached to the counter...

Page 33: ...through the mounting tabs at the top of the tank then into the bottom of the counter top to stabilize the unit as shown in the Fig 4 8 Once the washer is in a secure position the toe kick panels can b...

Page 34: ...ed by selecting Fill All The Way again and confirming Once the tank is full of water make sure the door is closed select and confirm Wash Pump The wash pump should spin up for approximately 10 seconds...

Page 35: ...of the glassware washer High Elevation Installations If the washer is installed at an elevation above 2000 meters 6561 feet the maximum programmable temperature set point MUST be changed from 93o C to...

Page 36: ...unter installation or with stainless steel panels for freestanding applications Both units come standard with forced air drying and pure water pump for drawing pure water from a non pressurized water...

Page 37: ...d lower standard open racks that accommodate a wide variety of baskets and inserts The upper rack includes a third wash arm for increased coverage The optional spindle racks can be used to inject wate...

Page 38: ...If the glassware washer is powered and not in operation pressing this button will unlatch the door Pressing this button during a wash cycle will prompt for user confirmation to pause the cycle and th...

Page 39: ...l operation and system monitoring can be done from the Home Screen The menu screen tabs are displayed across the top of each screen as shown on the Home Screen in Fig 6 2 You can move between menu scr...

Page 40: ...e Program Progress Indicator will display each segment of the program along with the maximum programed temperature of each segment The estimated run time will display just beneath the program name Pri...

Page 41: ...Program Progress Indicator graphically displays the progress of each segment of the program as the washer progresses through the cycle Once a segment is complete a blue check mark is shown If a non fa...

Page 42: ...ash cycle close the door and touch the Start Program Icon press OK to confirm The washer will resume the cycle once the internal temperature stabilizes When the cycle resumes the estimated time remain...

Page 43: ...rogram Screen To edit copy or delete a program first touch the desired program to highlight it In Fig 6 4 the program Extreme is highlighted To create a new program touch New Fig 6 5 illustrates the u...

Page 44: ...0 Hot or Pure D Cup 0 40 ml Steam 0 20 Wash 1 0 40 25 93 77 200 Hot or Pure D Cup 0 40 ml Wash 2 0 40 25 93 77 200 Hot or Pure D Cup 0 40 ml Rinse 1 8 0 40 25 93 77 200 Hot or Pure 6ml 0 40 ml Dry 0 2...

Page 45: ...d after the final Rinse segment After selecting the segment to add the Segment Wizard will prompt you to enter each required parameter To delete a segment from the program touch the segment then touch...

Page 46: ...ter the final Wash segment or if one or more Rinse segments already exist will be placed after the final Rinse segment After selecting the segment to add the Segment Wizard will prompt you to enter ea...

Page 47: ...automatically be ordered correctly for example a new Rinse segment will be placed after the final Wash segment or if one or more Rinse segments already exist will be placed after the final Rinse segme...

Page 48: ...OG_YYYY MM DD_XX where YYYY Year MM Month DD Day and XX 01 to 99 for the first through 99th log of that specific day The data log default rate is 10 seconds The default data rate can be changed in the...

Page 49: ...file 6 Select Top to snap to the top of the log file 7 Select Most Recent First to display the newest data at the top of the log file 8 Select the Customize icon at the bottom right corner of the scr...

Page 50: ...r swiping side to side 5 If your washer is equipped with a conductivity sensor to show or hide data on the chart touch the drop down at the bottom of the screen and select the data to display The char...

Page 51: ...Log Screen highlight the Log to delete by touching the Log name 2 Touching and holding a file name will allow you to select multiple files 3 Touch Delete After deletion a pop up will confirm number of...

Page 52: ...52 Settings The Settings Screen allows the user to set or modify the systems settings Language Choose from five languages English Spanish French German Italian Figure 6 13 Figure 6 14...

Page 53: ...Settings Screen touch the Security Icon then enter the PIN default is 1234 to gain access Select the areas to be secured See Fig 6 15 To change the PIN touch Set Code enter new PIN two times then touc...

Page 54: ...e calibration offset touch Offset field of the desired sensor A pop up will display which allows an offset value to be adjusted for the sensor 2 Using a known standard as reference change the offset t...

Page 55: ...desired value Reference Fig 6 17 A pop up will display which allows the maximum set point to be set 2 The pop up provides two choices 88o C or 93o C 3 If the washer is installed at an elevation above...

Page 56: ...Auto Update the following settings need to be entered Time Zone Enter the Greenwich Mean Time GMT offset value for your location integer value between 12 12 NTP server Enter the web address URL of th...

Page 57: ...will not be correct for your e mail account set up for fake e mail account Wash123 gmail com o smtp gmail com o Wash123 o cat ndmouse457 o 465 o Enable 3 From the Alerts Screen touch the Settings ico...

Page 58: ...Alerts next to the email address A pop up displays the alert options o Program Complete o Status Every 15 min 30 min 1 hour 2 hour o All Alerts o Power Fail 2 Select the desired alerts Only one Status...

Page 59: ...ween ON OFF with enable or disable audible beeps when the screen is touched Screen Timeout Function If enabled the screen will go to sleep low power mode when no screen touches have been detected for...

Page 60: ...measure for various sensors Touch the desired drop down field and make selection o Temperature Select the desired units of measure C or F o Length Depth Select the desired units of measure millimeter...

Page 61: ...rence Fig 6 22 From the Settings Screen touch the Maintenance Icon to view the Lifetime hours of the wash pump and dry blower Touch the Clean Sump Screen hours to modify the time interval for maintena...

Page 62: ...the toggle next to DHCP Enabled to change between enable disable When enabled the remaining fields will be grayed out as these will be assigned by the facility s network If the field next to IP Addre...

Page 63: ...ge the auto detergent or rinse aid abbreviation touch the respective name field in the Abbr column Modify the abbreviation as desired 2 character maximum Touch OK The auto detergent and rinse rid abbr...

Page 64: ...and modify the rate among the intervals available 10sec 30sec 60sec 5min or 10min Touch OK Touch the drop down menu next to Log File Deletion and modify the deletion interval among the selections ava...

Page 65: ...t sensor reading including offsets in the selected unit of measure This screen is for viewing only there are no selectable fields Reference Fig 6 26 Not all models will display the sensors shown in Fi...

Page 66: ...ater can be disabled If the pure water connection is pressurized the Pure Water Pump can be turned off to increase the flow rate of pure water into the washer Reference Fig 6 27 The following accessor...

Page 67: ...ersion Software updates via USB can be performed from the About page Diagnostics Used to test washer operation components after installation or should a problem occur Resources Provides QR codes for d...

Page 68: ...st first down load the latest version available at Labconco com to a USB thumbdrive From the About screen touch Update Insert the flash drive into the USB port located under the display screen Once th...

Page 69: ...n Valve for 10 seconds DRAIN PUMP Operates Drain Pump for 10 seconds PRINTER TEST Test Printer function if installed Manual Auto Run Tests Automatically runs a diagnostic and checks amperage draw on a...

Page 70: ...nco website for documentation and or accessory and consumable information Reference Fig 6 31 From the Help Screen touch Resources Using a smartphone with camera scan the desired QR code and you will b...

Page 71: ...bdrive touch OK From the Help Screen touch Backup Restore Select an action Export or Import o If Export selected choose to export either Log Files or User Programs or both can be selected Touch OK If...

Page 72: ...Racks If you purchased a FlaskScrubber proceed to FlaskScrubber Spindle Racks later in this section A FlaskScrubber can be converted to a SteamScrubber by replacing the lower rack and adding an upper...

Page 73: ...of the slide bracket rack seats Once the rack is seated on one side continue to lower the opposite side of the rack down to rest in the slide bracket seat The rack can then be moved to the lower posit...

Page 74: ...74 Figure 7 1 B DETAIL B SLIDE BRACKET RACK HANDLE UPPER RACK LOWER RACK RACK BRACKET PIN SEATS...

Page 75: ...Section 9 Accessories Consumables for available options Each spindle or spindle arm can be removed with the supplied wrench and replaced with plugs included with the washer The spindle arms can be an...

Page 76: ...e holder and then sliding the holder up or down For best results do not allow the glassware to rest directly on top of the spindle Glassware should be loaded so that it does not touch during a wash cy...

Page 77: ...e water hardness grains per gallon GPG of your water measures 0 4 GPG soft water Fill the detergent cavity completely with powdered detergent or 40ml liquid detergent if your water measures 4 GPG or h...

Page 78: ...ustible solvents in the Glassware Washer If soiled glassware contains flammable compounds rinse the glassware thoroughly prior to placing the glassware into the washer Heaters in the washer are very h...

Page 79: ...ent and Estimated Run Time 2 Touch the Run icon a pop up will ask for confirmation to start the selected program at the programed data rate and time delay A time delay can be added or modified by touc...

Page 80: ...ouvrez la porte lentement la vapeur chaude s l vera de la laveuse qui pourrait causer des blessures If you press open while the cycle is running the washer will prompt for confirmation to pause the c...

Page 81: ...segment and a Program Complete pop up will display until acknowledged If Auto Unlock was enabled in the program once the internal temperature is below 50o C the door latch will open to allow the wash...

Page 82: ...rements No loose fitting clothes Wear close toed shoes Although the service operations detailed in this section do not involve access to areas of the product with moving or electrical parts should you...

Page 83: ...fore it is not covered by the washer warranty The air gap protects the washer against water backing up in the event of a clogged drain Check the air gap for build up any time your washer is not draini...

Page 84: ...his reminder can be turned off by setting the reminder hours to zero see Section 5 Maintenance for additional details or the interval changed if desired Go to the Settings Screen then select Maintenan...

Page 85: ...the bottom of each side of the distribution tube slide under the metal plate in the back of the sump and the screen is seated in the sump emboss of the tank floor 7 Re secure the screen to the sump w...

Page 86: ...e to perform these maintenance operations may impair the performance of the Glassware Washer Maintenance Frequency Activity Weekly Monthly Annually Wipe down exterior surfaces of the stainless steel d...

Page 87: ...rately see Table 9 2 Catalog numbers are listed in Table 9 1 below Table 9 1 Insert Description Catalog Number Tray Insert 4573000 Utensil Basket 4573100 Petri Dish Insert 4589701 Mesh Basket 4573400...

Page 88: ...nsert Description Catalog Number Graduate Insert 4574600 Test Tube Insert 10 13 mm tubes 4574700 Test Tube Insert 14 20 mm tubes 4574800 Test Tube Insert 20 25 mm tubes 4574900 Test Tube Spindle Conve...

Page 89: ...ides Upper Small Spindle Rack 4668601 60 Small Spindle excludes Slides Lower Spindle Rack 4668900 36 Large Spindles Lower Small Spindle Rack 4668901 60 Small Spindles Upper Standard Rack 4668700 Inclu...

Page 90: ...kit provides an enclosure for the Liquid Detergent and or Rinse Aid Dispenser Kits when added to a FlaskScrubber or SteamScrubber model Cool Drain Water Kit The Cool Drain Water Kit mixes cool water...

Page 91: ...es may also be stored in the base stand s integral cabinet Catalog numbers are listed in Table 9 9 below Ethernet Kit This kit adds a Cat 5 Ethernet connection to the FlaskScrubber and SteamScrubber g...

Page 92: ...are with pure water Catalog numbers are listed in Table 9 12 below ScrubberMate Cart This cart provides convenient storage and transport for racks and inserts as well as miscellaneous glassware The ca...

Page 93: ...e listed in Table 9 14 Table 9 14 Description Catalog Number LabSolutions Powder Detergent 10 lb 4 5 kg 4422000 LabSolutions Powder Detergent 27 5 lb 12 5 kg 4422100 LabSolutions Liquid Detergent 1 ga...

Page 94: ...nection Check wire connections Correct wiring Auto Rinse Aid not used Turn Auto Rinse Aid dispense off in Accessories Dismiss alarm Conductivity Sensor CS Conductivity sensor disconnected Check wire c...

Page 95: ...ill level sensor Check Sensor Screen for readings Fill level sensor should be 0 when empty and 75 full Contact Labconco Product Service Defective controller Check output from PCB to drain valve and pu...

Page 96: ...Defective DI water pump Pure Pump Test Test pump operation Fail If pump is getting power replace If no power check wiring or IOB output Are leak in hose connections to water level sensor Check Sensor...

Page 97: ...k during wash or rinse segment Check for leaks both under and around washer Fix Leaks Drain Valve failure during wash or rinse segment Check for draining during wash segment Replace drain valve Over F...

Page 98: ...Detergent Cup Test with door closed Fail If cup is getting power and wiring has continuity replace Detergent cup D cup latch fouled Manually test door operation Clean D cup latch Poor drying Dry tempe...

Page 99: ...h cup door Move glassware Tank and inner door have surface rust Glassware is contaminated with acids Pre rinse glassware Clean with stainless steel cleaner and soft cloth Washer does not run No power...

Page 100: ...Remove obstruction Washer overfilling Check operation of fill sensor Recalibrate of replace water level sensor Washer leaks around door seal Improper installation Check the cabinet opening to see if...

Page 101: ...101...

Page 102: ...in Valve 115V 4586900P Drain Valve 230V 4586901P Drain Pump 115V 4663400P Drain Pump 230V 4663401P Pure Pump 12V 4527900 Wash Pump 115V 4584200 Wash Pump 230V 4584201 Pressure Sensor Board 4674200 Pre...

Page 103: ...t dimensions All dimensions shown in inches centimeters Undercounter Exterior Dimensions Freestanding Exterior Dimensions 27 7 70 4 50 2 127 5 24 1 61 2 32 1 MIN 81 5 36 0 MAX 91 4 27 8 70 6 50 2 127...

Page 104: ...04 SteamScrubber Interior Dimensions FlaskScrubber Interior Dimensions 18 8 47 7 8 8 OR 6 6 22 4 or 16 8 22 6 57 4 9 0 OR 11 2 22 9 OR 28 4 21 3 54 1 21 3 54 1 22 6 67 6 18 1 50 0 Figure B 3 Figure B...

Page 105: ...l Det Disp Cup Auto mL A20 A20 Wash 1 Steam Time 10 10 10 Wash Time 10 10 15 20 20 30 40 10 Temperature o C 50 60 70 80 70 93 93 60 Tap Fill X X X X X X X X Pure Fill Det Disp Cup Auto mL Cup Cup Cup...

Page 106: ...Temperature o C 93 93 Tap Fill X X Pure Fill Rinse Aid Cup ml Auto mL Rinse 6 8 Rinse Time Temperature o C Tap Fill Pure Fill Rinse Aid Cup ml Auto mL Rinse 7 8 Rinse Time Temperature o C Tap Fill Pur...

Page 107: ...0 3 50 60 21 19 402x01000 115 1 60 16 402x01010 208 230 1 50 60 11 402x01013 208 230 400 3 50 60 21 19 411x01000 115 1 60 16 411x01010 208 230 1 50 60 11 411x01013 208 230 400 3 50 60 21 19 412x01000...

Page 108: ...8V 6000W 5 8 F minute 3 2 C minute Wash Pump and Heater s On 1200W Models Heat Rate from 50o C to 82o C 2000W and 6000W Models Heat Rate from 50o C to 93o C Environmental Conditions Indoor use only Am...

Reviews: