background image

33

In-Fit Exercise Pools

NOTE: Do NOT attempt to use the swim 

spa pump to drain the spa.

NOTE: Close and replace caps on all 

drains prior to refilling the swim spa.

NOTE: When refilling the swim spa, 

you may need to bleed air from the 

system. Refer to Priming Your Spa for 

instructions.

Filter Maintenance

NOTE: It is not necessary to drain the 

swim spa in order to clean the filter.

Always make sure the spa is off before 

removing and cleaning the Aqua Klean® 

filter bags. We recommend the Aqua Klean® 

filter bags be cleaned every two weeks to 

avoid a decrease in jet performance. On 

initial start-up, the filters should be cleaned 

every other day for the first two weeks of 

operation. 

To clean the filter bags, place them into the 

washing machine. Use 1/4 cup of bleach, 

wash with warm water in gentle cycle. 

Do 

not machine dry.

Aqua Klean® Patent No. 6,685,843

Winterizing

In cold climates where freezing 

temperatures occur, special care is required 

to prevent the possibility of damage to the 

spa and equipment due to freezing. If you 

plan on using your spa during cold months, 

be sure your pump and heater are in good 

working order. The spa shell has been 

insulated to provide efficient operation in 

cold weather areas.


NOTE: If you elect not to drain your swim 

spa and the temperature is going to be 

below freezing for extended periods of

time, it is best to operate the heater at 

the maximum high temperature to 104ºF 

(40ºC), especially if there is a power 

outage threat. This will help reduce the 

likelihood of the water freezing if you 

have a power failure.

If you do not intend to use your swim spa 

during the winter months and there is 

danger of freezing, use the following steps 

to winterize your spa:

1. Turn off all electrical power to the swim 

    spa.

2. Drain swim spa and hoses of all water 

    using the directions for Draining Your 

    Swim Spa. Open all unions, and remove 

    drain plugs from bottom of pumps. If you 

    cannot draw off all of the water (especially 

    from hoses), add Recreational Vehicle 

    antifreeze to the remaining water through 

    the bottom of the skimmer and 

    jets. If antifreeze is used, it must be an 

    inhibitor Propylene Glycol such as Dow 

    Frost™, available through Dow 

    Chemical® 

    distributors, contact your dealer for 

    advice.

NOTE: Prior to refilling the swim spa, 

drain all antifreeze from swim spa and 

hoses using the instructions for Draining 

Your Swim Spa. Carefully monitor 

chemicals until all antifreeze residue has 

been eliminated.

3. The filter should be drained, and the 

    cartridge removed and cleaned.

4. Check to see that there is no water in the 

    heater element chamber.

5. Clean your swim spa as directed in the 

    following two sections on this page.

6. Cover your swim spa with a water-

    shedding, impenetrable cover.

Summary of Contents for In-Fit 13 SL

Page 1: ...LATION 10 INDOOR INSTALLATION 10 SWIM SPA SYSTEM COMPONENTS 12 SWIM SPA COMPONENTS 13 JETS AND AIR CONTROLS 14 JETS 14 CLEANING AND REPLACING JETS 14 ELECTRICAL INFORMATION 15 ELECTRICAL CONNECTIONS 1...

Page 2: ...EATURE WATERFALL CONTROL VALVES 28 in stream2 AUDIO SYSTEM 28 in touch SYSTEM 28 in touch BASIC SET UP INSTRUCTIONS 29 MAINTENANCE 31 WATER CHEMISTRY 31 SANITIZING 31 pH LEVEL 31 WATER MAINTENANCE 31...

Page 3: ...iseases should not use a swim spa or hot tub WARNING To avoid injury exercise care when entering or exiting the swim spa or hot tub WARNING Water temperature in excess of 100 F 38 C may be injurious t...

Page 4: ...to read these instructions carefully When the spa is properly installed and maintained your spa will provide years of enjoyable trouble free operation Every effort has been made to ensure the accurac...

Page 5: ...____________________ City _________________________ State _______________ Zip Code _______________________ Dealer Information Name _____________________________________________________________________...

Page 6: ...e that the flow rates are compat ible Never operate spa if the suction fittings are broken or missing Never replace a suction fitting with one rated less than the flow rate marked on the original suct...

Page 7: ...pment IEC Publication 417 Symbol 5019 2 At least two lugs marked BONDING LUGS are provided on the external surface or on the inside of the supply terminal box or compartment Connect the local common b...

Page 8: ...Hyperthermia occurs when the internal temperature of the body reaches a level several degrees above the normal body temperature of 98 6 F 37 C The symp toms of hyperthermia include an increase in the...

Page 9: ...and the distance that the crane boom must travel Be sure that the crane operator uses an 8 spreader bar and that the straps wrap all the way around the bottom frame of the Swim spa Locate the Swim sp...

Page 10: ...to drain off water that may cause falls and or water damage Water will splash out of the Swim spa during normal use when swimming and when exiting the Swim spa 3 Surface area of foundation pad and sur...

Page 11: ...overs have removable center seal padding To remove this padding open the Velcro on one side of the vinyl pouch and slide the white padding out If your spa does not have removable center seal padding y...

Page 12: ...of the following devices electronic control pack pumps heater UV water sanitizer ozone generator LED lighting interface and associated electrical controls not shown E Drain Access Adjacent to the equ...

Page 13: ...trol Pack All swim spa functions are operated by this control There are no user serviceable components in this control Opening this control may subject you to high voltage and danger of electrical sho...

Page 14: ...ssolve tension This jet may be the entry point for ozone produced during automatic filtration and therefore it is not adjustable Note Ozone production is stopped when functions are activated on contro...

Page 15: ...rupter GFCI with a rated tripping current not exceeding 30mA Means for disconnection must be incorporated in the fixed wiring in accordance with the wiring rules Parts containing live voltage except p...

Page 16: ...perate at a reduced total amp rating thus allowing installation of a lower rate GFCI RCD circuit breaker and service installation ELECTRICAL CONNECTIONS To hook up your spa your authorized dealer or l...

Page 17: ...nnections Export only 230V Single phase 230V Dual phase 1x32A 2x16A Connect jumpers Connect jumpers brown wires brown wires P7 P13 P7 P10 P10 P74 P13 P74 230V Three phase 230V Three Phase 3x16A Delta...

Page 18: ...panel 6 Secure the wire connections Push the wires into the equipment control pack 7 Close the cover on the equipment control and tighten the screws 8 Electrical hook up is now complete Do not re att...

Page 19: ...cycle the jets from high to low Water should come from the therapy jets If water flow is not established turn off jets and see Priming Your Swim Spa 4 Add chemicals See Chemical Treatment and Water M...

Page 20: ...ead the Command Control System makes controlling the spa effortless CONTROL PANEL OPERATION Please note All pumps and lights have an automatic timeout shut off programmed 30 minutes after the pump or...

Page 21: ...t the top right hand side of the screen shows the state of certain accessories that comes with the spa Notification Icons in touch Indicates that the in touch module is detected and connected to a Wi...

Page 22: ...ue is higher than the current tem perature Heating to xx x will be indicated instead Normally there is a short delay before the heating starts during which Heating Suspended is indicated Home Page Fro...

Page 23: ...to run 24 hours the screen will show you the purge setting instead of filtration The purges are pre programmed for a fixed number of minutes therefore the duration will be set to N A on the screen an...

Page 24: ...tion settings or schedules You can modify the programmed schedules by selecting one and adjusting the sched ule You have several possibilities for the schedule Mon Fri weekend every day or single days...

Page 25: ...ected error For more information see the Error messages section p 58 Date and Time Here you can adjust the time or the date Simply touch the option you want to change Set Date Here you can adjust the...

Page 26: ...odify the number of phases and the input current Please note that if there are two spa packs in the system i e a SwimSpa installation the master unit s chosen configuration must support a slave unit I...

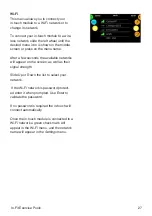
Page 27: ...ame After a few seconds the available networks will appear on the screen as well as their signal strength Slide Up or Down the list to select your network If the Wi Fi network is password protect ed e...

Page 28: ...size and it has the word AIR on the han dle Turn the valve handle clockwise to turn the air on and counterclockwise to turn the air off Open ing the valve increases jet pressure and closing the valve...

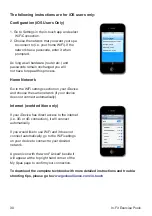
Page 29: ...After the connection has been established you can use your home WiFi network if you wish iOS devices 1 Connect to the in touch network in WiFi setting on your device 2 Start the in touch application...

Page 30: ...section on your iDevice and choose the same network if your device does not connect automatically Internet world edition only If your iDevice has direct access to the internet i e 3G or 4G connection...

Page 31: ...the water and oxidizes non filterable organic residue Allow the sanitizer level to drop back to the residual amount before using Also use your Clean Up Cycle after heavy use for additional filtration...

Page 32: ...hlorine and bromine they are not a substitute for these chemicals All chemicals should continue to be monitored especially during periods of heavy usage and when changing or replenishing the swim spa...

Page 33: ...pa and the temperature is going to be below freezing for extended periods of time it is best to operate the heater at the maximum high temperature to 104 F 40 C especially if there is a power outage t...

Page 34: ...with a soft cloth and wiped clean Use a non abrasive mild dishwashing detergent such as Ivory Liquid Rinse well and dry with a clean cloth NOTE Do not allow the acrylic surface to come in to contact...

Page 35: ...dd the required amount of spa chemicals with jets on weekly NOTE The chemical chart above is a simple schedule for moderate spa use Depending on the usage chemical balancing may be required more often...

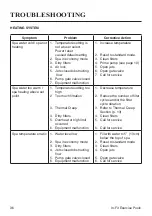
Page 36: ...water too warm spa heating above set point 1 Temperature setting too high 2 Too much filtration 3 Thermal Creep 4 Dirty filters 5 Overheat or high limit occurred 6 Equipment malfunction 1 Decrease te...

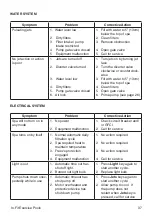
Page 37: ...e pump see page 26 ELECTRICAL SYSTEM Symptom Problem Corrective Action Spa will not turn on in any mode 1 No power 2 Equipment malfunction 1 Check circuit breaker and or GFCI 2 Call for service Spa tu...

Page 38: ...ours Reset power to spa Make sure that the pump associated to the heater is running Check and clean filters and reset the power to see if the error message goes away Air locked prime the pump see page...

Page 39: ...e sure that the pump associated with the heater is running Check and clean filters and reset the power to see if error message goes away Air locked prime the pump see page 22 RUNNING THE SPA WITH OUT...

Page 40: ...4 P A4 RED BLACK N A N A N A FUSE F2 F2 F1 F2 N A MANDATORY CONNECTION GRAY P22 K4 C LIGHT RELAY P35 P34 P9 240V P10 120V RED WHITE BLACK GREEN K9 P HEATING ELEMENT HEATER GROUND L1 N L2 WARNING G BLA...

Page 41: ...COLOR A1 BLACK A2 A3 K4 P A4 SHARED RED BLACK N A N A N A FUSE F1 F2 F2 N A MANDATORY CONNECTION GRAY P22 K4 C LIGHT RELAY P35 P34 K9 P WARNING G VERTS BLANCS N AVERTISSEMENT DEUX 50 C RATING P9 P81...

Page 42: ...A0 RED BLACK K6 P SHARED BLACK BLACK DIRECT FUSE F2 F3 F3 F1 F2 F3 F2 MANDATORY CONNECTION GRAY P22 K4 C LIGHT RELAY P35 P34 P9 240V P10 120V RED WHITE BLACK GREEN K9 P HEATING ELEMENT HEATER GROUND...

Page 43: ...RED BLACK K4 P A4 A0 RED BLACK BLACK K6 P SHARED BLACK DIRECT FUSE F1 F3 F3 F2 F2 F3 F2 MANDATORY CONNECTION GRAY P22 K4 C LIGHT RELAY P35 P34 K9 P ELEMENT HEATING HEATER GROUND DEUX 50 C N RATING L2...

Page 44: ...40V ACCESSORIES 120V ACCESSORIES RESPECTIVE WHITE N OR Y TERMINAL RESPECTIVE WHITE L2 OR X TERMINAL 240V EXCEPT A4 K22 P SHARED C4 BLACK K21 P K22 P SHARED RED BLACK N A N A N A FUSE F2 F3 F3 F1 F2 F2...

Page 45: ...P SHARED C4 BLACK K21 P K22 P SHARED RED BLACK N A N A N A FUSE F1 F3 F3 F2 F2 F2 F21 F21 F21 F21 N A N A L1 N L2 TERMINAL TO A GREEN G 240V ACCESSORIES RESPECTIVE WHITE N or Y TERMINAL L3 MANDATORY C...

Page 46: ...3 BLACK OUT A K27 P B4 BLACK K26 P SHARED K24 P RED RED K25 P BLACK OUT A FUSE F2 F3 F3 F1 F2 F2 F23 F23 F23 F22 F22 C1 C2 C3 BLACK K23 P C4 BLACK K21 P K22 P RED BLACK N A N A N A F21 F21 F21 F21 N A...

Reviews: