


Installation and Operation Manual
16
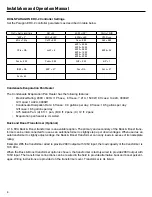
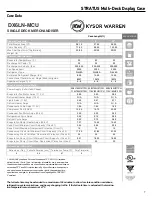
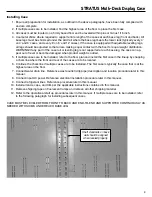
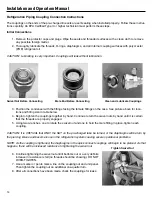
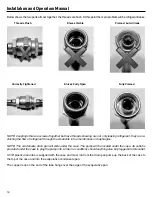
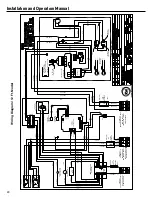
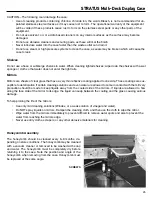
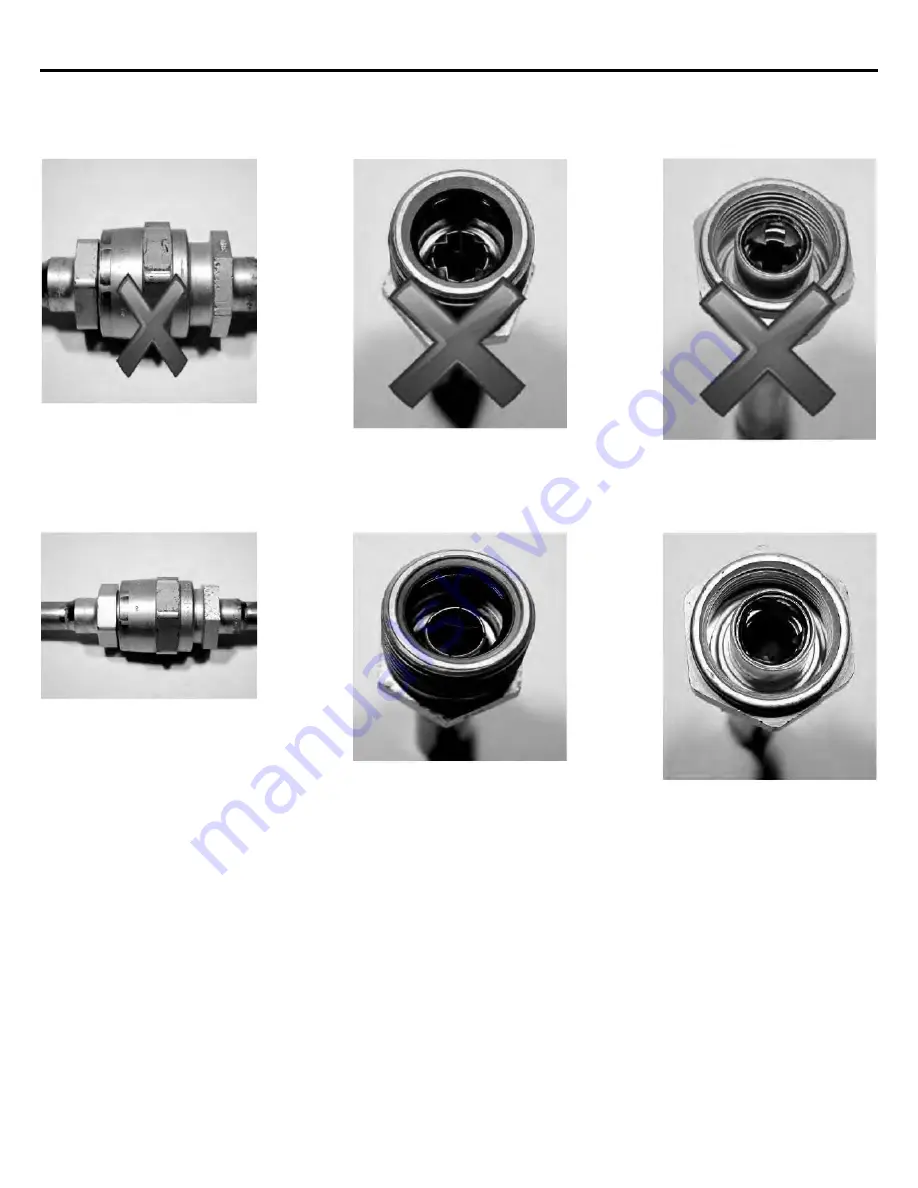
Below shows the two parts almost together; the threads are flush. At this point the main problem will be refrigerant leaks.
Threads Flush
Knives Visible
Pierced, but will leak
Correctly Tightened
Knives Fully Open
Fully Pierced
NOTE: Couplings that are screwed together but have threads showing are not only leaking refrigerant, they are re-
stricting the flow of refrigerant through the small slits in the membranes or diaphragms.
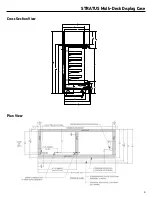
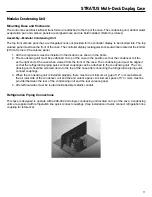
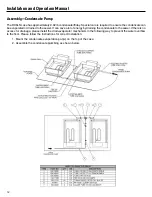
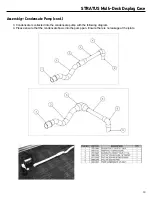
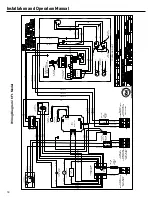
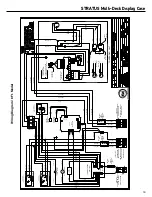
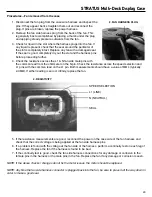
NOTE: The condensate drain pan will slide under the case. The pump will be located under the case. An outlet is
provided under the case to plug the pump into. Under no conditions should anything else be plugged into this outlet.
A 3/8" plastic drain tube is supplied with the case and must run from the drain pan pump up the back of the case to
the top of the case and into the evaporative condensate pan.
The copper loop on the end of the tube hangs over the edge of the evaporative pan.