background image

1.1 Improving Color Copy Quality (“Color Image Adjust” Function)

1

1-5

A

u

x

ili

ar

y

 F

unc

ti

ons

C

hap

ter

 1

7

Touch [Enter].

The specified settings are applied, and the Color Adjustments screen appears 
again.

8

Correctly position the document for normal printing.

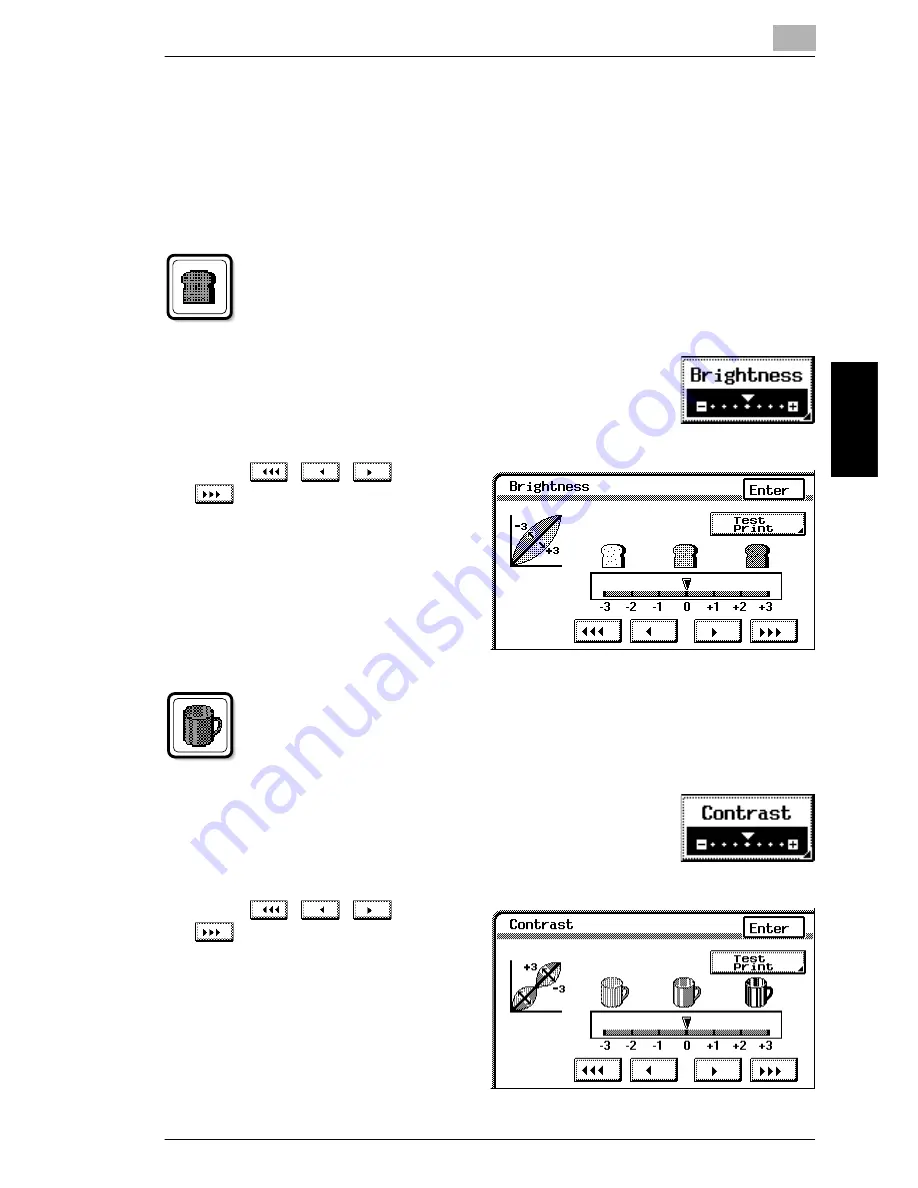
To adjust the “Brightness” parameter

This parameter can be used to make the image either lighter or darker.

1

In the Color Adjustments screen, touch [Brightness].

2

Touch , ,  

and 

 to select the desired setting, 

and then touch [Enter].

To adjust the “Contrast” parameter

This parameter can be used to make the image either crisper or 
smoother.

1

In the Color Adjustments screen, touch [Contrast].

2

Touch , ,  

and 

 to select the desired setting, 

and then touch [Enter].

Summary of Contents for KM-C2030

Page 1: ...OPERATION GUIDE Advanced Operations Please read the Operation Guide before using the copier Keep it close to the copier for easy reference 4581 7773 01 KM C2030 KM C3130 ...

Page 2: ...using the machine descriptions on func tions for use by the administrator Utility Mode and Administrator Mode func tions procedures for replacing parts and supplies troubleshooting procedures and machine specifications Before using the copier be sure to read chapters 1 through 4 of the Administrator Operations volume G Basic Operations This volume contains precautions for using the machine and des...

Page 3: ...st the Blue parameter 1 8 To adjust the Color Balance parameter 1 9 To adjust the Portrait parameter 1 10 To adjust the Hue parameter 1 10 To adjust the Density parameter 1 11 1 2 Editing Images Creation Functions 1 12 To set a Creation function 1 12 To make settings for the Monotone function 1 14 To make settings for the Background Color function 1 15 To make settings for the Color Separation fun...

Page 4: ... 34 1 8 Storing the Scanned Image in the Memory Scan to Memory Function 1 36 To set the Scan to Memory function 1 36 To combine scanned data saved in the memory 1 36 To delete scanned data from the memory to print stored data 1 37 1 9 Scanning the Document in Separate Batches Separate Scan Function 1 38 To set the Separate Scan function 1 38 1 10 Printing Control Numbers on Copies Distribution Fun...

Page 5: ...ation 3 Precautions 4 Part Names and Their Functions 5 Utility Mode Operations 6 Touch Panel Messages 7 Troubleshooting 8 Appendix Basic Operations For details on the following topics refer to the Basic Operations volume of this User Manual 1 Before Making Copies 2 Basic Copy Operations 3 Loading Paper 4 Original Documents 5 Specifying Copy Settings 6 Controlling Jobs ...

Page 6: ...e with this full color copier These functions are explained in an easy to understand way using the many copy samples For more details on the operating procedures for these functions refer to chapter 1 Auxiliary Functions Available Features Since the copy samples provided in this chapter were printed with photoengraving they may slightly differ in color with actual color copies ...

Page 7: ...el of blue Adjusts the concentration of cyan magenta yellow and black Adjusts the copy density Adjusts the difference between highlights and shadows Adjusts the sharpness of text Adjusts the level of green Adjusts the tint of fresh color Adjusts the color p 14 p 6 p 13 p 15 p 9 p 16 General Information About Color p 12 p 17 Color Image Adjust Function p 4 5 Portrait Parameter p 10 11 CMYBK color a...

Page 8: ...unction Copies with the light colored areas and the dark colored areas of the image inversed Prints multiple copies of the document reduced to postcard size on a single sheet of paper Prints a mirror image of the original Splits an enlargement of the document and copies each part onto a separate page Postcard Function Mirror Image Function Multi Page Enlargement Function Background Color Function ...

Page 9: ... about when comparing the yellow of a lemon and the red of a bean Obviously the yellow of the lemon is brighter Brightness is this degree of lightness that enables comparison regardless of the hue What makes the difference between the yellow of a lemon and the yellow a pear By saying that the lemon is a more vivid yellow and the pear is a duller yellow the difference between the two colors is stat...

Page 10: ...e vertical axis is the brightness and the horizontal axis from the center is the saturation Assigning colors to the solid object representing the three attributes of color shown in figure 1 produces the color model shown in figure 2 Although the level of saturation differs for each hue and degree of brightness creating a complex color model we can get a better understanding of the conditions under...

Page 11: ...6 p 1 7 Red Parameter This parameter can be used to adjust the degree of red in the image to one of seven levels Sample images Red Parameter Red Parameter 3 Original 3 ...

Page 12: ... Green Parameter p 1 7 Sample images This parameter can be used to adjust the degree of green in the image to one of seven levels Color Image Adjust Function Green Parameter Green Parameter Original 3 3 ...

Page 13: ...8 Blue Parameter p 1 8 Sample images Original This parameter can be used to adjust the degree of blue in the image to one of seven levels 3 3 Blue Parameter Blue Parameter ...

Page 14: ... Portrait Parameter p 1 10 3 3 Portrait Parameter Portrait Parameter Original Sample images Color Image Adjust Function This parameter can be used to adjust the tint of flesh color to one of seven levels ...

Page 15: ...olors of the document can be reproduced Changing the amount of each color of toner enables the tints in the copy to be finely adjusted Each color can be adjusted to a level within a range of 0 and 200 in 1 increments Adjusting the black tinge Color Balance Parameter Color Balance Parameter Increasing the amount of black Original Black Decreasing the amount of black ...

Page 16: ...e amount of cyan Increasing the green tinge Decreasing the amount of magenta Decreasing the amount of yellow Increasing the red tinge Color Image Adjust Function Original Magenta Cyan Yellow Decreasing the amount of cyan Increasing the amount of yellow Increasing the amount of magenta ...

Page 17: ...12 Brightness Parameter p 1 5 This parameter can be used to finely adjust the brightness of the image to one of 19 levels 3 3 Original Brightness Parameter Brightness Parameter Sample images ...

Page 18: ... Parameter p 1 5 This parameter can be used to finely adjust the image to one of 19 levels between soft smooth and crisp 3 3 Original Contrast Parameter Contrast Parameter Color Image Adjust Function Sample images ...

Page 19: ...14 Saturation Parameter 3 3 p 1 6 This parameter can be used to finely adjust the vividness of the image to one of 19 levels Original Saturation Parameter Saturation Parameter Sample images ...

Page 20: ... Parameter 3 3 p 1 6 Original This parameter can be used to adjust the amount of contours in text and images to one of seven levels Sharpness Parameter Sharpness Parameter Color Image Adjust Function Sample images ...

Page 21: ...16 Hue Parameter p 1 10 This parameter can be used to finely adjust the hue of the image to one of 19 levels 3 3 Original Hue Parameter Hue Parameter Sample images ...

Page 22: ...ty Parameter p 1 11 This parameter can be used to finely adjust the light and shading of the image to one of 19 levels 3 3 Density Parameter Density Parameter Color Image Adjust Function Original Sample images ...

Page 23: ...n Red Green Orange Pumpkin Yellow Green Teal Blue Aquamarine Pink Purple Plum Maroon Forest Green Brown Camel Sepia 2 Sepia 1 Monotone Function Monotone Function This function allows you to copy a document using only one of the 20 colors available ...

Page 24: ...Green Orange Pumpkin Yellow Green Teal Blue Aquamarine Pink Purple Plum Maroon Forest Green Brown Camel Background Color Function Background Color Function This function allows you to copy a document using one of the 18 colors available as the color of the background blank areas ...

Page 25: ...e separated colors Color Separation Function Color Separation Function Original This function allows you to copy a document while separating its colors into yellow magenta cyan and black In addition copies of the separated colors can also be printed in just black Yellow Magenta Cyan Black ...

Page 26: ...Cyan Red Green Orange Pumpkin Yellow Green Teal Blue Aquamarine Pink Purple Plum Maroon Forest Green Brown Camel Sepia 2 Sepia 1 Neg Pos Reverse Function Neg Pos Reverse Function This function allows you to copy a document with the light colored areas and the dark colored areas of the image inversed ...

Page 27: ...s you to reduce the document to the size of a postcard and print four copies on one sheet of paper This function allows you to copy a mirror image of the original document Mirror Image Function Mirror Image Function Postcard Function Postcard Function Original Original ...

Page 28: ...p 1 17 400 This function allows you to copy a document automatically split into parts with each part printed enlarged These copies can then be pasted together to make a large poster Multi Page Enlargement Function Multi Page Enlargement Function Original ...

Page 29: ...Auxiliary Functions Chapter 1 1 1Auxiliary Functions ...

Page 30: ...ailable Fea tures To make color adjustments The procedure for making practical copies using the Color Image Adjust function is described below Position the document s to be copied For more details refer to Feeding the Document of chapter 4 Original Documents in the Basic Operations volume Select the desired Color setting For more details refer to Selecting the Color Setting of chapter 5 Specifying...

Page 31: ... parameter Test prints of your document can be made so you can check how it would appear with each of the settings for the current parameter combined with the other currently specified color adjustment settings For details on making a test print refer to To make test prints on page 1 4 In the Color Adjustments screen touch Enter The Auxiliary screen appears again Specify any other necessary settin...

Page 32: ...can be 11 17 L A3 L or A4 C 2 Display the screen for the desired Color Image Adjust parameter For more details refer to page 1 2 3 Touch Test Print The Test Print screen appears Example Adjusting the Brightness parameter 4 Position the part of the document that you wish to make a test print of within the test area of the original glass 5 Press the Start key The copy job is queued for printing and ...

Page 33: ...inting To adjust the Brightness parameter This parameter can be used to make the image either lighter or darker 1 In the Color Adjustments screen touch Brightness 2 Touch and to select the desired setting and then touch Enter To adjust the Contrast parameter This parameter can be used to make the image either crisper or smoother 1 In the Color Adjustments screen touch Contrast 2 Touch and to selec...

Page 34: ...djustments screen touch Saturation 2 Touch and to select the desired setting and then touch Enter To adjust the Sharpness parameter This parameter emphasizes the edges of text so that they can be read more easily In addition this parameter can be used to make an overly sharp image softer or a blurry image clearer 1 In the Color Adjustments screen touch Sharpness 2 Touch and to select the desired s...

Page 35: ...increase the redness of flowers 1 In the Color Adjustments screen touch Red 2 Touch and to select the desired setting and then touch Enter To adjust the Green parameter This parameter can be used to adjust the level of green in the image for example when you wish to emphasize the green of forests and trees 1 In the Color Adjustments screen touch Green 2 Touch and to select the desired setting and ...

Page 36: ... Functions Chapter 1 To adjust the Blue parameter This parameter is used to adjust the level of blue in the image for example if you wish to add blue to water or the sky 1 In the Color Adjustments screen touch Blue 2 Touch and to select the desired setting and then touch Enter ...

Page 37: ...a G Decreasing the amount of cyan Increasing the green tinge G Increasing the amount of yellow and cyan G Decreasing the amount of magenta Increasing the blue tinge G Increasing the amount of magenta and cyan G Decreasing the amount of yellow Increasing the yellow tinge G Increasing the amount of yellow G Decreasing the amount of magenta and cyan Increasing the black tinge G Increasing the amount ...

Page 38: ...lesh tones 1 In the Color Adjustments screen touch Portrait 2 Touch and to select the desired setting and then touch Enter To adjust the Hue parameter The hue is divided into magenta yellow and cyan By adjusting the hue the image can be made either more reddish or more bluish 1 In the Color Adjustments screen touch Hue 2 Touch and to select the desired setting and then touch Enter ...

Page 39: ...Auxiliary Functions Chapter 1 To adjust the Density parameter This parameter can be used to finely adjust the copy density to any of 19 levels between 3 and 3 1 In the Color Adjustments screen touch Density 2 Touch and to select the desired setting and then touch Enter ...

Page 40: ...tures To set a Creation function The procedure for making practical copies using a Creation function is described below Position the document s to be copied For more details refer to Feeding the Document of chapter 4 Original Documents in the Basic Operations volume Select the desired Color setting For more details refer to Selecting the Color Setting of chapter 5 Specifying Copy Settings in the B...

Page 41: ...r to page 1 14 through page 1 23 Select the desired setting and then touch Enter The specified setting is applied Example Setting the Monotone function In the Creation screen touch Enter The Auxiliary screen appears again Specify any other necessary settings Press the Start key The copy job is queued for printing with the selected Creation function ...

Page 42: ...olors are listed on two screens Touch Monotone 2 in the lower right corner to display the next screen Touch Monotone 1 to return to the previous screen Touching Solid so that it is selected specifies that the document will be copied without shading regardless of the gradations in the original document Tip Touching Solid so that it is not selected specifies that the document will be copied with the...

Page 43: ...able as the color of the background blank areas 1 In the Creation screen touch Background Color 2 Select the desired color and then touch Enter The colors are listed on two screens Touch Background Color 2 in the lower right corner to display the next screen Touch Background Color 1 to return to the previous screen Tip To cancel the Back ground Color func tion touch Cancel in either Background scr...

Page 44: ...function touch Cancel in the Color Separation screen To set the Neg Pos Reverse function This function allows you to copy a document with the light and dark colored areas or the colors of the image inversed This allows you to make a copy of a positive image from color or B W negative films In the Creation screen touch Neg Pos Reverse To cancel the Neg Pos Reverse function touch Neg Pos Reverse aga...

Page 45: ...creen touch Multi Page Enlargemt 2 Normally the document size is automatically detected however the document size can be specified if you wish To specify the document size touch Size Input Specify the size of the original and then touch Enter to return to the Multi Page Enlargemt screen To specify a photo size or a non standard size touch Size Input and then touch Photo Size or Custom Size Select ...

Page 46: ...gemt screen 3 Specify how the original image will be enlarged according to the following methods To specify the final image size Continue with step 4 To specify an enlargement ratio Skip to step 6 To specify the paper size for each part of the enlarged image Skip to step 8 4 Touch Image Size 5 Select the final image size and then touch Enter For final image sizes in metric measurements touch Metri...

Page 47: ... screen touch Custom Size touch and to specify the size of the final image and then touch Enter This concludes the setting procedure for the Multi Page Enlargement function 6 Touch Zoom Ratio 7 Using the keypad enter the desired zoom ratio and then touch Enter This concludes the setting procedure for the Multi Page Enlargement function ...

Page 48: ...ze 9 Select the paper size for the various parts of the enlarged image and then touch Enter For paper sizes in metric measurements touch Metric select the desired paper size and then touch Enter Tip To cancel the Multi Page Enlargement function touch Cancel in the Multi Page Enlargemt screen ...

Page 49: ...the Creation screen touch Mirror Image 2 Normally the document size is automatically detected However if you wish to specify the document size touch Size Input 3 Select the document size and then touch Enter To specify a photo size or a non standard size touch Size Input and then touch Photo Size or Custom Size Select a photo size or touch and to specify the size of the original and then touch Ent...

Page 50: ...iary Functions Chapter 1 For document sizes in metric measurements touch Metric select the desired paper size and then touch Enter 4 In the Mirror Image screen touch Enter Tip To cancel the Mirror Image function touch Cancel in the Mirror Image screen ...

Page 51: ...able print area for the paper inside the area within the margins touch Multi Full Original To make copies so that the paper is filled regardless of the margins touch Multi Original In this case the margins are reduced by the image at the edge of the paper 3 Normally the document size is automatically detected However if you wish to specify the document size touch Size Input Select the document siz...

Page 52: ...d then touch Photo Size or Custom Size Select a photo size or touch and to specify the size of the original and then touch Enter For document sizes in metric measurements touch Metric Select the desired paper size and then touch Enter 4 In the Postcard screen touch Enter Tip To cancel the Postcard function touch Cancel in the Postcard screen ...

Page 53: ...ails refer to Feeding the Document of chapter 4 Original Documents in the Basic Operations volume 2 Select the desired Color setting For more details refer to Selecting the Color Setting of chapter 5 Specifying Copy Settings in the Basic Operations volume 3 Touch Auxiliary The Auxiliary screen appears 4 Touch File Margin Setting Copy position Description Copies are printed with the contents of the...

Page 54: ...f the document is not positioned as indicated in the screen touch OrigÖ Copy and then touch Original Direction Specify the orientation of the original and then touch Enter to return to the Basic screen 6 Specify any other necessary settings 7 Press the Start key Tip To cancel the File Margin function touch Cancel in the File Margin screen ...

Page 55: ...he document s to be copied For more details refer to Feeding the Document of chapter 4 Original Documents in the Basic Operations volume 2 Select the desired Color setting For more details refer to Selecting the Color Setting of chapter 5 Specifying Copy Settings in the Basic Operations volume 3 Touch Auxiliary The Auxiliary screen appears Setting Copy position Description Copies are printed with ...

Page 56: ...be erased is the width before copying Therefore be careful when selecting this setting while making enlarged or reduced copies Example When using the Edge Frame Erase function while copying an 11 17 size document with a zoom ratio of 0 647 7 Normally the document size is automatically detected However if you wish to specify the document size touch Size Input Select the document size and then touch...

Page 57: ...Size Select a photo size or touch and to specify the size of the original and then touch Enter For document sizes in metric measurements touch Metric Select the desired paper size and then touch Enter 8 In the Edge Frame Erase screen touch Enter 9 Specify any other necessary settings 10 Press the Start key Tip To cancel the Edge Frame Erase function touch Cancel in the Edge Frame Erase screen ...

Page 58: ...of chapter 5 Specifying Copy Settings in the Basic Operations volume 3 Touch Auxiliary The Auxiliary screen appears 4 Touch Image Adjust 5 Select either Full Size or Center Zoom To enlarge the image to its maximum so that it fits fully within the paper without changing the proportions of the image touch Full Size To enlarge the image to its maximum so that the shorter sides of the image fit fully ...

Page 59: ...y a photo size or a non standard size touch Size Input and then touch Photo Size or Custom Size Select a photo size or touch and to specify the size of the original and then touch Enter For document sizes in metric measurements touch Metric Select the desired paper size and then touch Enter 7 In the Image Adjustment screen touch Enter 8 Specify any other necessary settings 9 Press the Start key Ti...

Page 60: ... of chapter 4 Original Documents in the Basic Operations volume 2 Select the desired Color setting For more details refer to Selecting the Color Setting of chapter 5 Specifying Copy Settings in the Basic Operations volume 3 Specify the desired Paper and Zoom settings For more details refer to Selecting the Paper Setting and Specifying a Zoom Setting in the Basic Operations volume 4 Touch Auxiliary...

Page 61: ...size or a non standard size touch Size Input and then touch Photo Size or Custom Size Select a photo size or touch and to specify the size of the original and then touch Enter For document sizes in metric measurements touch Metric Select the desired paper size and then touch Enter 8 In the Image Repeat screen touch Enter 9 Specify any other necessary settings 10 Press the Start key Tip To cancel t...

Page 62: ...ted paper with the same size as the overhead transparencies first be loaded into any drawer other than the multipur pose paper drawer 1st drawer with the same orientation as the overhead transparencies To make settings for the OHP Interleaving function 1 Position the document s to be copied For more details refer to Feeding the Document of chapter 4 Original Documents in the Basic Operations volum...

Page 63: ...es of Transparencies OHP Interleaving Function 1 1 35 Auxiliary Functions Chapter 1 6 Specify any other necessary settings 7 Press the Start key Tip To cancel the OHP Interleaving function touch Cancel in the OHP Inter leaving screen ...

Page 64: ... be copied For more details refer to Feeding the Document of chapter 4 Original Documents in the Basic Operations volume 2 Select the desired Color setting For more details refer to Selecting the Color Setting of chapter 5 Specifying Copy Settings in the Basic Operations volume 3 Touch Auxiliary The Auxiliary screen appears 4 Touch Scan to Memory To cancel the Scan to Memory function touch Scan to...

Page 65: ...fer to the Combine Jobs Screen in the Basic Operations volume To delete scanned data from the memory to print stored data 1 Touch Job Control The Scanned Job screen appears 2 Select the job that you wish to print and delete from the memory To delete multiple jobs continue selecting all jobs that you wish to print 3 Touch OK The Job Log screen appears The selected job is deleted from the list on th...

Page 66: ...s a single copy job In addition the loading location of the document can be switched between the orig inal glass and the duplexing document feeder partly through the copy job Document capacity 100 sheets of plain paper 21 1 4lbs 80 g m2 or 38 sheets of thick paper 55 3 4 lbs 210 g m2 To set the Separate Scan function 1 Touch Auxiliary The Auxiliary screen appears 2 Touch Separate Scan To cancel th...

Page 67: ...1 9 Scanning the Document in Separate Batches Separate Scan Function 1 1 39 Auxiliary Functions Chapter 1 7 After all pages of the document have been scanned touch Finish and then press the Start key ...

Page 68: ...n 1 Position the document s to be copied For more details refer to Feeding the Document of chapter 4 Original Documents in the Basic Operations volume 2 Select the desired Color setting For more details refer to Selecting the Color Setting of chapter 5 Specifying Copy Settings in the Basic Operations volume 3 Touch Auxiliary The Auxiliary screen appears 4 Touch Distribution If a control number is ...

Page 69: ...h copy set If All Pages is selected the control number is only printed on all pages of each copy set 7 Select the desired color for the control number 8 Touch Enter If the first control number is not set the control numbers start from 001 After the control numbers reach 999 they return to 000 9 Specify any other necessary settings 10 Press the Start key Tip To cancel the Distribution function touc...

Page 70: ...1 1 10 Printing Control Numbers on Copies Distribution Function 1 42 Auxiliary Functions Chapter 1 ...

Page 71: ...Scanning Operations Chapter 2 2 2Scanning Operations ...

Page 72: ...a TIFF F JPEG or PDF file then sent to a computer or Internet fax terminal through an intranet or the Internet FTP transmission G The scanned data is uploaded to an FTP server as a TIFF F JPEG or PDF file In addition if an e mail address is specified the specified recipient can be noti fied by e mail of the FTP transmission at the same time that the data is uploaded to the FTP server HDD hard disk...

Page 73: ...e Destination screen appears Note If the printer controller is not installed the Destination screen does not ap pear when the Scan key is pressed and the copier does not enter Scan mode 2 Specify the appropriate settings Specify the recipient where the scan data will be sent and the scanning mode and then specify any other necessary settings 3 Press the Start key to start scanning and sending the ...

Page 74: ...2 2 1 Available Scanning Features 2 4 Scanning Operations Chapter 2 ...

Page 75: ... 949 457 9119 Southeastem Region 1500 Oakbrook Drive Norcross Georgia 30093 TEL 770 729 9786 FAX 770 729 9873 Southwestern Region 2825 West Story Road Irving Texas 75038 5299 TEL 972 550 8987 FAX 972 570 4704 Dallas Parts Distribution Center National Training Center 2825 West Story Road Irving Texas 75038 5299 TEL 972 659 0055 FAX 972 570 5816 KYOCERA MITA CANADA LTD 6120 Kestrel Road Mississauga ...

Reviews: