background image

4-2

4

Using 

C

 Camera

 Mode, 

N

 Continuous Shooting Mode and 

M

 Mo

vie Mode

Applicable mode: 

C

/

N

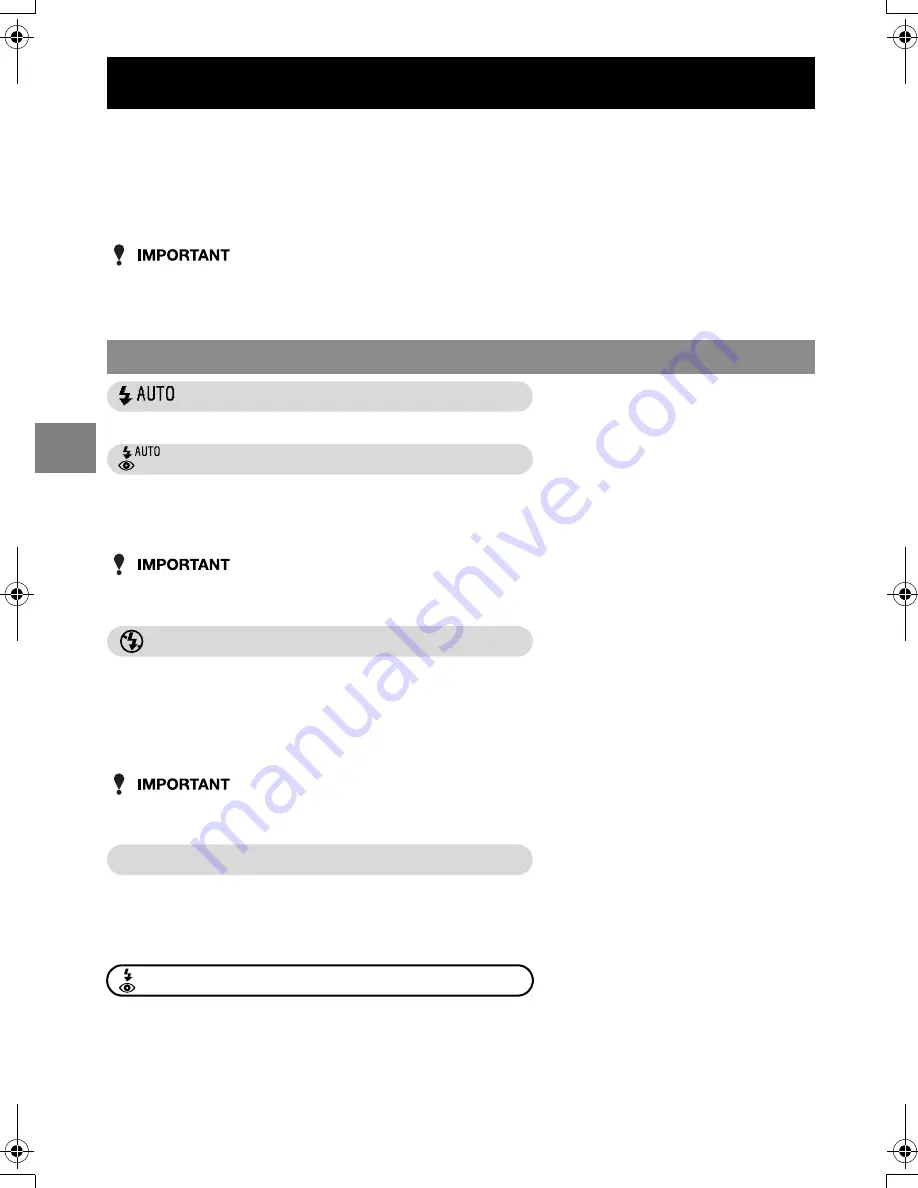
This camera features an Automatic Flash function that determines whether or not the flash 

is needed based on the ambient light level.

There are also ways of using the flash to good effect even in bright conditions. This section 

describes how to use the flash in situations such as those where conditions are bright but 

you still want to use the flash or where you don’t want to use the flash even though it’s dark.

• When using the flash for close-up shots, you should set the ISO sensitivity to 200 or less. 

If you set the sensitivity to a high ISO setting and then take close-up shots, the image will 

be overexposed.

 Auto Flash mode

C

: default

The camera detects the ambient light level and determines whether flash is required.

 Red-eye Reduction Auto mode

When people’s eyes appear red in a photograph, this is referred to as the ‘red-eye effect’ 

(

 p.4-3). In this mode, the flash reduces the red-eye effect by firing twice: once just before 

the picture is taken and again when the picture is taken.

• The shot is taken the second time the flash fires, not the first time. Take care to ensure that 

neither the camera nor the subject moves after the flash fires for the first time.

 Flash Off mode

N

: default

In this mode, the flash never fires, regardless of the ambient light levels. This mode is best 

for shots of sunsets or shots where you want to retain an indoor ambiance. Because the 

shutter speed used may be slow, depending on the light levels, you should place the 

camera on a stable surface and use the self-timer (

 p.4-4) to prevent camera shake when 

the shot is taken.

• If the photographed image is too dark, use the exposure compensation (

 p.4-8) or ISO 

sensitivity (

 p.4-22) settings to adjust the brightness.

F

 Fill-in Flash mode

In this mode, the flash fires regardless of the ambient light conditions. When you take a 

picture in strong sunlight or when the subject is backlit, the subject tends to be dark. In such 

situations, this mode allows you to take a picture that clearly shows both the subject and the 

background.

 Fill-Flash with Red-eye Reduction mode

* Only when a long exposure is set.

This mode can only be set for long-exposure shots (

 p.4-21) and should only be used 

when long-exposure shots are always taken using the flash. To reduce red-eye, the flash 

fires once just before shooting and a second time when the shot is taken.

Using the Flash

Flash modes

Finecam_E.book  Page 2  Thursday, August 28, 2003  6:21 PM

Summary of Contents for FineCam SL300R

Page 1: ... DVLF 2SHUDWLRQV RQFWLRQQHPHQW GH EDVH 7HFKQLTXHV IRU 7DNLQJ 3LFWXUHV 7HFKQLTXHV GH SULVH GH YXHV 0RGH C 0RGH N 0RGH M 0RGH C 0RGH N 0RGH M 3OD EDFN 0RGH P 0RGH GH OHFWXUH P 6 7 83 0RGH G 0RGH 352 5 00 5 G SSHQGL QQH H QWURGXFWLRQ QWURGXFWLRQ 1 6 5 1d 6 ...

Page 2: ... determined by turning the equipment off and on the user is encouraged to try to correct the interference by one or more of the following measures Change the direction of the radio or TV antenna Move the equipment or the radio or TV For example if the equipment is to the right of the TV move it to the left of the TV Or move the equipment farther away from the radio or TV Plug the equipment into a ...

Page 3: ...violation of applicable copyright laws Be aware that some performances exhibitions or displays may impose restrictions on photographic or other recording even when the purpose of such recordings are personal enjoyment The SD logo is a registered trademark MultiMediaCard is a registered trademark of Infineon Technologies AG Germany licensed to MMCA MultiMediaCard Association Microsoft and Windows a...

Page 4: ...otography Data and Erasing Images Manual REC Review 2 8 Deleting Unwanted Images Erasing Images 2 8 When the Memory Card is Full 2 10 Connecting the Camera to a Computer 2 11 Computer hardware and software requirements 2 11 Connecting to a Windows PC 2 12 Installing the USB drivers Windows 98 and Windows 98SE only 2 12 Viewing images on a Windows PC 2 13 Disconnecting the USB cable from a Windows ...

Page 5: ...g the focusing method 4 19 Setting the focusing method 4 19 Determining the shooting distance with manual focusing MF 4 20 LONG EXP Using Slow Shutter Speeds 4 21 ISO Changing the Sensitivity to Photograph Fast Moving Subjects 4 22 METERING Selecting the Area Used for Setting the Exposure 4 23 DIGITAL ZOOM Switching the Digital Zoom ON and OFF 4 24 5 Using the P Playback Mode Functions 5 1 PLAYBAC...

Page 6: ...Automatically to Save Power 6 6 MODE LOCK Preserving Your Function Settings 6 7 BEEP Adjusting the Volume of the Camera Button Beep 6 8 SHUTTER VOL Adjusting the Volume of the Shutter Sound 6 9 COLOR SELECT Selecting the Menu Color 6 9 START SCREEN Selecting the Startup Screen 6 10 REC REVIEW Checking Images Right After You Shoot Them 6 11 LANGUAGE Selecting the Menu Language 6 12 FILE NO Starting...

Page 7: ...graphy using a digital camera such as using the flash setting the number of pixels and image quality and setting white balance Using the P Playback Mode Functions This chapter describes the camera s Playback mode in which you can check images you have shot on the LCD monitor In Playback mode you can also record sound onto your images and resize trim and rotate photographed images in 90 increments ...

Page 8: ...o avoid being burned Never attempt to disassemble or modify the camera since you may receive a severe electric shock Do not operate the electronic flash at close proximity to a person s eyes especially those of an infant since eye damage may result Do not attempt to take pictures while driving or walking since you may cause an accident When taking pictures remain aware of your surroundings and wha...

Page 9: ...t at all This is not a malfunction and does not affect the recorded image in any way The LCD monitor may appear difficult to see in some outdoor lighting situations This camera incorporates a safety circuit to protect its microcomputer against strong external static electricity Though rarely it may fail to function because this safety circuit has come into action In this case turn off the camera s...

Page 10: ... do not attempt to recharge it using a third party charger as the battery pack may generate heat or smoke catch fire or explode a WARNING Never place batteries in a microwave oven or other container exposed to high voltage since battery liquid may leak or the battery pack may generate heat emit smoke or flame or rupture Do not use leaking batteries Battery liquid may contact your skin causing pers...

Page 11: ...ts outlet and clean away the dirt before reusing In the event that AC adapter plug emits smoke or unusual smell or sound or if it is damaged by impact or falling cease use immediately Continuing to use a damaged plug could result in fire danger In the event of damage to a plug consult your dealer or Kyocera Yashica Service Center Do not connect the AC adapter to any sources of power other than a h...

Page 12: ...ash unit Self timer LED Light sensor Lens Cover glass POWER button 0 p 1 5 Shutter release button p 2 3 DISPLAY button J p 3 8 SCENE button I p 3 4 Zoom button W wide angle p 3 3 Zoom button T telephoto p 3 3 MENU button K Speaker 4 way button UDLR OK button E Card access LED LCD monitor Card battery cover p 1 2 Mode buttons OQ Mode select LED Caution LED ...

Page 13: ...any position through 120 in either direction By pointing the lens unit at yourself you can take your own picture self portrait while watching the image on the LCD monitor By changing the angle of the lens unit you can use the camera like a periscope to take pictures over the heads of a crowd while you view the image on the LCD monitor If you rotate the lens unit and LCD monitor back to their origi...

Page 14: ...irectly on a printer or download them onto a memory card and take them to your local print processing store for printing Consult your local print processing store for details of the print services offered p 5 19 Shooting still images The 3 2 megapixel high performance CCD enables you to shoot high quality still images p 2 2 Shooting continuous shooting Allows you to take continuous shots at a rate...

Page 15: ...tem Around the Camera E mail PC Printer Notebook Card reader USB cable supplied Card reader Memory card AC adapter supplied Digital camera Finecam SL300R Photo lab Digital print DPOF compatible printer third party E mail ...

Page 16: ......

Page 17: ...Preparations This chapter tells you what you have to do to get the camera ready for taking pictures and covers topics such as inserting and charging the battery loading memory cards and switching the camera on ...

Page 18: ...plied with the camera Check that the and markings are oriented correctly 3 Close the card battery cover Close the cover and slide it in the opposite direction to the arrow U to lock it Removing the Battery Pack 1 Check that the camera is switched off and then open the card battery cover 2 Use your fingertip to slide the catch retaining the battery pack sideways and release the catch M G M G ...

Page 19: ...p the battery pack Strong impacts caused by being dropped can cause the battery pack to leak fluid If you do not intend to use the battery pack for a long period store it in a cool dark place Charging the Battery Connect the AC adapter to the camera to charge the battery pack Full charging takes around 3 hours Turn the camera off during charging The caution LED red lights during charging and goes ...

Page 20: ...rection to the arrow U to lock it Write protect switch SD Memory Cards only SD Memory Cards are provided with a write protect switch Sliding this switch downward prevents any more data from being recorded onto the card and protects the images and data already stored on the card When you load a write protected card into the camera in C M or N mode the WRITE PROTECT message appears the LCD monitor Y...

Page 21: ...switching the camera on While the camera is switched on pressing the POWER button H switches the camera off 2 Push the memory card in gently with your fingertip If you push the memory card in slightly it pops back out and you can then pull it out completely 3 Close the card battery cover Close the cover and slide it in the opposite direction to the arrow U to lock it Switching the Camera On Press ...

Page 22: ...s R Fully charged At least half used Charge low Charge the battery soon Camera will not function Charge the battery When the battery charge is completely depleted the LOW BATTERY message appears on the LCD monitor Depending on the environment in which the digital camera is being used the amount of power consumed may increase Even if the battery level icon is displayed the camera may switch itself ...

Page 23: ...rints of your images are inserted in the format selected here p 6 4 4 When you have completed all the settings press the OK button E to exit the settings The date and time must be set On a digital camera the date and time of shooting are stored on the memory card along with the image data This information is useful for organizing your images into albums for viewing on a computer Using the Accessor...

Page 24: ...in the illustration Using the Cleaning Pad Attach the cleaning pad to the hand strap as shown in the illustration Clean the lens and LCD monitor with the side to which the cleaning cloth is attached Wipe the lens with the cleaning pad if it becomes dirty Memory cards go in here ...

Page 25: ...Basic Operations This chapter covers the basics of using your digital camera including taking pictures viewing your pictures erasing images and connecting the camera to a computer ...

Page 26: ...he mode button until the C icon lights on the mode select LED After the startup screen the date is displayed for roughly 3 seconds Check that the date is correct 4 With the LCD monitor facing towards you gently turn the left side of the camera lens unit Holding the LCD monitor at a good angle for viewing twist the lens unit until the lens points at the subject 5 Use the LCD monitor to compose your...

Page 27: ...and LCD monitor unit are at an angle of between 30 and 45 to each other 6 Press the shutter release button down half way to set exposure and focus The camera gives a short beep and the green shooting mark B lights on the LCD monitor to indicate that the exposure and focus have been set Pressing the shutter release button half way When you press the shutter release button it stops at a point on the...

Page 28: ...l the LED goes off before taking the next shot See Using the Flash p 4 2 When the card access LED is flashing this indicates that the image is being recorded onto the memory card Do not open the card battery cover or remove the memory card while the LED is flashing as this could cause data corruption or in some cases camera damage You can take pictures while the card access LED is flashing 7 When ...

Page 29: ...t conditions but the focus does not change The movie is shot using the focus set just before shooting started 4 When you press the shutter release button down further the camera makes a clicking sound and shooting begins Pressing the shutter release button displays the seconds counter The red shooting mark B also lights during movie shooting The table below shows the number of seconds that can be ...

Page 30: ...d images Press L to scan backward through the images 3 Press the T side of the zoom button to enlarge the image and the W side to return the enlarged image to its original size After zooming in you can use the 4 way button to select the area displayed Revert the image back to its original size before you scan fowards or backword through your images Viewing Images Movie Playback 1 Press O or Q on t...

Page 31: ...or R on the 4 way button to select the movie to be viewed 3 Press the OK button E to begin playback Displaying Information for Playback Images INFORMATION 1 Press D on the 4 way button during image playback The information for the currently displayed image appears See p 7 6 for detailed information on the screen displayed 2 Press D again to clear the information display screen and return to the or...

Page 32: ...Erasing Images Manual REC Review 1 Immediately after taking a picture in C mode press D on the 4 way button The last image you shot appears on the LCD monitor 2 Press U on the 4 way button The photography data is displayed See p 7 6 for detailed information on the screen displayed 3 Press the shutter release button half way to return the camera to the original shooting mode Deleting Unwanted Image...

Page 33: ...ear 3 Press R on the 4 way button to select ERASE 4 Press the OK button E The erase confirmation message screen appears 5 Press U on the 4 way button to select EXECUTE Use L and R on the 4 way button to select the image to be erased MULTI 4 5 ERASE_IMAGE EXECUTE CANCEL ...

Page 34: ... button E to erase the image The saved image that follows the erased image appears on the LCD monitor To erase another image repeat the procedure from step 5 If there are no further images the NO IMAGE message appears 7 Press the MENU button K to finish the erase procedure When the Memory Card is Full When you cannot record any more images on a memory card the MEMORY CARD FULL message appears on t...

Page 35: ... computers Must have Windows 98 Windows 98SE Windows Me Windows 2000 Professional Windows XP Home Edition or Professional pre installed Macintosh computers Must have Mac OS 9 0 to 9 2 x or Mac OS 10 0 to 10 2 x excludes OS X server pre installed Successful operation is not guaranteed on systems where the software has been upgraded to the versions listed above Connecting the Camera to a Computer Co...

Page 36: ...ware as described in Uninstalling the driver software on p 2 18 and then re install the drivers Connecting to a Windows PC Installing the USB drivers Windows 98 and Windows 98SE only 1 Switch the PC on and start up Windows 2 Load the bundled CD ROM into the CD ROM drive 3 Double click My Computer and then the CD ROM icon to open the CD ROM window 4 Double click the SETUP exe icon to begin the inst...

Page 37: ...mage viewing software already installed To play movies QuickTime 4 1 or later must be installed You cannot check images on your PC unless there is a memory card in the camera Viewing images on a Windows PC 1 Load the memory card into the camera p 1 3 2 Connect the AC adapter to the camera 3 Connect the camera to your PC using the dedicated USB cable and then start up the PC Check the size of the U...

Page 38: ...ng differs according to the version of Windows you are using p 2 16 If PC MODE is displayed on the LCD monitor but no Removable Disk icon appears in the My Computer window check that the USB cable is securely connected 4 Press the POWER button H to switch the camera on PC MODE is displayed on the LCD monitor and you can check the images stored on the camera s memory card on your PC and copy the im...

Page 39: ...age will no longer be viewable in the camera Do not format memory cards in your PC as this may result in you being unable to use the memory card on the camera Memory card folder configuration On Windows PCs the folders for camera memory cards are configured as shown below Removable disk Still image Movie The same file name cannot be used in the same folder If one of the images is erased on the cam...

Page 40: ... from a Windows PC 1 Double click the Unplug or Eject Hardware icon in the task bar in the lower right corner of the desktop 2 Select USB Disk and then click Stop 3 Select USB Disk and then click OK 4 When the The USB Disk E device can now be safely removed from the system message appears click OK 5 Disconnect the USB cable from PC and camera ...

Page 41: ...ck the Unplug or Eject Hardware icon in the task bar in the lower right corner of the desktop 2 Select USB Mass Storage Device and then click Stop 3 Select Kyocera Finecam SL300R USB Device and then click OK 4 When the The USB Mass Storage Device can now be safely removed from the system message appears click OK 5 Disconnect the USB cable from PC and camera ...

Page 42: ...rocedure is only required for Windows 98 and Windows 98SE Uninstalling the driver software Windows 98 and Windows 98SE only 1 Load the memory card into the camera p 1 3 2 Connect the AC adapter to the camera 3 Connect the camera to your PC using the dedicated USB cable and then start up the PC 4 Press the POWER button H to switch the camera on 5 Right click My Computer and select Properties 6 When...

Page 43: ...Select Finecam SL300R marked with a question mark in Other devices and then click Remove 8 When the device deletion confirmation message appears click OK 9 Switch the camera off disconnect the USB cable and then restart your PC ...

Page 44: ...lled You cannot check images on your Macintosh unless there is a memory card in the camera Connecting to a Macintosh Viewing images on a Macintosh computer 1 Load the memory card into the camera p 1 3 2 Connect the AC adapter to the camera 3 Connect the camera to your Macintosh using the dedicated USB cable and then start up the Macintosh Check the size of the USB connectors The small connector pl...

Page 45: ...pears check that the USB cable is securely connected 4 Press the POWER button H to switch the camera on PC MODE is displayed on the LCD monitor and you can check the images stored on the camera s memory card on your Macintosh and copy the images to your Macintosh 5 An untitled disk icon appears on the desktop Double click the icon to open the disk window Displayed as NO_NAME in Mac OS 10 0 to 10 2...

Page 46: ...a Drag the untitled Mac OS 9 or NO_NAME Mac OS X folder on the desktop to the Trash Check that the It is now safe to disconnect the device message is displayed or that the untitled Mac OS 9 or NO_NAME Mac OS X icon is no longer displayed on the desktop before disconnecting the USB cable Memory card folder configuration On Macintosh computers the folders on camera memory cards are configured as sho...

Page 47: ...s third party Refer to the instructions provided with your DPOF compatible printer for details of the printing procedure Where date insertion is specified in the DPOF settings the date may not be printed on some printer models Digital Printing on a Printer Insert into the printer Remove the memory card from the camera DPOF compatible printer third party ...

Page 48: ......

Page 49: ...er describes some more advanced photography techniques including photographic subjects that are difficult for the camera to focus on using the zoom to compose shots selecting the best shooting mode for the subject and using continuous shooting ...

Page 50: ...eted The focus and exposure are then locked Focus Lock AE Lock 2 With the shutter release button still half pressed move the camera until the shot is composed as you want it and then press the shutter release button down fully to take the shot Removing your finger from the shutter release button releases the Focus Lock and AE Lock Subjects that are difficult to focus on The camera has difficulty f...

Page 51: ...e magnifications up to 6 To use the digital zoom press the T side of the zoom button to zoom in fully on the subject then briefly release the zoom button and press it again You can also disable the digital zoom so that it is not used p 4 24 Using the Zoom Button Optical Zoom and Digital Zoom 1 Press the T side of the zoom button until the image is fully zoomed When you press the zoom button the zo...

Page 52: ...Setting the Best Camera Mode for the Scene Shot SCENE Button I Displaying the Scene Mode menu 1 With the camera in shooting mode press the SCENE button I 2 The Scene Mode menu appears on the LCD monitor 3 Press U or D on the 4 way button to select the best shooting mode for the subject 4 Press the OK button E The Scene Mode menu disappears and you can take the picture using the selected shooting m...

Page 53: ... as sporting events The focus is set to CAF p 6 2 mode in which the camera adjusts the focus continuously so that the image remains focused while you track moving subjects Portrait Applicable mode C N Use this shooting mode for photographs of people In this mode the white balance is optimized to give exquisite skin tones and the ISO sensitivity p 4 22 is set to 100 to allow you to capture fine det...

Page 54: ...e close up pictures at distances as close as approx 20 cm 7 9 1 from the subject Because the focal length of the lens is locked in the wide angle position shortest focal length the zoom does not function 2 As flash mode you can select either Fill in Flash mode in which the flash fires for every shot or Flash Off mode in which the flash never fires See Using the Flash on p 4 2 1 Distance measured f...

Page 55: ... the memory card is full To ensure that you obtain true approx 3 5 frame per second performance format the SD memory card on the camera p 6 5 beforehand If you repeatedly shoot and erase frames the continuous shooting speed may drop If this occurs save the images on your PC and then format the memory card on the camera before continuing If the subject is dark so that slower shutter speeds are used...

Page 56: ...LAY button J to cycle through the LCD monitor display modes as shown below Switching theLCDMonitor Icon Displayand Backlight On and Off Specifying the settings LCD monitor backlighting OFF Icons displayed No icons displayed Flash mode scene mode p 3 4 and the focusing gauge when MF is selected are displayed Icons displayed F2 8 ISO200 10 2003 09 01 1 0 2 F SAF 1 1 F2 8 ISO200 2003 09 01 1 0 2 F SA...

Page 57: ...e the camera is switched off Setting the AF mode to SAF CAF mode in which the camera continually resets the focus is suitable for subjects involving a lot of movement such as sporting events but this mode also consumes more power If you are shooting subjects with little or no movement you should select SAF mode which consumes very little power p 6 2 This camera uses a dedicated battery pack BP 780...

Page 58: ......

Page 59: ... pixels and image quality and setting white balance The icons below each of the function headings in this chapter provide a quick reference guide to the modes in which that function can be used The meanings of the icons are shown below Applicable mode C Can be used in C camera mode Applicable mode M Can be used in M movie mode Applicable mode N Can be used in N continuous shooting mode ...

Page 60: ...e flash fires not the first time Take care to ensure that neither the camera nor the subject moves after the flash fires for the first time Flash Off mode N default In this mode the flash never fires regardless of the ambient light levels This mode is best for shots of sunsets or shots where you want to retain an indoor ambiance Because the shutter speed used may be slow depending on the light lev...

Page 61: ...uous Shooting mode only one photograph can be taken This setting reverts to the default when the camera is switched off To retain the setting set Mode Lock p 6 7 to ON Red eye effect Red eye is an effect whereby the subject s pupils appear red in a photograph because the light entering the eye is reflected off the retina Setting the flash mode 1 Switch the camera on and press O or Q on the mode bu...

Page 62: ...s the zoom ISO sensitivity and AE mode settings When taking pictures refer to the distances shown in the figure at right For more details see the Accessories and Specifications provided separately See p 4 22 for information on the ISO settings Avoiding camera shake Camera shake refers to the effect of images appearing blurred or out of focus because the camera moved when the picture was taken This...

Page 63: ...intended use of the shot p 4 7 3 Use L or R on the 4 way button to select SELF TIMER t and then press the OK button E 4 Press U or D on the 4 way button to select the desired delay time and then press the OK button E Sets a self timer delay of 10 seconds Sets a self timer delay of 2 seconds OFF Normal photography default 5 The or icon appears on the LCD monitor to show the selected delay Press the...

Page 64: ...image size you should choose the quality that best suits the intended use of the shot p 4 7 3 Use L or R on the 4 way button to select PIXELS and then press the OK button E 4 Press U or D on the 4 way button to select the desired image size and then press the OK button E 5 The selected number of pixels etc appears on the LCD monitor Press the MENU button K to clear the menu icons and make picture ...

Page 65: ...elect the desired image quality and then press the OK button E F Fine Shoots images at a low compression ratio N Normal Shoots images at a high compression ratio default 5 The selected image compression ratio F or N appears on the LCD monitor Press the MENU button K to clear the menu icons and make picture taking easier Guide to choosing image size and image quality For high quality printing or to...

Page 66: ...s switched off To retain the setting set Mode Lock p 6 7 to ON Exposure compensation when the flash is used is limited to between 1 0 and 1 0 EV When the EVALUATION metering mode p 4 23 is used the exposure compensation may differ from the specified setting for some subjects Using Exposure Compensation 1 Switch the camera on and press O or Q on the mode button until the C N or M icon lights on the...

Page 67: ... or Q on the mode button until the C N or M icon lights on the mode select LED 2 Press the MENU button K to display the menu icons 3 Use L or R on the 4 way button to select WHITE BALANCE and then press the OK button E 4 Press U or D on the 4 way button to select the desired function and then press the OK button E 5 An icon such as appears on the LCD monitor Press the MENU button K to clear the me...

Page 68: ...to restore the original setting or otherwise modify the setting to suit the scene or subject being shot Setting the Frame Rate 1 Switch the camera on and press O or Q on the mode button until the M icon lights on the mode select LED 2 Press the MENU button K to display the menu icons 3 Use L or R on the 4 way button to select FRAME SEC and then press the OK button E 4 Press U or D on the 4 way but...

Page 69: ... to COLOR B W or SEPIA C N M 4 13 CHROMA Can be set to STANDARD or gives more intense colors while gives paler colors C N 4 14 SHARPNESS Can be set to 3 2 1 STANDARD or 1 Positive values give sharper outlines around the subject C N 4 15 WB PRESET Allows you to set your own reference value for white using a sheet of white paper etc C N M 4 16 AE MODE The available settings are aperture values of F2...

Page 70: ...select SET DETAILS and then press the OK button E 4 Press U or D on the 4 way button to select SOUND and then press R 5 Press U or D on the 4 way button to select the desired setting and then press the OK button E ON Shoots movies with sound default OFF Shoots movies without sound 6 Press the MENU button K to clear the menu 7 An icon such as appears on the LCD monitor SET DETAILS COLOR MODE WB PRE...

Page 71: ... or Q on the mode button until the C N or M icon lights on the mode select LED 2 Press the MENU button K to display the menu icons 3 Use L or R on the 4 way button to select SET DETAILS and then press the OK button E If you selected M in step 1 select here 4 Press U or D on the 4 way button to select COLOR MODE and then press R 5 Press U or D on the 4 way button to select the desired color mode an...

Page 72: ... intensity 1 Switch the camera on and press O or Q on the mode button until the C or N icon lights on the mode select LED 2 Press the MENU button K to display the menu icons 3 Use L or R on the 4 way button to select SET DETAILS and then press the OK button E 4 Press U or D on the 4 way button to select CHROMA and then press R 5 Press U or D on the 4 way button to select the desired chroma and the...

Page 73: ...or Q on the mode button until the C or N icon lights on the mode select LED 2 Press the MENU button K to display the menu icons 3 Use L or R on the 4 way button to select SET DETAILS and then press the OK button E 4 Press U or D on the 4 way button to select SHARPNESS and then press R 5 Press U or D on the 4 way button to select the desired sharpness and then press the OK button E 3 3 Sharper outl...

Page 74: ... 2 Press the MENU button K to display the menu icons 3 Use L or R on the 4 way button to select SET DETAILS and then press the OK button E If you selected M in step 1 select here 4 Press U or D on the 4 way button to select WB PRESET and then press R 5 Position your prepared white sample so that it fills the frame on the screen and then press U or D on the 4 way button to select SET Then press the...

Page 75: ...ts aperture and shutter speed and F2 8 or F7 5 in which the aperture is fixed and the camera sets the optimum shutter speed The higher the aperture the greater the area centered on the subject that is sharply focused depth of field 7 appears on the LCD monitor AE MODE Selecting the Exposure Setting Method 1 Switch the camera on and press O or Q on the mode button until the C or N icon lights on th...

Page 76: ...camera sets the optimum shutter speed and aperture settings for the subject default F2 8 F2 8 The area in sharp focus depth of field is shallow so that the subject stands out clearly from the background F7 5 F7 5 The area in sharp focus depth of field is deep so that both the subject and background or foreground are sharp When F7 5 is selected take care to avoid camera shake 6 Press the MENU butto...

Page 77: ...e photographer decides the shooting distance and sets the focus FOCUSING Selecting the focusing method Setting the focusing method 1 Switch the camera on and press O or Q on the mode button until the C N or M icon lights on the mode select LED 2 Press the MENU button K to display the menu icons 3 Use L or R on the 4 way button to select SET DETAILS and then press the OK button E If you selected M ...

Page 78: ...s the OK button E 6 Press the MENU button K to clear the menu 7 The focusing frame for WIDE AF and SPOT AF or focusing gauge for manual focusing appears on the LCD monitor Determining the shooting distance with manual focusing MF Use L or R on the 4 way button to set the distance If the shooting mark B appears when you press the shutter release button half way you can take pictures at the specifie...

Page 79: ...ow Shutter Speeds 1 Switch the camera on and press O or Q on the mode button until the C or N icon lights on the mode select LED 2 Press the MENU button K to display the menu icons 3 Use L or R on the 4 way button to select SET DETAILS and then press the OK button E 4 Press U or D on the 4 way button to select LONG EXP and then press R 5 Press U or D on the 4 way button to select the desired expos...

Page 80: ...to take pictures in dark locations or use fast shutter speeds It also slightly increases the effective range of the flash The default ISO setting is AUTO in which case the camera sets the ISO sensitivity to suit the ambient conditions 7 The selected setting LT4S etc appears on the LCD monitor ISO Changing the ISO Sensitivity to Photograph Fast Moving Subjects 1 Switch the camera on and press O or ...

Page 81: ... button to select the desired ISO setting and then press the OK button E No icon AUTO The camera sets the ISO sensitivity to suit the ambient conditions default ISO100 100 Fixed at ISO 100 ISO200 200 Fixed at ISO 200 ISO400 400 Fixed at ISO 400 ISO800 800 Fixed at ISO 800 6 Press the MENU button K to clear the menu 7 The selected setting ISO200 etc appears on the LCD monitor METERING Selecting the...

Page 82: ... Press U or D on the 4 way button to select the desired metering mode and then press the OK button E No icon EVALUATION The entire screen is partitioned into 64 zones and the light in each zone is measured to determine the optimum exposure for the subject default CENTER Light is measured with greater weight given to the central part of the screen an area larger than that used for spot metering SPO...

Page 83: ...ENU button K to display the menu icons 3 Use L or R on the 4 way button to select SET DETAILS and then press the OK button E If you selected M in step 1 select here 4 Press U or D on the 4 way button to select DIGITAL ZOOM and then press R 5 Press U or D on the 4 way button to select the desired setting and then press the OK button E ON Digital zooming can be used default OFF Digital zooming is di...

Page 84: ......

Page 85: ... This chapter describes the camera s Playback mode in which you can check images you have shot on the LCD monitor In Playback mode you can also record sound onto your images and resize trim and rotate photographed images in 90 increments ...

Page 86: ...ll bars appear at the bottom and on the right side of the screen The scroll bars act as a guide to which part of the original image is currently displayed T 4 With the image enlarged use U D L R on the 4 way button to scroll the screen up down left or right in the image 4 5 Press the W side of the zoom button to retrun the enlarged image to its original size The image reverts to the original size ...

Page 87: ...k MULTI Viewing Multiple Images Using MULTI playback 1 Switch the camera on and press O or Q on the mode button until the P icon lights on the mode select LED 2 Press the MENU button K to display the menu icons 3 Use L or R on the 4 way button to select MULTI and then press the OK button E The MULTI playback screen appears Button Description U Increases the volume D Decreases the volume L Press on...

Page 88: ...ndicates that print settings have been specified for the image Current frame Total frames Shows the position of the selected image relative to the total number of photographed images Cursor Movie icon To next image forwards Press L on the 4 way button to move back and R to move forward Use U or D to move up and down a row respectively Postrecording icon Indicates that sound has been postrecorded o...

Page 89: ... the MENU button K to return to the MULTI playback screen Reverting to normal playback SINGLE playback 1 Use U D L R on the 4 way button to position the cursor on the image you want to view in normal playback mode 2 Press the OK button E to change to normal playback POSTRECORDING Adding Voice Messages to Images Recording a message 1 Switch the camera on and press O or Q on the mode button until th...

Page 90: ...image to which you want to add a voice message 5 Use U on the 4 way button to select EXECUTE and then press the OK button E to begin voice recording 6 Dictate your message into the camera s microphone 7 To stop a recording mid way through press the OK button E The screen in step 3 reappears 8 Press the MENU button K to clear the menu icons and return to the normal playback screen POSTRECORDING STO...

Page 91: ...R on the 4 way button to select the image from which you want to erase the voice message 5 Use U on the 4 way button to select EXECUTE and then press the OK button E The voice message is erased and the RECORD SOUND message appears 6 Press the MENU button K to return to the normal playback screen Playing back a recorded message 1 Switch the camera on and press O or Q on the mode button until the P ...

Page 92: ...ton until the P icon lights on the mode select LED 2 Press the MENU button K to display the menu icons 3 Use L or R on the 4 way button to select PROTECT and then press the OK button E 4 Use L or R on the 4 way button to select the image to be protected 5 Use U on the 4 way button to select SET and then press the OK button E to set the image protection The icon appears on protected images Button D...

Page 93: ...images From step 3 in Protecting an image on p 5 8 4 Use L or R on the 4 way button to select the image you want to unprotect 5 Use U on the 4 way button to select EXECUTE and then press the OK button E to remove the image protection 6 Press the MENU button K to return to the normal playback screen ERASE Erasing Individual Images 1 Switch the camera on and press O or Q on the mode button until the...

Page 94: ...n cannot be used to erase protected images p 5 8 4 Use L or R on the 4 way button to select the image to be erased 5 Use U on the 4 way button to select EXECUTE and then press the OK button E to complete erasing 6 Press the MENU button K to return to the normal playback screen ERASE ALL Erasing All Images 1 Switch the camera on and press O or Q on the mode button until the P icon lights on the mod...

Page 95: ... files so the original images are left untouched Image shot on a CONTAX or third party digital camera cannot be resized Resized images are stored as shown below 4 Use U on the 4 way button to select EXECUTE and then press the OK button E All the images are erased and the NO IMAGE message appears RESIZE Resizing and Trimming Images Resizing an image 1 Switch the camera on and press O or Q on the mo...

Page 96: ...umber of pixels press the OK button E To enlarge an area press the T side of the zoom button to enlarge the image by 2 or 4 and then use U D L R on the 4 way button to select the area Then press the OK button E 7 Use U or D on the 4 way button to select the image size and then press the OK button E 8 The name of the resized image is displayed Check the image and then press the OK button E 9 Press ...

Page 97: ...on the 4 way button to switch between images The images cannot be erased if you select RETURN and then press the OK button E Resized images cannot be protected Checking and erasing resized images From step 3 in Resizing an image on p 5 11 4 Use U or D on the 4 way button to select VIEW RESIZED IMAGE and then press the OK button E The resized image is displayed 5 To erase the image press U on the 4...

Page 98: ...on p 5 11 4 Use U or D on the 4 way button to select RESIZE ALL IMAGES and then press the OK button E 5 Use U or D on the 4 way button to select the image size and then press the OK button E You can interrupt resizing in progress by pressing the MENU button K but some of the images will be saved at the new size 6 The number of resized images are displayed Check the images and then press the OK but...

Page 99: ...icon lights on the mode select LED 2 Press the MENU button K to display the menu icons 3 Use L or R on the 4 way button to select ROTATE and then press the OK button E 4 Use L or R on the 4 way button to select the image to be rotated 5 Use U or D on the 4 way button to select a setting and then press the OK button E 90 Rotates the image 90 to the left counterclockwise 90 Rotates the image 90 to t...

Page 100: ...al playback screen AUTO PLAY Displaying Images Automatically as a Slideshow Setting AUTO PLAY 1 Switch the camera on and press O or Q on the mode button until the P icon lights on the mode select LED 2 Press the MENU button K to display the menu icons 3 Use L or R on the 4 way button to select AUTO PLAY and then press the OK button E 4 Use U or D on the 4 way button to select INTERVAL and then pre...

Page 101: ...corded voice messages and movies are included in the slideshow NOPLAYBACK Postrecorded voice messages and movies are not included in the slideshow 10 Use U or D on the 4 way button to select the EFFECT and then press R START FRAME RECORD MOVIE EFFECT THIS FRAME 2SEC START INTERVAL EXECUTE PLAYBACK OFF SETTING AUTO PLAY RETURN START FRAME RECORD MOVIE EFFECT THIS FRAME 2SEC START INTERVAL EXECUTE 1...

Page 102: ...nd then press the OK button E to begin the slideshow Button Description Movie Still image with postrecorded message Still image U Increases the volume Increases the volume Not applicable D Decreases the volume Decreases the volume Not applicable L Press once to stop the movie and begin scanning backwards through the movie frame by frame After that scanning moves one frame back each time you press ...

Page 103: ...cessing shop provides a DPOF printing service For more information on DPOF settings refer to the instruction manual provided with your DPOF compatible printer Select RETURN and press the OK button E to return to the normal playback screen PRINT SETTINGS Specifying DPOF Print Settings Specifying DPOF settings 1 Switch the camera on and press O or Q on the mode button until the P icon lights on the ...

Page 104: ... Use U or D on the 4 way button to set the number of prints and then press the OK button E The number of prints is set 9 Specify the setting for date imprinting Use U or D on the 4 way button to select DATE and then press R If you select PRINT for DATE here for an image for which WITH DATE was selected for INSERT DATE p 6 4 when the shot was taken the dates will be printed on top of each other 10 ...

Page 105: ... return to the step 4 screen 11 Use U or D on the 4 way button to select PRINT SETS and then press R to apply the DPOF settings The screen in step 4 reappears Specifying index print settings This function produces a single print showing thumbnail versions of the images recorded on the memory card From step 3 in Specifying DPOF settings on p 5 19 4 Use U or D on the 4 way button to select INDEX and...

Page 106: ...settings From step 3 in Specifying DPOF settings on p 5 19 4 Use U or D on the 4 way button to select ALL RESET and then press R 5 Use U on the 4 way button to select EXECUTE and then press the OK button E All the print settings are deleted and the step 4 screen reappears Begin by protecting the images you want to keep 1 In the MULTI playback screen p 5 3 press the MENU button K to display the men...

Page 107: ...L 3 Press the MENU button K to display the menu icons Select ERASE ALL from the menu and press the OK button E The ERASE ALL message appears 4 Select EXECUTE and press the OK button E 5 The protected images are left untouched and all the other images are erased ...

Page 108: ......

Page 109: ...ET UP Mode Functions This chapter describes how to set up some of the camera s more advanced functions such as specifying the AF Auto Focus settings adjusting the LCD monitor brightness and initializing memory cards ...

Page 110: ...l the G icon lights on the mode select LED 2 Press U or D on the 4 way button to select AF MODE and then press R 3 Press U or D on the 4 way button to select the desired setting and then press the OK button E SAF single auto focus AF operates just once when you press the shutter release button half way default CAF continuous auto focus In C mode and N mode auto focus operates continuously In M mod...

Page 111: ...ss R 3 Press U or D on the 4 way button to select the desired setting and then press the OK button E 2 Sets the maximum brightness 1 Sets the brightness slightly higher than normal STANDARD Normal level of brightness default 1 Sets the brightness slightly lower than normal 2 Sets the minimum brightness 4 The selected brightness is set and the screen in step 2 reappears AF MODE AF METHOD BRIGHT CNT...

Page 112: ...etting the Camera s Date and Time See Setting the Date and Time p 1 6 in Chapter 1 INSERT DATE Writing the Date onto Image Files Use this procedure to specify whether the date is inserted on your images If images that were shot with INSERT DATE set to WITH DATE are then printed with PRINT selected for DATE in PRINT SETTINGS p 5 19 the dates will be printed on top of each other The date is inserted...

Page 113: ...ializing a card also erases protected images 1 Switch the camera on and press O or Q on the mode button until the G icon lights on the mode select LED 2 Press U or D on the 4 way button to select INSERT DATE and then press R 3 Press U or D on the 4 way button to select NO DATE or WITH DATE and then press the OK button E 4 Date insertion is set and the screen in step 2 reappears FORMAT Initializing...

Page 114: ... Save Power 1 Switch the camera on and press O or Q on the mode button until the G icon lights on the mode select LED 2 Press U or D on the 4 way button to select POWER SAVE and then press R 3 Press U or D on the 4 way button to select the delay until the camera switches off and then press the OK button E NO PWR OFF The camera is not automatically switched off Take care to remember to switch the c...

Page 115: ...en POWER SAVE is set to NO PWR OFF If the camera is left switched on for six minutes or more it automatically enters sleep mode In this case the camera remains in the sleep mode and is not switched off To return the camera to its normal shooting mode press the shutter release button half way or press any of the other function buttons MODE LOCK Preserving Your Function Settings 1 Switch the camera ...

Page 116: ...alid when the camera is switched off 4 The selected settings are applied and the screen in step 2 reappears BEEP Adjusting the Volume of the Camera Button Beep 1 Switch the camera on and press O or Q on the mode button until the G icon lights on the mode select LED 2 Press U or D on the 4 way button to select BEEP and then press R 3 Press U or D on the 4 way button to select the desired button bee...

Page 117: ...n the mode select LED 2 Press U or D on the 4 way button to select SHUTTER VOL and then press R 3 Press U or D on the 4 way button to select the desired shutter sound volume and then press the OK button E 3 Maximum volume 2 Medium volume default 1 Low volume OFF No shutter sound 4 The selected settings are applied and the screen in step 2 reappears COLOR SELECT Selecting the Menu Color 1 Switch th...

Page 118: ...he screen in step 2 reappears START SCREEN Selecting the Startup Screen 1 Switch the camera on and press O or Q on the mode button until the G icon lights on the mode select LED 2 Press U or D on the 4 way button to select START SCREEN and then press R 3 Press L or R on the 4 way button to select the desired screen KYOCERA logo screen Default User defined screen Allows you to set an image stored o...

Page 119: ...button E Selecting RESET restores the settings in step 3 6 Use U on the 4 way button to select SET and then press the OK button E 7 Press L or R on the 4 way button to select the middle image and then press the OK button E 8 The screen for step 2 reappears REC REVIEW Checking Images Right After You Shoot Them 1 Switch the camera on and press O or Q on the mode button until the G icon lights on the...

Page 120: ...ep 2 reappears LANGUAGE Selecting the Menu Language 1 Switch the camera on and press O or Q on the mode button until the G icon lights on the mode select LED 2 Press U or D on the 4 way button to select LANGUAGE and then press R 3 Press U or D on the 4 way button to select the desired language and then press the OK button E 4 The selected settings are applied and the screen in step 2 reappears STA...

Page 121: ...nd begin again from 100KCBOX reset the file numbers without inserting the memory card and insert a formatted memory card before shooting FILE NO Starting Image File Numbers from 0001 1 Switch the camera on and press O or Q on the mode button until the G icon lights on the mode select LED 2 Press U or D on the 4 way button to select FILE NO and then press R 3 Press U on the 4 way button to select E...

Page 122: ...on and press O or Q on the mode button until the G icon lights on the mode select LED 2 Press U or D on the 4 way button to select MODE RESET and then press R 3 Press U on the 4 way button to select EXECUTE and then press the OK button E 4 The settings are reset and the screen in step 2 reappears START SCREEN REC REVIEW FILE NO MODE RESET SET 2SEC ENGLISH EXECUTE EXECUTE SET UP 3 3 LANGUAGE RESET ...

Page 123: ...hapter provides a range of technical information including measures for dealing with camera problems the names of the icons displayed on the LCD monitor the operation of the LEDs and a glossary of digital camera terms ...

Page 124: ...I cannot erase an image The icon appears The image is protected Unprotect the image p 5 9 I cannot erase an image The image file was recorded using a different device The image cannot be erased using this camera You can use FORMAT to erase the image but this will erase all the images on the card p 6 5 The number of available shots did not increase after I erased an image This is because the erased...

Page 125: ... camera settings I can t rotate or protect the image or specify DPOF settings The SD memory card is write protected Release the write protection for the card p 1 4 Messages and Responses Message Cause Response MEMORY CARD FULL There is not enough recording space available on the memory card Insert a new memory card or erase some unwanted images Alternatively changing the image size or quality may ...

Page 126: ...OLOR MODE Default COLOR 4 13 C N SET DETAILS CHROMA Previous STANDARD 4 14 C N SET DETAILS SHARPNESS Previous STANDARD 4 15 C N M SET DETAILS WB PRESET Previous White balance set by you 4 16 C N SET DETAILS AE MODE Previous PROGRAM 4 17 C N M SET DETAILS FOCUSING Previous SPOT AF 4 19 C N SET DETAILS LONG EXP Default OFF 4 21 C N SET DETAILS ISO Previous AUTO 4 22 C N SET DETAILS METERING Previous...

Page 127: ...imer page 4 4 8 Digital zoom page 4 24 9 Long Exposure Exposure compensation page 4 21 page 4 8 0 Focus gauge appears when focus mode is set to MF page 4 20 1 Date 2 Battery indicator 3 Audio mode page 4 11 4 Remaining seconds that can be recorded for movies 5 Frame rate page 4 10 q SELF TIMER page 4 4 w PIXELS page 4 5 e QUALITY page 4 6 r EXP COMP page 4 8 t WHITE BALANCE page 4 9 y SET DETAILS ...

Page 128: ...age Information Display INFORMATION display Playback mode Manual REC Review display Camera mode q Folder name and file name page 2 15 w File size e Quality compression ratio page 4 6 r Number of pixels page 4 5 t Protection status y Whether or not voice is used u Shutter speed page 7 11 i Aperture page 7 9 o Exposure compensation setting page 4 8 0 ISO sensitivity page 4 22 1 DPOF settings page 5 ...

Page 129: ...sing the self timer When a movie is being shot When the shutter operates and shooting ends When the camera is connected to a PC Card access LED orange Flashes while the camera is accessing the memory card such as recording images to memory card or reading data While the LED is flashing do not open the card battery cover or remove the memory card Flashes Lights Flashes ...

Page 130: ...tter speed is slow you need to take care of camera shake As the flash is being charged you need to wait to take the next picture until the LED stops flashing Battery recharging Now recharging There is an error on the battery pack AC adapter or camera Flashes rapidly Flashes slowly Lights Flashes ...

Page 131: ... of any digital camera DCF Design rule for Camera File system This is a standard adopted by the Japan Electronics and Information Technology Industries Association JEITA that stipulates items such as the file formats for digital cameras and related devices In principle digital cameras that conform to the DCF standard can freely exchange images even when the images were shot on a different brand of...

Page 132: ...ges of distant objects Focus This term refers to the focal point of a lens but is more broadly used to refer to the condition whereby the subject of a photograph is seen most clearly When the focusing is correct and the subject is clearly visible the shot is said to be in focus When this is not the case the shot is out of focus Format The initialization of a memory card Infinity Once the subject o...

Page 133: ...or that uses a thin film transistor TFT TFT monitors provide good resolution and excellent responsiveness White balance To the human eye the light from a white incandescent light globe or a fluorescent tube does not appear to differ particularly from sunlight In fact however they are a quite different in color from the light of the sun Without some adjustment shots taken under an incandescent ligh...

Page 134: ......

Reviews: