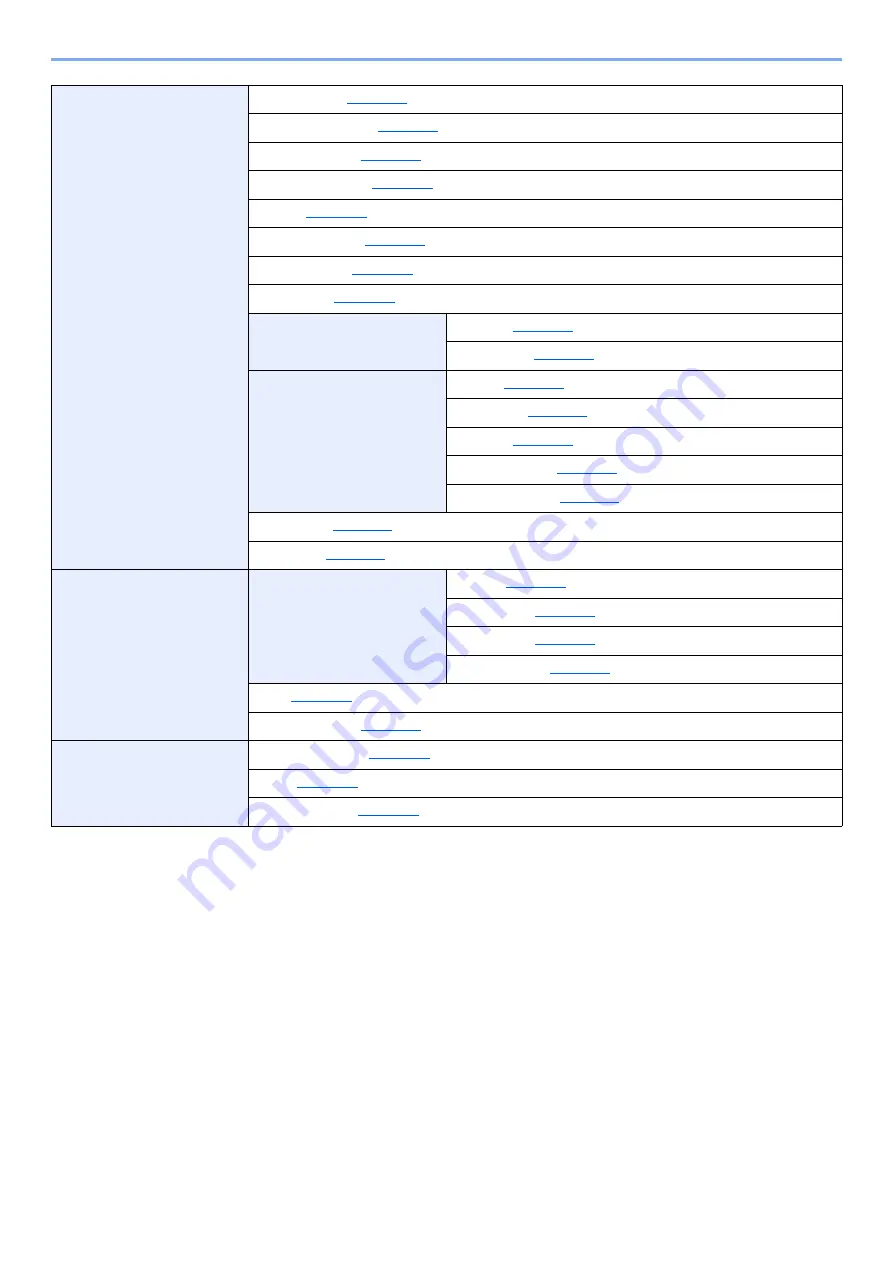
Kyocera ECOSYS P6035cdn Operation Manual Download Page 16

xv

 > Menu Map

Print Settings

Paper Source (

page 8-10

)

Auto Cass.Change (

page 8-10

)

MP Tray Priority (

page 8-10

)

Paper Feed Mode (

page 8-10

)

Duplex (

page 8-10

)

Override A4/LTR (

page 8-10

)

Emulation Set. (

page 8-10

)

Color Mode (

page 8-10

)

Print Quality

EcoPrint (

page 8-11

)

Gloss Mode (

page 8-11

)

Page Setting

Copies (

page 8-11

)

Orientation (

page 8-11

)

Wide A4 (

page 8-11

)

XPS FitTo Page (

page 8-11

)

TIFF/JPEG Size (

page 8-11

)

User Name (

page 8-11

)

Job Name (

page 8-11

)

Network

TCP/IP Settings

TCP/IP (

page 8-18

)

IPv4 Setting (

page 8-18

)

IPv6 Setting (

page 8-18

)

Protocol Detail (

page 8-19

)

Ping (

page 8-19

)

Restart Network (

page 8-19

)

Optional Network

Wireless Network (

page 8-20

)

Basic (

page 8-20

)

Communication (

page 8-21

)

Summary of Contents for ECOSYS P6035cdn

Page 1: ...OPERATION GUIDE ECOSYS P6035cdn ECOSYS P7040cdn PRINT...

Page 2: ...can always be used in the optimum condition Please read this Operation Guide before using the machine We recommend the use of our own brand supplies Please use our genuine toner containers which have...

Page 3: ...1 12 Automatic 2 Sided Print Function 1 12 Resource Saving Paper 1 12 Environmental benefits of Power Management 1 12 Energy Star ENERGY STAR Program 1 13 2 Installing and Setting up the Machine 2 1...

Page 4: ...int Settings Screen 4 5 Printer Driver Help 4 6 Changing the Default Printer Driver Settings Windows 7 4 6 Canceling Printing from a Computer 4 6 Printing by AirPrint 4 7 Printing by Google Cloud Prin...

Page 5: ...on System Menu 8 1 System Menu 8 2 Menu Settings 8 3 Report 8 5 Paper Settings 8 7 Print Settings 8 10 Device Common 8 12 User Job Account 8 17 Network 8 18 Optional Network 8 19 Security 8 22 Op Func...

Page 6: ...Malfunctions 10 9 Responding to Messages 10 13 Adjustment Maintenance 10 20 Clearing Paper Jams 10 25 11 Appendix 11 1 Optional Equipment 11 2 Overview of Optional Equipment 11 2 Optional Applications...

Page 7: ...content such as a trial print run or documents for internal confirmation use this function to save toner Use this function when a high quality print is not required EcoPrint page 6 4 Save energy and c...

Page 8: ...Mode page 6 5 Use functions more efficiently Install the machine without concerning the network cables Wireless Network In an environment where the wireless LAN is used you can install the machine wi...

Page 9: ...to use basic functions of the machine how to use convenient features how to perform routine maintenance and what to do when problems occur For safe use of the machine Safety Guide Provides safety and...

Page 10: ...o access the machine from a Web browser on your computer to check and change settings Print data from a computer Printer Driver User Guide Explains how to install the printer driver and use the printe...

Page 11: ...procedures for using document boxes 6 Using Various Functions Explains convenient functions that are available on the machine 7 Status Job Cancel Explains how to check the status of a job and the job...

Page 12: ...ve from the current page to the previously displayed page This is convenient when you want to return to the page from which you jumped to the current page Click an item in the Table of Contents to jum...

Page 13: ...procedures for operating the machine In this Operation Guide continuous operation is as follows Actual procedure Procedure indicated in this guide Select the Menu key Select the or key to select Devic...

Page 14: ...ection File Selection Print Print Change Set Function Quiet Mode page 6 5 Duplex page 6 4 EcoPrint page 6 4 File Name Entry page 6 5 JobFinish Notice page 6 4 Del after Print page 6 5 Delete Move Job...

Page 15: ...5 12 Remove Memory page 5 14 Counter page 2 30 Paper Settings MP Tray Set Paper Size page 8 7 Media Type page 8 7 Cassette 1 Set Media Type page 8 8 Other Paper Size page 8 8 Custom PaperSize page 8...

Page 16: ...oPrint page 8 11 Gloss Mode page 8 11 Page Setting Copies page 8 11 Orientation page 8 11 Wide A4 page 8 11 XPS FitTo Page page 8 11 TIFF JPEG Size page 8 11 User Name page 8 11 Job Name page 8 11 Net...

Page 17: ...ge 8 14 Display Bright page 8 12 Error Handling DuplexPaperError page 8 13 Paper Mismatch page 8 13 MP Tray Empty page 8 13 ColorToner Empty page 8 13 Timer Setting Auto Panel Reset page 8 16 PanelRes...

Page 18: ...nal Auth page 9 11 NW User Property page 9 10 Job Account Set Job Accounting page 9 14 AccountingAccess page 9 15 Account Local page 9 15 Apply Limit page 9 21 Unknown ID Job page 9 25 Adjust Maint Qu...

Page 19: ...ty Europe 1 5 SAFETY OF LASER BEAM USA 1 6 Safety Instructions Regarding the Disconnection of Power 1 7 WARNING 1 7 Radio Tag Technology 1 7 Other precautions for users in California the United States...

Page 20: ...mbol indicates that the related section includes safety warnings Specific points of attention are indicated inside the symbol General warning Warning of high temperature The symbol indicates that the...

Page 21: ...ters when this machine is moved after installation the floor material may be damaged During printing some ozone is released but the amount does not cause any ill effect to one s health If however the...

Page 22: ...ntact a physician If you do happen to get toner in your eyes flush them thoroughly with water If there is any remaining tenderness contact a physician If toner does happen to get on your skin wash wit...

Page 23: ...mal operation of the product by user no radiation can leak from the machine This machine is classified as Class 1 laser product under IEC EN 60825 1 2007 Caution Performance of procedures other than t...

Page 24: ...ical Health CDRH of the U S Food and Drug Administration FDA This act prohibits the sale of laser products in the U S without certification and applies to laser products manufactured after Aug 1 1976...

Page 25: ...nt into an outlet on a circuit different from that to which the receiver is connected Consult the dealer or an experienced radio TV technician for help The use of a non shielded interface cable with t...

Page 26: ...are trademarks of Apple Inc registered in the U S and other countries All European language fonts installed in this machine are used under licensing agreement with Monotype Imaging Inc Helvetica Palat...

Page 27: ...OpenSSL Project for use in the OpenSSL Toolkit http www openssl org THIS SOFTWARE IS PROVIDED BY THE OpenSSL PROJECT AS IS AND ANY EXPRESSED OR IMPLIED WARRANTIES INCLUDING BUT NOT LIMITED TO THE IMPL...

Page 28: ...ou return to Monotype Imaging Under the terms of this License Agreement you have the right to use the Fonts on up to three printers If you need to have access to the fonts on more than three printers...

Page 29: ...c 1 ii as appropriate Further use duplication or disclosure is subject to restrictions applicable to restricted rights software as set forth in FAR 52 227 19 c 2 12 You acknowledge that you have read...

Page 30: ...x printing be set to use duplex mode by default Resource Saving Paper For the preservation and sustainable use of forest resources it is recommended that recycled as well as virgin paper certified und...

Page 31: ...the standards laid out in the International Energy Star Program ENERGY STAR is a voluntary energy efficiency program with the goal of developing and promoting the use of products with high energy effi...

Page 32: ...p Screen 2 11 Login Logout 2 12 Login 2 12 Logout 2 13 Default Settings of the Machine 2 14 Setting Date and Time 2 14 Network Setup LAN Cable Connection 2 15 Energy Saver function 2 18 Sleep and Auto...

Page 33: ...ng and Setting up the Machine Part Names Part Names Machine Exterior 1 Top Tray 2 Paper Stopper 3 Cassette 1 4 Power Switch 5 Handles 6 USB Memory Slot 7 Operation Panel 8 Handles 9 Rear Cover 1 5 6 1...

Page 34: ...onnectors Interior 1 Network Interface Connector 2 USB Port 3 USB Interface Connector 4 Option Interface 5 Feed Cover 6 Size Dial 7 Paper Length Guide 8 Paper Width Guides 9 Multi Purpose Tray 10 Pape...

Page 35: ...ing up the Machine Part Names 12 Toner Container Black 13 Toner Container Magenta 14 Toner Container Cyan 15 Toner Container Yellow 16 Toner Container Lock Lever 17 Waste Toner Cover 18 Waste Toner Bo...

Page 36: ...stalling and Setting up the Machine Part Names With Optional Equipments Attached 1 Cassette 2 2 Cassette 3 3 Cassette 4 4 Rear Cover 2 5 Rear Cover 3 6 Rear Cover 4 Optional Equipment page 11 2 2 3 1...

Page 37: ...nect the cable to the machine 1 Connect the LAN cable to the network interface connector 2 Connect the other end of the cable to the hub 2 Power on the machine and configure the network IMPORTANT If t...

Page 38: ...left side of the body 2 Connect the other end of the cable to the PC 2 Power on the machine Connecting the Power Cable 1 Connect the cable to the machine Connect one end of the supplied power cable to...

Page 39: ...RTANT When the Data indicator is lit up or blinked the machine is operating Turning off the power switch while the machine is operating may cause it to malfunction CAUTION If this machine will be left...

Page 40: ...tom of the message display Flashing Indicates an error that you can resolve On Indicates that the printer is ready and on line Off Indicates that the printer is off line because printing is manually s...

Page 41: ...key to display the setting menus The directions of usable arrow keys are shown on the screen displayed When the or key is selected the selection moves line by line When the or key is selected the sele...

Page 42: ...ion panel When Help is displayed on the message display select Help to display the Help screen The Help screen shows machine operation Select the key to display the next step or select the key to disp...

Page 43: ...K key 3 Select Login NOTE The factory default login user name and login password are set as shown below ECOSYS P6035cdn ECOSYS P7040cdn Login User Name 3500 4000 Login Password 3500 4000 You will be u...

Page 44: ...To logout from the machine select the Logout key to return to the login user name login password entry screen Users are automatically logged out in the following circumstances When the machine enters...

Page 45: ...is enabled you can only change the settings by logging in with administrator privileges If user login administration is disabled the user authentication screen appears Enter a login user name and pas...

Page 46: ...d you can only change the settings by logging in with administrator privileges If user login administration is disabled the user authentication screen appears Enter a login user name and password and...

Page 47: ...the or key to move the position being entered which is shown highlighted NOTE You can set any value between 000 and 255 Use the numeric keys or select the or key to enter a number Select the or key t...

Page 48: ...less Network page 8 20 Available Network Displays access points to which the machine can connect Push Button If the access point supports the push button method wireless settings can be configured usi...

Page 49: ...machine to respond more slowly Follow the steps below to set the sleep timer for the machine to go into sleep mode when not in use 1 Display the screen Menu key T key Device Common OK key T key Timer...

Page 50: ...y wakes up and starts printing Follow the steps below to select the sleep level and use Energy Saver mode for each function 1 Display the screen Menu key key Device Common OK key key Timer Setting OK...

Page 51: ...iver allows you to take full advantage of the features of the machine Use this driver to create PDF files KX XPS DRIVER This printer driver supports the XPS XML Paper Specification format developed by...

Page 52: ...to the following Custom Install page 2 24 1 Insert the DVD 2 Display the screen NOTE Installation on Windows must be done by a user logged on with administrator privileges If the Welcome to the Found...

Page 53: ...ction cannot be used NOTE To install Status Monitor it is necessary to install Microsoft NET Framework 4 0 beforehand The machine cannot be detected unless it is on If the computer fails to detect the...

Page 54: ...to exit the wizard If a system restart message appears restart the computer by following the screen prompts This completes the printer driver installation procedure NOTE When you have selected Device...

Page 55: ...r logged on with administrator privileges If the Welcome to the Found New Hardware Wizard dialog box displays select Cancel If the autorun screen is displayed click Run setup exe If the user account m...

Page 56: ...p the Machine Installing Software 2 Select the driver to be installed 3 Select the utility to be installed 4 Click Install NOTE To install Status Monitor it is necessary to install Microsoft NET Frame...

Page 57: ...to exit the wizard If a system restart message appears restart the computer by following the screen prompts This completes the printer driver installation procedure NOTE When you have selected Device...

Page 58: ...ted 3 Finish uninstalling If a system restart message appears restart the computer by following the screen prompts This completes the software uninstallation procedure NOTE Uninstallation on Windows m...

Page 59: ...ation software This completes the printer driver installation If a USB connection is used the machine is automatically recognized and connected If an IP connection is used the settings below are requi...

Page 60: ...click the item that appears in Name 3 Select the options available for the machine 4 The selected machine is added NOTE When using an IP connection click the IP icon for an IP connection and then ente...

Page 61: ...tting up the Machine Checking the Counter Checking the Counter Check the number of sheets printed 1 Display the screen Menu key key Counter OK key 2 Check the counter Select the item you want to check...

Page 62: ...a registered login name and password User Authentication and Accounting User Login Job Accounting page 9 1 I want to Function Reference page Restrict the users of the machine User Login page 9 2 Auto...

Page 63: ...ing for the default user with administrator privileges is shown below Upper case and lower case letters are distinguished case sensitive Login User Name Admin Login Password Admin Setting Description...

Page 64: ...current status 2 Configure the function Select a category from the navigation bar on the left of the screen NOTE If the screen There is a problem with this website s security certificate is displayed...

Page 65: ...P address or the host name Print the status page to check the machine s IP address and the host name Menu key key Report OK key key Report Print OK key key Status Page OK key Yes 3 Log in with adminis...

Page 66: ...achine Command Center RX 2 Configure the Security Settings From the Security Settings menu select the setting you want to configure NOTE For details on settings related to certificates refer to the fo...

Page 67: ...st name Print the status page to check the machine s IP address and the host name Menu key key Report OK key key Report Print OK key key Status Page OK key Yes 3 Log in with administrator privileges T...

Page 68: ...ost name Enter the device information and then click Submit IMPORTANT After changing the setting restart the network or turn the machine OFF and then ON To restart the network interface card click Res...

Page 69: ...e size of E mails Item E mail Size Limit in E mail Send Settings The procedure for specifying the SMTP settings is explained below 1 Display the screen Display the SMTP Protocol screen 1 Launch your W...

Page 70: ...2 39 Installing and Setting up the Machine Command Center RX 4 From the Network Settings menu click Protocol 2 Configure the settings Set SMTP E mail TX to On in the Send Protocols 1 2...

Page 71: ...2 40 Installing and Setting up the Machine Command Center RX 3 Display the screen Display the E mail Settings screen From the Function Settings menu click E mail 1 2...

Page 72: ...don t need to set the following items when you only enable the function of sending e mail from the machine Set the following items if you want to enable the function of receiving e mail on the machine...

Page 73: ...ge to check the machine s IP address and the host name Menu key key Report OK key key Report Print OK key key Status Page OK key Yes 3 From the Document Box menu click Custom Box 4 Click Add 2 Configu...

Page 74: ...reen 1 Launch your Web browser 2 In the address or location bar enter the machine s IP address or the host name Print the status page to check the machine s IP address and the host name Menu key key R...

Page 75: ...d Setting up the Machine Command Center RX 2 Print the document 1 Select the document you wish to print Select the checkbox of the document to be printed 2 Click Print 3 Configure settings for printin...

Page 76: ...his chapter explains the following operations Loading Paper 3 2 Precaution for Loading Paper 3 3 Loading in the Cassettes 3 4 Loading Paper in the Multi Purpose Tray 3 7 Specifying Paper Size and Medi...

Page 77: ...page 3 4 2 Cassette 2 page 3 4 3 Cassette 3 page 3 4 4 Cassette 4 page 3 4 5 Multi Purpose Tray page 3 7 NOTE The number of sheets that can be held varies depending on your environment and paper type...

Page 78: ...as dampness can be a cause of problems Seal any remaining paper after loading in the multi purpose tray or cassettes back in the paper storage bag If the machine will not be used for a prolonged peri...

Page 79: ...t of the machine 2 Adjust the cassette size 1 Adjust the position of the paper width guides located on the left and right sides of the cassette Press the paper width adjusting tab and slide the guides...

Page 80: ...the size dial so that the size of the paper you are going to use appears in the paper size window 3 Load paper 1 Fan the paper then tap it on a level surface to avoid paper jams or skewed printing 2...

Page 81: ...n for Loading Paper page 3 3 Before loading the paper be sure that it is not curled or folded Paper that is curled or folded may cause paper jams Ensure that the loaded paper does not exceed the level...

Page 82: ...s Hagaki Cardstock 30 sheets Envelope DL Envelope C5 Envelope 10 Envelope 9 Envelope 6 3 4 Envelope Monarch Youkei 4 Youkei 2 5 sheets OHP film 1 sheet Coated 30 sheets 1 Open the multi purpose tray I...

Page 83: ...p Curled paper must be uncurled before use When loading paper into the multi purpose tray check that there is no paper left over in the tray from a previous job before loading the paper If there is ju...

Page 84: ...d How to load envelopes orientation and facing will differ depending on the type of envelope Be sure to load it in correctly otherwise printing may be done in the wrong direction or on the wrong face...

Page 85: ...Quality CUSTOM 1 8 Cassette 2 to 4 Plain 60 105 g m2 Preprinted Labels Bond Recycled Vellum 60 105 g m2 Rough Letterhead Color Prepunched Envelope Coated Thick 106 220 g m2 High Quality CUSTOM 1 8 Oth...

Page 86: ...3 Specify the paper size 1 key Other Paper Size OK key 2 Select the paper size and select the OK key If you selected Custom use the procedure below to specify the paper length and width 3 key Custom...

Page 87: ...edia type and select the OK key Item Description Paper Size Available options are as follows Values Envelope Monarch Envelope 10 Envelope DL Envelope C5 Executive Letter Legal A4 B5 A5 A6 B6 Envelope...

Page 88: ...3 13 Preparation before Use Paper Stopper Paper Stopper When using paper A4 Letter or larger open the paper stopper shown in the figure...

Page 89: ...er 4 6 Printing by AirPrint 4 7 Printing by Google Cloud Print 4 8 Printing Data Saved on the Printer 4 9 Specifying the Job Box from a Computer and Storing the Job 4 9 Printing Documents from Private...

Page 90: ...e from the Name menu and click the Properties button NOTE To print the document from applications install the printer driver on your computer from the supplied DVD Product Library In some environments...

Page 91: ...s not included in print sizes of the machine such as cardstock or envelopes the paper size needs to be registered To print on the special paper such as thick paper or transparency click Media type men...

Page 92: ...the machine set the paper size and type in the following Paper Size and Media Type for the Multi Purpose Tray MP Tray Setting page 3 12 NOTE If you loaded a postcard or envelope select Cardstock or E...

Page 93: ...ling Imaging tab This tab lets you configure settings related to the quality of the print results Publishing tab This tab lets you create covers and inserts for print jobs and put inserts between shee...

Page 94: ...operties menu of the printer driver 3 Click the Basic button on the General tab 4 Select the default settings and click the OK button Canceling Printing from a Computer To cancel a print job executed...

Page 95: ...4 2 and later products and Mac OS X 10 7 and later products This function enables you to connect and print to any AirPrint compatible device without installing a printer driver To allow the machine t...

Page 96: ...oogle account to print from a machine connected to the Internet The machine can be configured in the Command Center RX Command Center RX User Guide NOTE A Google account is necessary to use Google Clo...

Page 97: ...nt Box page 4 10 Printing Document from Stored Job Box page 4 12 Printing Document from Quick Copy Box page 4 14 Printing Document from Proof and Hold Box page 4 16 Specifying the Job Box from a Compu...

Page 98: ...he screen 1 Document Box key key Private Stored OK key 2 Select the creator of the document and select the OK key 2 Print the document 1 Select the document to print and Select OK key The file is sele...

Page 99: ...ill be placed on the right of the selected file Checkmarks will be placed on the right of the all files when All Files is selected When all files are checked all checkmarked files are deselected Selec...

Page 100: ...key key Private Stored OK key 2 Select the creator of the document and select the OK key 2 Print the document 1 Select the document to print and Select OK key The file is selected A checkmark will be...

Page 101: ...rk will be placed on the right of the selected file Checkmarks will be placed on the right of the all files when All Files is selected When all files are checked all checkmarked files are deselected S...

Page 102: ...lay the screen 1 Document Box key key Quick Copy OK key 2 Select the creator of the document and select the OK key 2 Print the document 1 Select the document to print and Select OK key The file is sel...

Page 103: ...document to delete and Select OK key The file is selected A checkmark will be placed on the right of the selected file Checkmarks will be placed on the right of the all files when All Files is selecte...

Page 104: ...ts You can print the documents stored in the Proof and Hold box The procedure is as follows 1 Display the screen 1 Document Box key key Quick Copy OK key 2 Select the creator of the document and selec...

Page 105: ...e document to delete and Select OK key The file is selected A checkmark will be placed on the right of the selected file Checkmarks will be placed on the right of the all files when All Files is selec...

Page 106: ...ue number between 0 and 300 NOTE When 0 is set Quick Copy cannot be used JobRet Deletion This setting specifies that documents such as Private Printing Quick Copying or Proof and Hold Printing saved t...

Page 107: ...The Status Monitor automatically shuts down after 7 minutes if it is not being used Status Monitor Display The display of the Status Monitor is as follows Quick View State The status of the printer is...

Page 108: ...ed Select a job on the job list and it can be canceled using the menu displayed with a right click Paper Tray Status Tab Information is displayed about the paper in the printer and about the amount of...

Page 109: ...f the printer is connected to a TCP IP network and has its own IP address use a web browser to access the Command Center RX to modify or confirm the network settings This menu is not displayed when us...

Page 110: ...e event notification If this setting is set to Off then the Status Monitor will not start up even when printing is executed 2 Select an event to use with the text to speech function in Available event...

Page 111: ...r 5 2 Canceling Jobs 5 3 What is Document Box 5 4 Using a Custom Box 5 6 Creating a New Custom Box 5 6 Editing and Deleting Custom Box 5 8 Storing Documents 5 8 Printing Documents 5 9 Editing Document...

Page 112: ...king the Equipment s Serial Number The equipment s serial number is printed in the location shown in the figure NOTE You ll need the equipment s serial number when contacting your Service Representati...

Page 113: ...While the printer displays Processing select Cancel key The Job Cancel List appears showing the list of current print jobs 2 Cancel a job 1 Select the job to cancel and the OK key 2 Select Yes The jo...

Page 114: ...atedly Quick Copy Proof and Hold Box page 4 14 page 4 16 Quick Copy feature facilitates additional prints of a document already printed Activating Quick Copy and printing a document using the printer...

Page 115: ...e Machine What is Document Box Removable Memory Box page 5 12 A USB memory stick can be connected to the USB memory slot on the machine to print a saved file You can print data directly from the USB m...

Page 116: ...r RX Command Center RX User Guide NOTE To use Custom Box an optional SSD must be installed in the machine If user login administration is enabled you can only change the settings by logging in with ad...

Page 117: ...atory Enter a password of up to 16 characters and select the OK key Reenter the same password for confirmation and select the OK key This can be set if Shared is selected in Permission Box Number Ente...

Page 118: ...r to the following Printer Driver User Guide NOTE If the default screen of the box is set to a Job Box display the Custom Box screen Document Box key Back key key Custom Box OK key NOTE When you have...

Page 119: ...ocument was saved select key Print OK key To change the print settings select key Print ChangeSet OK key If Print is selected change the number of copies to print as necessary If Print ChangeSet is se...

Page 120: ...t the checkmarked file and select Select again to cancel the selection 2 OK key key Move OK key 3 Select the destination box and the OK key The selected document is moved NOTE If the default screen of...

Page 121: ...Box are checked all checkmarked files are deselected Select the checkmarked file and select Select again to cancel the selection 2 OK key key Delete OK key Yes NOTE If the default screen of the box i...

Page 122: ...uld have an extension pdf Files to be printed should be saved no further down than the top 3 folder levels including the root folder Plug the USB memory directly into the USB Memory Slot 1 Plug the US...

Page 123: ...t the OK key 4 Change the number of copies duplex printing etc as desired For the features that can be selected refer to the following 5 Select the OK key Printing of the selected file begins NOTE Sel...

Page 124: ...ory Follow the steps below to remove the USB memory 1 Display the screen Menu key key USB Memory OK key 2 Select Remove Memory key Remove Memory OK key 3 Remove the USB memory IMPORTANT Be sure to fol...

Page 125: ...vailable on the Machine 6 2 Custom Box Printing 6 2 Removable Memory Printing Documents 6 3 Functions 6 4 EcoPrint 6 4 Duplex 6 4 Job Finish Notice 6 4 File Name Entry 6 5 Quiet Mode 6 5 Del after Pri...

Page 126: ...erence page Quiet Mode Lower print speed for quiet processing page 6 5 Duplex Print a document on both sides of the paper page 6 4 EcoPrint EcoPrint saves toner when printing page 6 4 File Name Entry...

Page 127: ...on both sides of the paper page 6 4 EcoPrint EcoPrint saves toner when printing page 6 4 File Name Entry Adds a file name page 6 5 JobFinish Notice Sends E mail notice when a job is complete page 6 4...

Page 128: ...tion Off Disables the function Bind Long Edge Prints the reverse side of a document in the same orientation as the front side Bind Short Edge Prints the reverse side of a document rotated 180 with res...

Page 129: ...nt speed for quiet processing Select this mode when the running noise is uncomfortable It is possible to set the use of Quiet Mode for each function Value Off On Del after Print Delete after Printed A...

Page 130: ...ution Print Resolution XPS FitTo Page Reduces or enlarges the image size to fit to the selected paper size when printing XPS file Value Off On Item Description Paper Size Fits the image size to the se...

Page 131: ...ancel This chapter explains the following topics Checking Job Status 7 2 Checking Job History 7 3 Sending the Log History 7 4 Device Communication 7 5 Checking the Remaining Amount of Toner and Paper...

Page 132: ...changed from Command Center RX Command Center RX User Guide Item Description Job Name When the job name in Job Name is displayed in a short form select Detail to see the complete job name Select the...

Page 133: ...played on the extreme right of each job The job has been completed An error has occurred The job has been canceled 3 Check the job history Select the key to view the next screen Select the key to retu...

Page 134: ...ncel The job has been canceled Job Type Printer Printer job Report Report List USB Data from removable memory Box Job from Document Box Accepted Time Accepted time of job User Name User Name for the e...

Page 135: ...the status Select the items you want to check Then select the OK key to show the status of the selected device The items you can check are described below USB Keyboard The status of the optional USB...

Page 136: ...splay the screen To check the toner status select Toner while the machine is awaiting printing If you select Paper you will return to the paper status screen 2 Check the status The items you can check...

Page 137: ...hapter explains the following topics System Menu 8 2 Menu Settings 8 3 Report 8 5 Paper Settings 8 7 Print Settings 8 10 Device Common 8 12 User Job Account 8 17 Network 8 18 Optional Network 8 19 Sec...

Page 138: ...ge and configure as needed Operation Method page 2 10 NOTE In order to change settings that require administer privileges you must log in with administrator privileges The factory default login user n...

Page 139: ...ype Select the type of USB keyboard that you want to use page 8 13 Format SSD Format an optional SSD page 8 14 Format SD Card Format an optional SD SDHC memory card page 8 14 Disp Status Log Set the d...

Page 140: ...on by the machine Same as the computer restart page 8 26 Data Security Configure settings for data stored in the optional SSD and machine s memory page 8 25 Op Functions You can use the optional appli...

Page 141: ...on Menu Map Prints Menu Map to check the settings of the machine Status Page Prints the status page allowing you to check the information including current settings available memory space and optional...

Page 142: ...the specified destinations whenever a set number of jobs has been logged Value Off On Off On Jobs Set the number of jobs at which the job history is automatically sent The setting range is 1 to 100 T...

Page 143: ...and media type name can be changed Media Type Setting page 8 9 Reset Type Adj Resets the attribute settings of all media types set in Media Type Set Media Type Set page 8 7 Item Description Paper Size...

Page 144: ...lope Coated Thick 106 220 g m2 High Quality CUSTOM 1 8 Other Paper Size Available options are as follows Values Cassette 1 Executive Letter Legal A4 B5 A5 A6 B6 ISO B5 Custom Oficio II 216 340 mm 16K...

Page 145: ...3 91 g m to 105 g m Extra Heavy Transparencies Media Type Default Media Type Default Plain Normal 2 Cardstock Heavy 1 Transparency Extra Heavy Color Normal 2 Rough Normal 3 Prepunched Normal 2 Vellum...

Page 146: ...nter driver settings are followed Auto Feed If Auto is selected in the printer driver and there is paper in the MP tray then the paper feed will be from the MP tray Always If there is paper in the MP...

Page 147: ...orientation Copies Set the default number of copies from 1 to 999 Value 1 to 999 copies Orientation You can select portrait upright or landscape sideways page orientation Value Portrait Landscape Wid...

Page 148: ...he language displayed on the message display Item Description Def Screen Box Select the screen to be displayed when Document Box key is selected Value Custom Box Job Box Item Description Key Confirmat...

Page 149: ...pose tray Value Continue The setting is ignored and the job is printed Display Error Message to cancel printing is displayed MP Tray Empty Turn this setting to On if you want the error displayed when...

Page 150: ...s Log Menu key key Device Common OK key key Disp Status Log OK key IMPORTANT Formatting will destroy any existing data on a storage device including a used SSD NOTE This function will not be displayed...

Page 151: ...on Time Set the date and time for the location where you use the machine Value Hour 00 to 23 Minute 00 to 59 Second 00 to 59 Setting Date and Time page 2 14 NOTE If you change the time while using the...

Page 152: ...educe power consumption even more than Quick Recovery mode Value Quick Recovery Energy Saver NOTE When the optional Network Interface Kit is installed this is not displayed Status Set whether to use t...

Page 153: ...ally prints paper The options are between 5 and 495 seconds Value 5 to 495 seconds in 5 second increments Ping Timeout Set the time until timeout occurs when Ping is executed in Network Value 1 to 30...

Page 154: ...entered Subnet Mask Set the IP subnet masks Value NOTE If DHCP is set to On this item is displayed only and cannot be entered Default Gateway Set the IP gateway addresses Value NOTE If DHCP is set to...

Page 155: ...not to receive e mail using POP3 Value Off On FTP Server Select whether or not to receive documents using FTP 1 Value Off On LDAP Select whether or not to use LDAP Value Off On SNMP Select whether or...

Page 156: ...art Network Restarts the network card of the device NOTE This function is displayed when the optional Wireless Network Interface Kit is installed Item Description ConnectionStatus When the optional Wi...

Page 157: ...K 1 Encryption Select encryption settings The setting values vary depending on the Netwk Authentic setting Data Encryption Set the encryption method When Netwk Authentic is set to Open or Shared Value...

Page 158: ...rk or turn the machine OFF and then ON Item Description Enhanced WSD Set whether to use our proprietary web services 1 Value Off On 1 The setting will be changed after restarting the device or the net...

Page 159: ...machine 2 Set SSL to On in SSL Setting SSL Setting page 8 23 Item Description IPSec Make this setting when you use IPSec Value Off On Item Description ThinPrint Select whether to use ThinPrint 1 2 Val...

Page 160: ...BASE Half 10BASE Full 100BASE Half 100BASE Full 1000BASE T Item Description USB Host This locks and protects the USB port USB host Value Unblock Block USB Device This locks and protects the USB interf...

Page 161: ...eration Guide NOTE This function is displayed when the optional SSD is installed and the optional Data Security Kit is activated DataSanitization Return the following information registered in the mac...

Page 162: ...and humidity This function can be used for fine adjustment of tone and color drift to print in the optimum color ColorCalibration page 10 20 If color tone does not improve or color drift does not impr...

Page 163: ...Obtain Network User Property 9 10 ID Card Settings 9 11 Using User Login Administration 9 12 Login Logout 9 12 Overview of Job Accounting 9 13 Enabling Job Accounting 9 14 Job Accounting Access 9 15 S...

Page 164: ...tor The security levels can be modified only by the Machine Administrator To manage the job account from PC In addition to the above settings the following are necessary to manage the job account from...

Page 165: ...key If the domain has not been set select the number where is displayed and select Menu Select Edit and select the OK key then enter the domain name in 256 characters or less Select the OK key and th...

Page 166: ...ser name and password are rejected check the following settings Network Authentication setting of the machine User property of the Authentication Server Date and time setting of the machine and the Au...

Page 167: ...th machine administrator rights and administrator privileges is already stored Each user s properties are Machine Administrator User Name DeviceAdmin Login User Name ECOSYS P6035cdn 3500 ECOSYS P7040c...

Page 168: ...of the machine administrator you must log in with machine administrator authority You can only view user information if you log in as a regular user The factory default login user name and login pass...

Page 169: ...9 7 User Authentication and Accounting User Login Job Accounting Setting User Login Administration Deleting a user To delete a user use KYOCERA Net Manager KYOCERA Net Manager Install Manual...

Page 170: ...n is selected the user does not have to type the name and password for each print job Prompt for name A screen for entering the user name and password will be displayed when attempting a printing The...

Page 171: ...9 9 User Authentication and Accounting User Login Job Accounting Setting User Login Administration 3 Click OK NOTE For other settings of job accounting refer to the following Printer Driver User Guide...

Page 172: ...eros Enabling User Login Administration page 9 3 Setting to obtain network user information is performed from the operation panel The details of the information to be obtained should be set with Comma...

Page 173: ...E If the login user name entry screen appears during operations enter a login user name and password and select Login For this you need to login with administrator privileges The factory default login...

Page 174: ...ogin administration is enabled the login user name and login password entry screen appears each time you use this machine Use the procedure below to login and logout Login If the login user name entry...

Page 175: ...eets Used on Jobs Printed from a PC To manage the number of jobs to be printed from the PC on the network you need to configure settings by using the printer driver on the PC 100 400 200 A 00000001 1...

Page 176: ...ame entry screen appears during operations enter a login user name and password and select Login For this you need to login with administrator privileges The factory default login user name and login...

Page 177: ...K key 2 Configure the settings key AccountingAccess OK key key Local or Network OK key NOTE If the login user name entry screen appears during operations enter a login user name and password and selec...

Page 178: ...unt List OK key Add 2 Enter the account ID Enter the account name OK key A new account is added on the account list NOTE If the login user name entry screen appears during operations enter a login use...

Page 179: ...estriction Items Applying Restriction Restriction can be applied in the following modes Item Descriptions Print Restrict Total Limits the total number of sheets used for printing Print Restrict Full C...

Page 180: ...ou want to change and select the OK key 4 Refer to step 2 of Adding an Account and Restricting the Use of the Machine to change account information 5 Select the OK key The account information is chang...

Page 181: ...K key 2 Delete an account 1 Select the account you want to delete and OK key 2 key Delete OK key Yes The account is deleted NOTE If the login user name entry screen appears during operations enter a l...

Page 182: ...nt ID Enter the Account ID Printing will be performed using the entered Account ID If this option is selected the user does not have to enter the Account ID for each print job Prompt for account ID A...

Page 183: ...r Job Account OK key key Job Account Set OK key key Apply Limit OK key For details on each function see the table below Item Description Apply Limit This specifies how the machine behaves when the cou...

Page 184: ...follows Item Descriptions Printed Pages Displays the number of color printing and black and white printing and the total number of pages used You can also use by Duplex and by Combine to check the nu...

Page 185: ...lay the screen 1 Menu key key User Job Account OK key 2 key Job Account Set OK key key Account Local OK key 3 Print the report key Account Report OK key Yes Accounting report is printed NOTE If the lo...

Page 186: ...y When the screen to enter the login user name and password appears If user login administration is enabled the screen to enter the login user name and password appears Enter a login user name and pas...

Page 187: ...the screen 1 Menu key key User Job Account OK key 2 Configure the settings key Unknown ID Job OK key key Reject or Permit OK key Item Descriptions Permit The job is permitted to be printed Reject The...

Page 188: ...ollowing topics Regular Maintenance 10 2 Cleaning 10 2 Toner Container Replacement 10 3 Waste Toner Box Replacement 10 7 Troubleshooting 10 9 Solving Malfunctions 10 9 Responding to Messages 10 13 Adj...

Page 189: ...ainer is replaced Print problems such as soiling of the reverse side of printed pages may occur if the paper transfer unit becomes dirty Wipe away the paper dust on the registration roller and the pap...

Page 190: ...10 000 images 12 000 images NOTE The toner container packed with the new printer has to fill up the system when operating the first time Therefore only 50 of the first toner kits can be used for prin...

Page 191: ...oubleshooting Regular Maintenance Replacing the Toner Container Installation procedures of the toner container is same for every color The procedures here represent the yellow toner container 1 2 3 4...

Page 192: ...10 5 Troubleshooting Regular Maintenance 5 6 7 IMPORTANT Do not touch the points shown below 5 6 5 6...

Page 193: ...does not close check that the new toner container is installed correctly in step 6 Return the exhausted toner container to your dealer or service representative The collected toner container will be...

Page 194: ...ular Maintenance Waste Toner Box Replacement When the waste toner box becomes full immediately replace the waste toner box 1 2 3 CAUTION Do not attempt to incinerate parts which contain toner Dangerou...

Page 195: ...oting Regular Maintenance 4 5 NOTE Return the exhausted waste toner box to your dealer or service representative The collected waste toner box will be recycled or disposed in accordance with the relev...

Page 196: ...ch is turned on Check the power cord Connect both ends of the power cord securely page 2 7 Blank sheets are ejected Are the originals loaded correctly Check that the settings of the application softwa...

Page 197: ...COSYS P6035cdn Select the Menu key Adjust Maint Service Setting MC and increase the adjustment value Increase the adjustment value 1 level at a time from the current value If there is no improvement a...

Page 198: ...y page 3 2 Is the paper damp Replace the paper with new paper page 3 2 Printouts are curled Is the paper damp Replace the paper with new paper page 3 2 Cannot print Is the machine plugged in Plug the...

Page 199: ...e adjustment value Increase the adjustment value 1 level at a time from the current value If there is no improvement after the value is increased by 1 level increase by 1 level again If there is still...

Page 200: ...ray page 3 7 Message Checkpoints Corrective Actions Reference Page Box limit exceeded 1 1 When Auto Error Clear is set to On processing resumes automatically after a set amount of time elapses For det...

Page 201: ...llowing Auto Err Clear page 8 16 Message Checkpoints Corrective Actions Reference Page Error occurred Turn the power switch off and on System error has occurred Turn the main power switch OFF and then...

Page 202: ...failed because there was insufficient space available on the SSD or RAM disk or because the RAM disk was disabled when demounting the SSD To print an error report and return the printer to the print...

Page 203: ...OK Multi copies cannot be printed because RAM disk is disabled or the SSD is not installed The job is canceled Select OK Try adding more memory or installing SSD and configuring the RAM disk settings...

Page 204: ...nsufficient space on the RAM disk If the optional RAM dis is installed increase the RAM disk size by changing RAM Disk Setting in System Menu Replace MK Replace Maintenance Kit which is displayed on t...

Page 205: ...ON If the error still occurs divide the file into smaller files If the error occurs after the file is divided the specified file may be damaged Delete the file 04 Insufficient space on SSD to complet...

Page 206: ...s been exceeded Turn the power OFF ON If the error still occurs the removable memory is not compatible with the machine Use the removable memory formatted by this machine If the removable memory canno...

Page 207: ...en returns to the Adjust Maint menu Color Registration Procedure This function is available to resolve color drift If it is not resolved by normal registration or to perform more detailed settings use...

Page 208: ...10 21 Troubleshooting Troubleshooting Chart Example 3 Display the correction menu key Adjust Magenta OK key The magenta correction menu appears...

Page 209: ...he values read from the chart and select the OK key Magenta correction is performed After a brief interval you will return to the standard menu for color printing position correction To increase the v...

Page 210: ...key Color Regist OK key key Detail OK key 2 Print the chart key Print Chart OK key Yes A chart is printed On the chart for each of M magenta C cyan and Y yellow charts for H 1 to 5 and V 1 to 5 are pr...

Page 211: ...es from V 3 center 2 Select the or key to change the H 1 to H 5 and V 3 items select the or key to enter the values read from the chart and select the OK key Magenta correction is performed After a br...

Page 212: ...and the error message will be cleared The machine resumes with the page that was printing when the jam occurred 1 Shows the location of a paper jam 2 Displays the Help screen NOTE For details on Help...

Page 213: ...tears during removal be sure to remove any loose scraps of paper from inside the machine Scraps of paper left in the machine could cause subsequent jamming Multi Purpose Tray 1 2 CAUTION The fixing un...

Page 214: ...10 27 Troubleshooting Troubleshooting 3 4 5 6...

Page 215: ...10 28 Troubleshooting Troubleshooting Cassettes 1 to 4 Procedures for handling a paper jam in Cassettes 1 to 4 are all the same This section explains procedures using Cassette 1 as an example 1 2...

Page 216: ...10 29 Troubleshooting Troubleshooting Rear Cover 1 Feed 1 2 CAUTION Some parts are very hot inside the machine Exercise caution as there is a risk of burn injury...

Page 217: ...10 30 Troubleshooting Troubleshooting 3 4 Rear Cover 2 1 NOTE If the paper cannot be removed do not try to forcefully remove it Rear Cover 1 Feed page 10 29...

Page 218: ...10 31 Troubleshooting Troubleshooting 2 3 4...

Page 219: ...10 32 Troubleshooting Troubleshooting Rear Cover 3 1 2 NOTE If the paper cannot be removed do not try to forcefully remove it Rear Cover 1 Feed page 10 29...

Page 220: ...10 33 Troubleshooting Troubleshooting Rear Cover 1 1 2 3 CAUTION Some parts are very hot inside the machine Exercise caution as there is a risk of burn injury A1...

Page 221: ...10 34 Troubleshooting Troubleshooting 4 5 6 A2 A2...

Page 222: ...10 35 Troubleshooting Troubleshooting Duplex Unit 1 2 3 CAUTION Some parts are very hot inside the machine Exercise caution as there is a risk of burn injury A1...

Page 223: ...10 36 Troubleshooting Troubleshooting 4 5 6 7 A2 A2 A3...

Page 224: ...10 37 Troubleshooting Troubleshooting 8...

Page 225: ...Using the Keys 11 10 Selecting Type of Characters 11 11 Characters That Can be Entered Using the Numeric Keys 11 11 Entering Symbols 11 12 Entering Characters 11 12 Paper 11 14 Basic Paper Specificati...

Page 226: ...Optional Equipment The following optional equipment is available for the machine 2 PF 5100 1 Card Authentication Kit B 3 Expansion Memory 5 IB 50 6 IB 51 4 HD 6 HD 7 7 SD Memory Card SDHC Memory Card...

Page 227: ...n on the previously registered local user list For more information about how to register this information refer to the following Card Authentication Kit B Operation Guide 2 PF 5100 Paper Feeder 500 s...

Page 228: ...metal object before handling the memory modules Or wear an antistatic wrist strap if possible when you install the memory modules Installing the Memory Modules 1 Turn off the machine and disconnect t...

Page 229: ...and stored on this SSD This enables high speed printing of multiple copies using an electric sort function Also you can use the Document Box functions What is Document Box page 5 4 5 IB 50 Network In...

Page 230: ...ng the SD SDHC Memory Card Once inserted in the machine s slot the contents of the SD SDHC memory card can be read from the operation panel or automatically when you power on or reset the machine Inst...

Page 231: ...t cannot be retrieved The Data Security Kit encrypts data before storing it in the SSD It guarantees higher security because no data cannot be decoded by ordinary output or operations 9 UG 33 ThinPrin...

Page 232: ...ta Security Kit Card Authentication Kit 1 1 This can be used on a trial basis for a limited time ThinPrint Option 1 NOTE Restrictions such as the number of times the application can be used during the...

Page 233: ...the item you can view Extend the trial period key Date of Trial Extend Yes The trial period is extended NOTE If you started the Security Kit or Thin Print option and entered the license key turn the p...

Page 234: ...aracter from the character list 3 Numeric keys Select to enter characters and symbols 4 Clear key Select to delete characters 5 OK key Select to finalize entry and return to the screen before the entr...

Page 235: ...key changes the character in the order from left to right _ 1 Repeats from the first character on the left 1 During number entry a b c A B C 2 Repeats from the first character on the left 2 During nu...

Page 236: ...he 7 key three times r is entered 2 Select the key r changes to R w x y z W X Y Z 9 Repeats from the first character on the left 9 During number entry _ space 0 Repeats from the first character on the...

Page 237: ...ey Displays the symbol list 5 Select the or key to move the cursor and select 6 Select the OK key is entered 7 Select the 3 key four times D is entered 8 Select the key Account Name Text ABC R Symbols...

Page 238: ...quality of paper Poor quality paper may result in unsatisfactory output Basic Paper Specifications The following table lists the specifications of paper that is supported with this machine Refer to t...

Page 239: ...on Those types of paper may produce harmful fumes from the heat of printing and may damage the drum Be sure to use the standard paper that contains at least 80 pulp i e not more than 20 of the total p...

Page 240: ...ies depending on the relative humidity in the room High relative humidity causes paper to become damp making the edges expand so it appears wavy Low relative humidity causes paper to lose moisture mak...

Page 241: ...ss Paper whiteness affects print contrast Use whiter paper for sharper brighter copies Quality Machine problems may occur if sheet sizes are not uniform or if corners are not square edges are rough sh...

Page 242: ...er Thus special paper is more likely than regular paper to cause printing problems Before purchasing special paper in volume try testing a sample to ensure the print quality is satisfactory General pr...

Page 243: ...by the force applied in the machine The carrier sheet bears the top sheet until the label is used This composition of labels may cause more problems The label surface must be covered completely with...

Page 244: ...us keep the package sealed until you are ready to use them Keep the following points in mind Do not use envelopes with exposed adhesive In addition do not use the type of envelope in which the adhesiv...

Page 245: ...fications page 11 14 Coated Paper Coated paper is created by treating the surface of the base paper with a coating that provides higher printing quality than plain paper Coated paper is used for parti...

Page 246: ...tterhead Envelope Thick High Quality Custom 1 to 8 Paper Size Cassette A4 A5 A6 B5 B6 Letter Legal Statement Executive Oficio II Folio 216 340 mm 16K B5 ISO Custom 105 148 mm to 216 356 mm Multi Purpo...

Page 247: ...nsion W D H 15 23 64 20 61 64 18 31 64 390 532 469 5 mm Weight ECOSYS P6035cdn Approx 63 9 lb Approx 29 0 kg ECOSYS P7040cdn Approx 67 2 lb Approx 30 5 kg without toner container Space Required W D Us...

Page 248: ...em Windows XP Windows Server 2003 Windows Vista Windows 7 Windows 8 Windows 8 1 Windows Server 2008 R2 Windows Server 2012 R2 Mac OS 10 5 or later Interface USB Interface Connector 1 Hi Speed USB Netw...

Page 249: ...In Sleep mode power consumption is kept to a minimum Bonjour Bonjour also known as zero configuration networking is a service that automatically detects computers devices and services on an IP networ...

Page 250: ...s operation of PCL6 KPDL3 PostScript 3 compatible FTP File Transfer Protocol A protocol to transfer files on the TCP IP network whether the Internet or an intranet Along with HTTP and SMTP POP FTP is...

Page 251: ...F PDF A and is a file format based on PDF 1 4 It has been standardized as ISO 19005 1 and is a specialization of PDF which has been mainly used for printing for long term storage A new part ISO 19005...

Page 252: ...ss When you enter the subnet mask be sure to set the DHCP setting to Off TCP IP Transmission Control Protocol Internet Protocol TCP IP is a suite of protocols designed to define the way computers and...

Page 253: ...and Deleting Custom Box 5 8 Editing Documents 5 10 Printing Documents 5 9 Storing Documents 5 8 D Data Security 8 25 Data Security Kit 11 7 DataSanitization 8 25 Date 8 15 Date Format 8 15 Date Setti...

Page 254: ...an Account 9 19 Editing an Account 9 18 Enabling Job Accounting 9 14 Job Accounting Access 9 15 Login 9 24 Logout 9 24 Overview of Job Accounting 9 13 Print Accounting Report 9 23 Printing 9 20 Restri...

Page 255: ...Jam Location Indicators 10 25 Multi Purpose Tray 10 26 Rear Cover 1 10 33 Rear Cover 1 Feed 10 29 Rear Cover 2 10 30 Rear Cover 3 10 32 Paper Length Guide 2 3 3 5 Paper Settings 8 7 Cassette 1 to 4 Se...

Page 256: ...1 28 Status Job Cancel 7 1 Subnet Mask 11 28 Settings 8 18 Supplies Checking the Remaining Amount 7 6 Symbols 1 2 System Menu 8 2 Adjustment Maintenance 8 26 Device Common 8 12 Network 8 18 Op Functio...

Page 257: ...in 2 12 Logout 2 13 Obtain NW User Property 9 10 Overview of User Login Administration 9 2 Printing 9 8 User Login Job Accounting 8 17 Job Accounting 9 13 Unknown ID Job 9 25 User Login 9 2 W Waste To...

Page 258: ......

Page 259: ...nd Floor 19 Byron Avenue Takapuna Auckland New Zealand Phone 64 9 415 4517 Fax 64 9 415 4597 KYOCERA Document Solutions Asia Limited 16 F Mita Centre 552 566 Castle Peak Road Tsuenwan NT Hong Kong Pho...

Page 260: ...84950 is a trademark of KYOCERA Corporation KYOCERA Document Solutions Deutschland GmbH Otto Hahn Strasse 12 40670 Meerbusch Germany Phone 49 2159 9180 Fax 49 2159 918100 KYOCERA Document Solutions Au...

Page 261: ...First edition 2015 6 2NTKDEN000...

Reviews: