background image

OTHER ADJUSTMENTS AND REPLACEMENTS

64

B

Auxiliary Electric

Max power is less than 110 W including the equipped light
55 W.

B

Slow Blow Fuse

Slow blow fuse is provided to protect the electrical circuits.
If the fusible link is blown, check the electrical circuits for
trouble and then replace with a new compatible slow blow
fuse.

(1) Fuse box
(2) Auxiliary electric A

(1) Fuse box
(2) Auxiliary electric A

(1) Slow blow fuse (50 A)

(1) Slow blow fuse (60 A)

Summary of Contents for Super Series 2 KX 91-3

Page 1: ...MODELS OPERATOR S MANUAL 1BAAGABAP0290 1BAAGABAP0280 English Australia Code No RC468 8131 4 K X 9 1 3 S 2 U 3 5 3 S 2 PRINTED IN JAPAN KUBOTA Corporation 2007 READ AND SAVE THIS MANUAL KX91 3 U35 3...

Page 2: ...ood from the soil and from the sea industrial development architecture and construction and transportation Thousands of people depend on KUBOTA s know how technology experience and customer service Yo...

Page 3: ...e Warning lamp Battery charge Warning lamp Auto Idle AI Lamp Indicator lamp Glow Working light switch Horn Wiper Washer switch Diesel Hydraulic fluid Gear oil Grease Fast Slow Excavator Overhead movem...

Page 4: ...best use of your excavator please read this manual carefully It will help you become familiar with the operation of the excavator and contains many helpful hints about excavator maintenance It is KUBO...

Page 5: ...Charge Lamp 12 Oil Lamp 12 Glow Lamp 12 LCD Display for Normal Operation 12 LCD Display for Warning 13 Warning Lamp 14 Checkpoints after Starting the Engine 14 STARTING THE ENGINE UNDER COLD CONDITIO...

Page 6: ...OF THE EXCAVATOR 38 MAINTENANCE 40 MAINTENANCE INTERVALS 40 OPENING AND CLOSING OF PARTS 43 Opening and Closing of the Fuel Tank Cap 43 Opening Closing of the Engine Hood 43 Opening Closing of the Sid...

Page 7: ...her Filter Element in Hydraulic Tank 57 Replacing Hydraulic Pilot Filter Element 58 EVERY 1000 SERVICE HOURS OR ONCE A YEAR 58 Replacing Air Filter Element 58 EVERY 1500 SERVICE HOURS 58 Checking Fuel...

Page 8: ...CONTENTS PREPARATION FOR OPERATION IN COLD WEATHER 69 PROCEDURE AFTER DONE WORK 69 LONG STORAGE 70 RECOMMENDED OILS 72 APPENDICES 73 MAIN DIMENSIONS 73 LIFTING CAPACITY 74...

Page 9: ...with a ROPS FOPS Do not modify structural members of ROPS by welding drilling bending grinding or cutting as this may weaken the structure If any component is damaged replace it Do not attempt repair...

Page 10: ...undergone all necessary maintenance 15 Do not modify the excavator otherwise it could lead to unforeseen safety problems 16 Make sure attachments particularly those utilizing quick attach systems are...

Page 11: ...sible adult 3 Be alert and shut your machine down if children enter the work area 4 Never carry children on your machine There is no safe place for them to ride They may fall off and be run over or in...

Page 12: ...g with fuel Avoid spilling and over filling of fuel 3 Smoking is prohibited while refueling or handling the battery Keep sparks and fire away from the fuel tank and battery Flammable gases escape from...

Page 13: ...ust and other foreign particles 14 Securely support excavator with stands or suitable blocking before working underneath For your safety do not work under any hydraulically supported devices They can...

Page 14: ...SAFE OPERATION 6 6 DANGER WARNING AND CAUTION LABELS...

Page 15: ...7 SAFE OPERATION...

Page 16: ...SAFE OPERATION 8...

Page 17: ...9 SAFE OPERATION...

Page 18: ...SAFE OPERATION 10...

Page 19: ...11 SAFE OPERATION...

Page 20: ...SAFE OPERATION 12...

Page 21: ...e routine maintenance can be done by yourself Your KUBOTA dealer is responsible for servicing and the delivery of spare parts When ordering spare parts from your KUBOTA dealer always mention the seria...

Page 22: ...ngine Type Water cooled 4 cycle diesel engine with 3 cylinder Model name KUBOTA D1703 M E3 BH US2 KUBOTA D1703 M E3 BH US1 Total displacement cc 1647 Engine power SAE J1955 gross kW 22 1 Rated speed r...

Page 23: ...TS DEPICTED CONTENTS 1 Bucket cylinder 2 Arm 3 Bucket link 2 and 3 4 Bucket link 1 5 Bucket 6 Boom cylinder 7 Swing bracket 8 Track 9 Dozer blade 10 Boom 11 Arm cylinder 12 Working light 13 Canopy 14...

Page 24: ...4 Breaker lock switch 5 Travel speed switch 6 Speed indicator light 7 Starter switch 8 LCD display 9 Flow volume setting switch 10 Switch for Auto idle control 11 Heater switch CAB type only 12 Emerge...

Page 25: ...ck lever DEPICTED CONTENTS 1 Drive lever left 2 Lock lever left 3 Control lever for front attachments left 4 Drive pedal 5 Drive lever right 6 Lock lever right Only Canopy type 7 Control lever for fro...

Page 26: ...abels See DANGER WARNING AND CAUTION LABELS in SAFE OPERATION CAB TYPE MACHINES BWiper Washer Switch CAB type only Turn the starter switch to position RUN and push the switch for the wiper and washer...

Page 27: ...k in a dusty conditions or if the glass windows get foggy A RECIRCULATION Set the knob to the position and the in CAB air will be recirculated This is useful for heating the CAB quickly or keeping it...

Page 28: ...he area between front window and CAB frame Otherwise the operator risks serious injuries by pinching or crushing A Other persons should stay away when opening the window To open and close the front wi...

Page 29: ...ition and press the working light switch BEmergency Hammer CAB type only To avoid personal injury A When breaking the window pane close your eyes and cover them with an arm Emergency hammer is for bre...

Page 30: ...not to overload the battery and starter avoid start ups of more than 10 sec A When engine does not start in 10 sec please wait 20 sec or more before attempting to restart STARTING THE ENGINE To avoid...

Page 31: ...itch Press the display selector switch while the engine is running The LCD meter display will change from one indication mode to the other Change the two mode display according to your jobs A With the...

Page 32: ...l turn on A The above indication appears momentarily when the engine is started but it does not mean any trouble This is because the oil charge sensor output becomes unstable when the engine is starte...

Page 33: ...inue the job 2 Reduce engine rpm s to idle and keep it at idle for 5 minutes 3 Stop the engine and check the following points 1 3 1 Low coolant level or leak 2 Fan belt tension 3 Mud or dust deposits...

Page 34: ...Engine After starting the engine but before starting operation check the following points 1 Turn the throttle potentiometer down and let the engine idle for approx five minutes This allows the engine...

Page 35: ...fluid temperature is too low the operations will be affected Do not operate the excavator under full load before the engine has warmed up enough STOPPING THE ENGINE To avoid personal injury or death A...

Page 36: ...if equipped 5 Connect the terminal of the red jumper cable with the plus terminal of the low battery and connect the other end of the cable to the plus terminal of the auxiliary battery 6 Connect the...

Page 37: ...tant role during the run in phase of the excavator The numerous movable parts are not yet run in so many fine metal particles are generated and cause damage and shorten the life of many components Pay...

Page 38: ...the lowest level C Arm rest Arm rest may be set at upright position if desired C Arm rest angle adjustment Turn the arm rest angle adjust knob to the desired angle BLock Lever To avoid personal injur...

Page 39: ...es as well as special regulations for night work BTravel Buzzer When you handle the drive levers the buzzer sounds at the same time or before the excavator starts to run DRIVING To avoid personal inju...

Page 40: ...n 180deg i e the dozer in relation to the operator s seat is behind then the travel direction is opposite to the drive direction of the levers when activating the drive lever forwards the machine in r...

Page 41: ...peed changes from second speed to first The symbol light goes out A Each time the travel speed switch is pressed the travel speed is switched between first and second A Do not activate the travel spee...

Page 42: ...the excavator turns right the left track seen from the operator will move backward from the operator C Change of Direction while Travelling 1 While travelling forwards bring the left drive lever into...

Page 43: ...When traveling up or down a slope use extra caution and follow the instructions below While traveling uphill keep the lower edge of the bucket approx 20 to 40cm above the ground Although the KUBOTA e...

Page 44: ...iar A Position the pattern selector lever located on the right side of operator s seat in either the lower position pattern A or the upper position pattern B A Engage the lock lever to prevent acciden...

Page 45: ...3 to 5 seconds This condition results from the viscosity of the hydraulic oil and is not a sign of malfunction The cushion cylinder will operate normally as the oil warms up A When lowering the boom...

Page 46: ...This is caused by the combined load of the arm and bucket moving the cylinder piston away from the hydraulic flow causing a delay in the cylinder action until the flow catches up with cylinder piston...

Page 47: ...t and the upper structure will turn to the left 2 Move the control lever to the right and the upper structure will turn to the right BBoom Swing Operation 1 Tilt the pedal rearward 2 Step on the left...

Page 48: ...o get the arm relieved The service port will otherwise get fully open A When the lock lever is raised the service port activation switch is off A Let the engine warm up after start up for approx 10 mi...

Page 49: ...port operation by pushing the service port activation switch Each time the service port activation switch is pushed the action mode changes from 1 through 4 A When turning the starter key to the RUN p...

Page 50: ...30 EXCAVATOR OPERATION A Setting of limited flow volume Max flow volume right and left can be adjusted in 15 stages independently...

Page 51: ...31 EXCAVATOR OPERATION A Service Port Max Flow Volume Max Flow Volume Theoretical L min KX91 3S2 63 0 U35 3S2 60 0 Max Pressure MPa kgf cm KX91 3S2 23 5 240 U35 3S2 24 5 250...

Page 52: ...r breaker choices contact your dealer A Do not change the engine rpm using the limited flow volume setting The service port speed will be otherwise lower by which the attachment may get interrupted In...

Page 53: ...ry A Stop the engine before removing changing the equipment A Release pressure in the hydraulic system before removing chaging the equipment See HOW TO RELEASE PRESSURE TRAPPED IN THE HYDRAULIC SYSTEM...

Page 54: ...ing operations A Excavation using the gravitational impact of the machine A Compacting of gravel or soil using the dropping action of the bucket A Excavation using the traveling power of the machine A...

Page 55: ...C SYSTEM A Lower the attachments and the dozer blade to the ground A Turn the key to STOP position and shut off the engine A After stopping the engine turn the key to RUN position A Release pressure i...

Page 56: ...the CAB of the vehicle could be damaged when swinging around the upper body A Do not jack up the machine using its boom to load or unload the excavator from the vehicle Doing this is dangerous A Make...

Page 57: ...ramps with the dozer in the front After ensuring that the tracks are completely on the bed swing the upper body around to the back of the vehicle 5 Block the tracks and chain down the excavator with...

Page 58: ...xed in the middle of the hook 5 The load must be lifted vertically from the ground 6 Do not enter the working area under suspended loads and do not move the load over people The load must only be move...

Page 59: ...JIS G 35 25 6 x24 1 Boom side Hook in the steel cable with a shackle into the lifting hole 2 Dozer side Hook in the steel cable with a shackle into the lifting hole around the CAB or canopy 3 Lifting...

Page 60: ...y 2 years 59 14 Air filter element Outer element clean every 200 hrs 52 2 replace every 1000 hrs 58 2 Inner element replace every 1000 hrs 58 2 15 Greasing swing ball bearings every 200 hrs 53 16 Fuel...

Page 61: ...ain every 50 hrs 49 49 10 Battery condition check every 50 hrs 49 11 Greasing swing bearing teeth every 50 hrs 51 12 Fan belt tension adjust every 200 hrs 51 13 Radiator hoses and clamps check every 2...

Page 62: ...filter more frequently if used under dusty conditions When the filter is very dirty from dusty conditions replace the filter 3 Replace only if necessary 4 Consult your local KUBOTA Dealer for this se...

Page 63: ...ency A Do not touch the exhaust muffler or the exhaust pipe serious burns can occur Insert the key into the key hole and turn it clockwise to open the hood To close it lower the bonnet and hold it dow...

Page 64: ...n in the storage box U35 3S2 1 Pull the seat lock lever and tilt over the seat forward 2 Store the tools in the storage box To avoid personal injury A Stop the engine and remove the key before tilting...

Page 65: ...eeze and water in the specified mixing ratio up to the full level See Changing Radiator Coolant in every 2 years maintenance A Do not fill the reserve tank over the FULL marking A Do not fill with dir...

Page 66: ...he engine and remove the key before checking the oil level A Before filling oil wipe away all sand and dust from around the oil port Make sure to use an identical type of hydraulic fluid A The excavat...

Page 67: ...ts After ending work grease again Grease the marked grease nipples shown by arrows in the illustration below 1 Boom bottom linkage 1 place 2 Arm bottom linkage 1 place 3 Bucket link pin 4 places 4 Boo...

Page 68: ...e If the windows washer is switched on with the washer liquid tank empty the motor may be damaged Always keep the tank filled BChecking and Cleaning Engine and Electrical Wiring To avoid personal inju...

Page 69: ...lable type battery if the fluid level is below the LOWER lower limit level mark Otherwise the battery component parts may prematurely deteriorate which may shorten the battery s service life or cause...

Page 70: ...ery start with the positive terminal first A Do not check battery charge by placing a metal object across the terminals Use a voltmeter or hydrometer 1 Make sure each electrolyte level is to the botto...

Page 71: ...bolt 1 shift the alternator 2 in the direction shown by the arrow 2 Replace the fan belt if worn out cracked or torn A If the engine is run with a loose fan belt the belt could slip and cause overhea...

Page 72: ...the TOP mark upwards Do not remove the inner element safety element A Should the machine be used in extreme dusty areas the air filter element must be inspected and cleaned more frequently than in th...

Page 73: ...d air Pressure of compressed air must be under 205 kPa 2 1 kgf and the cartridge should be blown clean from the inside to the outside until the dust deposits are noticeably reduced A If the air suctio...

Page 74: ...njury A First stop the engine then remove the key and wait long enough for the oil to cool down 1 Remove the drain plug on the underside of the engine and drain all oil 2 Re tighten the drain plug 3 F...

Page 75: ...top the engine and remove the key 6 The engine oil level is reduced by the amount of the filter capacity after the engine is started It is necessary to add oil A Always check the oil level after havin...

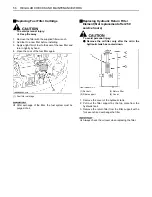
Page 76: ...r the fuel system must be purged of air BReplacing Hydraulic Return Filter Element first replacement after 250 service hours To avoid personal injury A Remove the oil filter only after the oil in the...

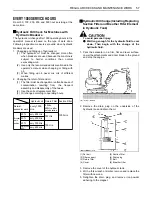
Page 77: ...oil 1 The filter must be changed more often because of contamination resulting from the frequent assembly and disassembly of the hoses 2 Use the correct replacement filter 3 Oil change according to op...

Page 78: ...cover firmly 8 Let the engine run for approx 3 minutes 9 Check the oil level of hydraulic oil tank EVERY1000SERVICEHOURSORONCEA YEAR BReplacing Air Filter Element Open the engine cover and remove the...

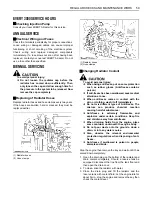
Page 79: ...ns poison A If anti freeze has been swallowed seek medical attention at once A When anti freeze comes in contact with the skin or clothing wash it off immediately A Do not mix different types of Anti...

Page 80: ...n the radiator cap properly If the cap is loosely or not properly fitted overheating of the engine can result due to coolant fluid loss BReplacing Fuel Hose Replace the hoses and clamps See Checking F...

Page 81: ...ve the cover 2 2 Apply grease 4 to the grease nipple 3 3 Tension the track in the lifted position so that the distance A clearance between the center track roller and the track surface of the track is...

Page 82: ...w swing turn Avoid spin turns to reduce lug wear and entry of dirt 2 The relief valve may be activated if too much dirt and sand clog the tracks In this case move the machine for a short distance stra...

Page 83: ...e track with the help of the boom arm and bucket idle the engine and remove mud from the track especially from the openings of the link plate carefully CHANGING THE BUCKET To avoid personal injury A W...

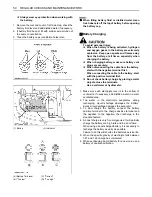
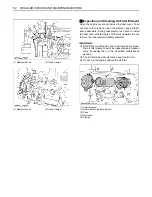
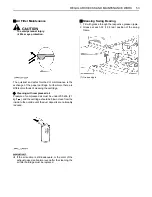
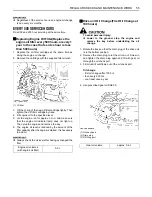
Page 84: ...W BSlow Blow Fuse Slow blow fuse is provided to protect the electrical circuits If the fusible link is blown check the electrical circuits for trouble and then replace with a new compatible slow blow...

Page 85: ...in winter Pour hot water over the radiator Battery is almost dead insufficient compression Recharge battery Insufficient engine power Low fuel level Check fuel and add if necessary Clogged air cleane...

Page 86: ...bucket drive swing and dozer power is too low Hydraulic oil level too low Add oil Leakages of hoses and or joints Replace hose or joint Swing motor and front attachment does not work Lock lever in LO...

Page 87: ...failure Check the fan belt When the belt is in good condition keep running until the battery becomes dead Immediately contact your local dealer for repair red 24V line engine startup alternator defect...

Page 88: ...from OFF to RUN repeatedly 10 times the message disappears C In case the service hour meter replaced due to any trouble with it the meter is set to 0 Contact your KUBOTA dealer for details No Check po...

Page 89: ...A Use permanent anti freeze or long life coolant A Drain the coolant completely and clean the inside of the radiator then fill with the water and anti freeze mixture A The anti freeze acts as an anti...

Page 90: ...n oil change and grease the excavator 3 Heavily grease the visible section of the cylinder rods 4 Remove the battery and store indoors 5 If it is expected that the temperature will sink below the 0 32...

Page 91: ...nt parts To prevent serious damage to the hydraulic system use only a KUBOTA genuine hydraulic hose Inspection Interval Check points Daily Checks Oil leak at fuel and hydraulic hose connections and po...

Page 92: ...engine oil Multi purpose Shell Rotella T15W 40 XD 3 15W 40 XD 3 Extra 15W 40 In winter or by low temperatures SAE 75 Mobilube HD80W 90 MIL L 2105C Shell Oil S8643 SAE 80 Mobilube HD80W 90 Shell Spira...

Page 93: ...parentheses CAB type models mm A B C D E F G H I J KX91 3S2 410 475 1550 4940 3530 3185 2390 1310 3485 5245 U35 3S2 600 635 1700 4945 4720 3525 3315 3140 2230 850 3665 5260 K L M N O P Q R S KX91 3S2...

Page 94: ...ng and other lifting accessories are taken into consideration for the loads Machine conditions No bucket all others according to the standard regulations To avoid personal injury or death A No loads g...

Page 95: ...75 LIFTING CAPACITY...

Page 96: ...76 LIFTING CAPACITY...

Page 97: ...77 LIFTING CAPACITY...

Page 98: ...78 LIFTING CAPACITY...

Reviews: