


EZHD-TVL4/8/16 DVR Quick Installation Guide
4
DVR Installation
During the installation of the DVR:
1.
Use brackets for rack mounting (where applicable; otherwise, use a suitable rack shelf).
2.
Ensure there is ample room for audio and video cables.
3.
When installing cables, ensure that the bend radius of the cables are no less than five times than its diameter.
4.
Connect both the alarm and RS-485 cable.
5.
Allow at least 2cm (≈0.75-inch) of space between racks mounted devices.
6.
Ensure the DVR is grounded.
7.
Environmental temperature should be within the range of -10
ºC ~ 55
ºC, 14ºF ~ 131ºF.
8.
Environmental humidity should be within the range of 10% ~ 90%.
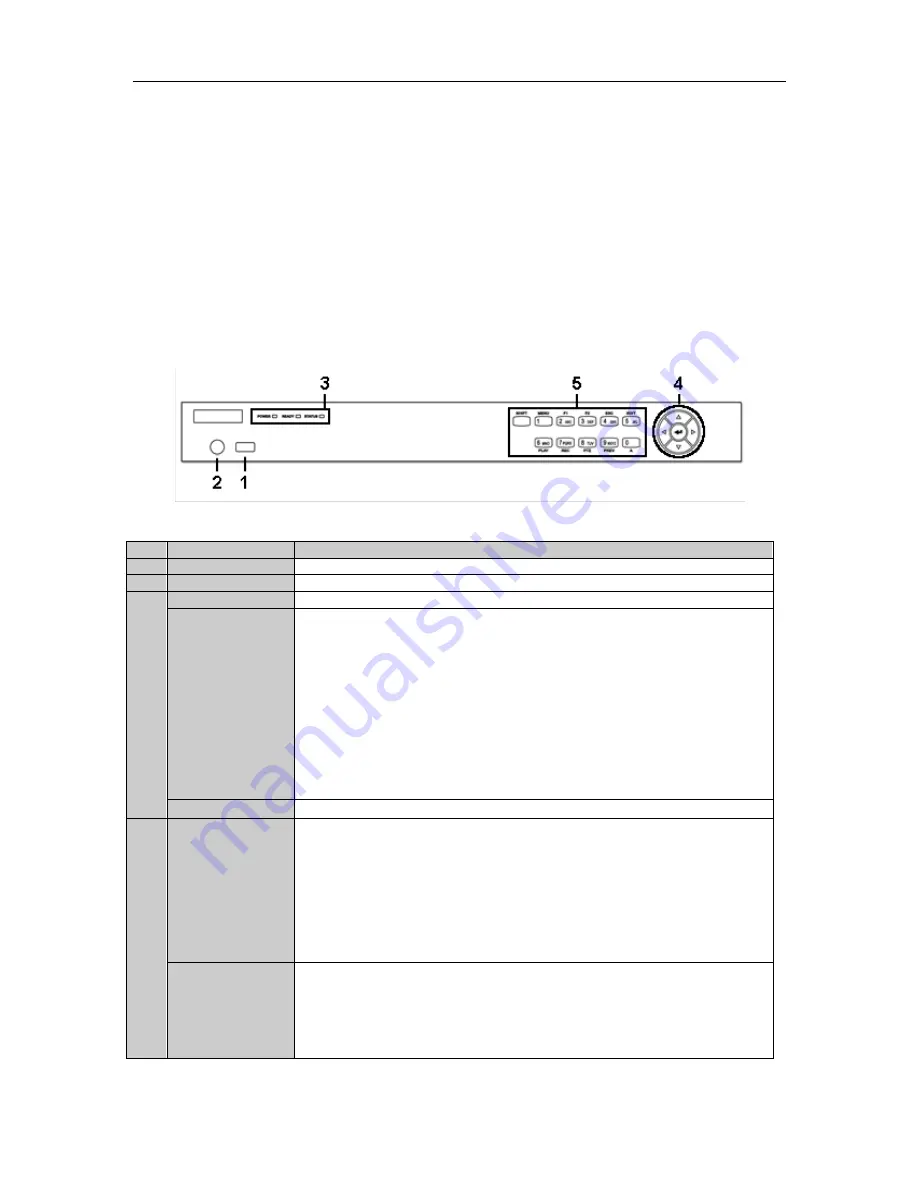
Front Panels
Front Panel of 4/8/16ch DVR
No.
Name
Function Description
1
USB Interface
Connect to USB mouse or USB flash memory.
2
IR Receiver
Receiver for IR remote control.
3
POWER
Power indicator lights in green when DVR is powered up.
STATUS
Indicator turns green when DVR is controlled by an IR remote control with the
address from 1~254;
Indicator turns red when the SHIFT button is used;
Indicator does not light when the DVR is controlled by a keyboard or by the IR
remote control with the address of 255;
Indicator turns green when the DVR is controlled by IR remote control (with the
address from 1~254) and keyboard at the same time , and the SHIFT button is not
used;
Indicator turns orange : (a) when the DVR is controlled by IR remote control (with
the address from 1~254) and keyboard at the same time and the SHIFT button is used
as well; (b) when the DVR is controlled by IR remote control (with the address from
1~254) and the SHIFT button is used.
Tx/Rx
TX/RX indictor blinks in green when network connection is functioning properly.
4
DIRECTION
The DIRECTION buttons are used to navigate between different fields and items in
menus.
In Playback mode, the Up and Down button is used to speed up and slow down
recorded video.
In All-day Playback mode, the Left/Right button can be used to select the recorded
video for the next/previous day; in Playback by Normal Video Search, the Left/Right
button can be used to select the next/previous recorded file.
In Live View mode, the directional buttons can be used to cycle through channels.
In PTZ control mode, it can control the movement of a PTZ camera.
ENTER
Confirm selection in any of the menu modes. It can also be used to tick checkbox
fields.
In Playback mode, it can be used to play or pause the video.
In Single-frame Playback mode, pressing the ENTER button will advance the video
by a single frame.
In Auto-switch mode, it can be used to stop /start auto switch.


