37
36
2. Assembly of the microscope
For packaging purposes, the microscope is delivered in several separate parts.
The assembly of the microscope is easy.
2. Assembly of the microscope
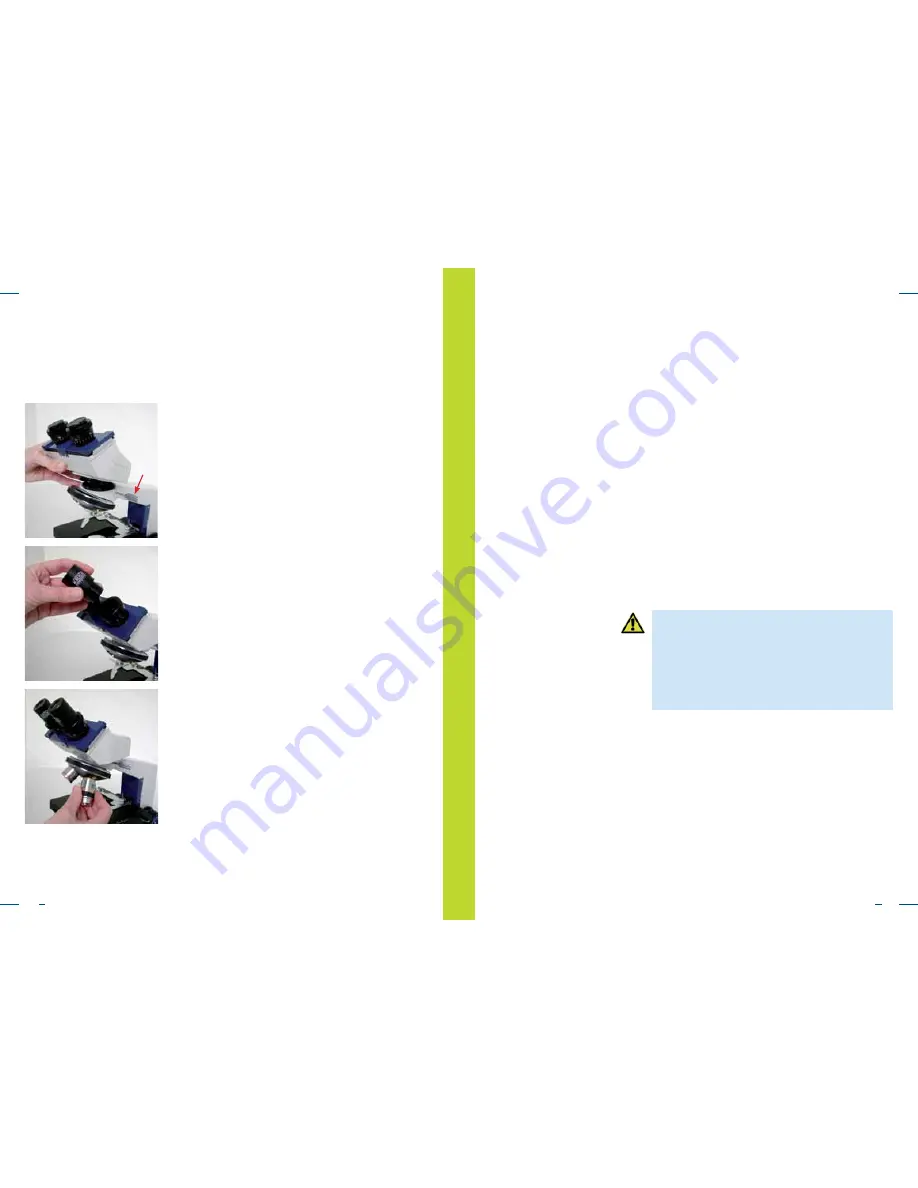
1. Remove the stand from the packaging, attach
the ocular head and fasten it by using the screw
located at the side.
2. Remove the covers and insert the eyepieces into the
ocular head.
3. Unpack the four lenses from the plastic boxes and
screw them into the lens turret.
The microscope is now ready for use. In the appendix
you will find an explanation on how to attach the
accessories.
3. Operating the microscope
3. Operating the microscope
1. Turn on the main switch.
2. Place the sample on the microscope stage.
3. Release the coarse adjustment pre-selection stop
(see 3.2).
4. Focus with the 4x or 10x object lens on the sample.
5. Adjust the eye distance and dioptre compensation
(see 3.1).
6. Swivel in the desired object lens.
7. Lock the adjusting level for the coarse adjustment
pre-selection stop into position (see 3.2).
8. Adjust the light intensity using the brightness
control.
9. Fine adjust the focus using the fine adjustment
knob.
10. Adjust the aperture diaphragm (see 3.3)
Note
In case there is no power available, the mirror
(available as an accessory) can be used to illumi-
nate the sample. For this purpose, remove the bulb
condenser and replace it with the mirror.
The base of the mirror is screwed into the socket of
the bulb condenser.


