Krone MX 310 GD Original Operating Instructions Download Page 1

O

r

ig

in

a

o

p

e

r

a

t

in

g

 i

n

s

t

r

u

c

t

io

n

s


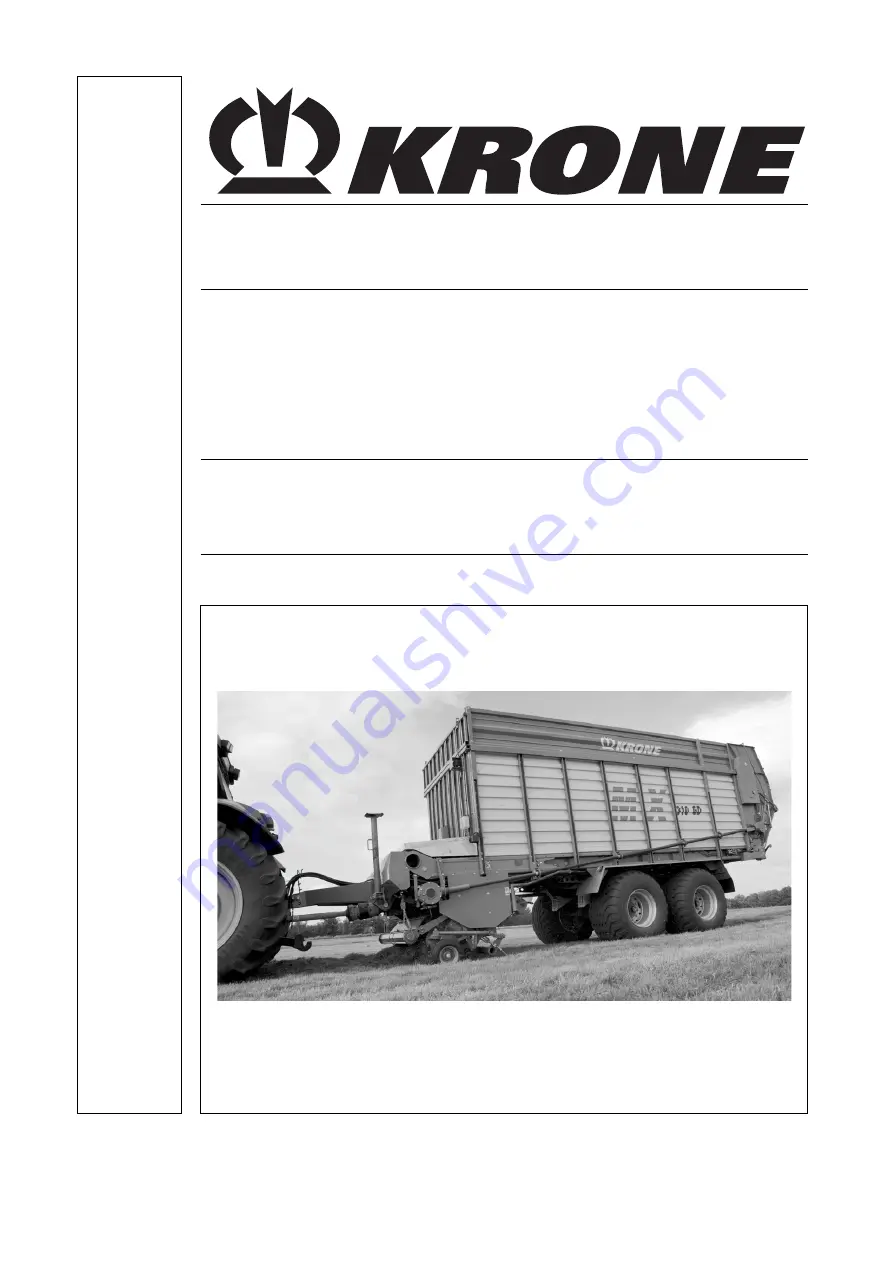
 Short-cut loading wagon / Short-cut 

feeder wagon 


<v>T - Typ1</v> 

MX 310 GL

</v>  

<v>T - Typ2</v> 

MX 350 GL

</v>  

<v>T - Typ3</v> 

MX 310 GD

</v>  

<v>T - Typ4</v> 

MX 350 GD

</v>  

<v>T - Typ5</v> </v>  

<v>T - Typ6</v> </v>  
<v>T - Typ7</v> </v>  
<v>T - Typ8</v> </v>  
<v>T - Typ9</v> </v>  
<v>T - Typ10</v> </v>  


(

<v>T - ab Masch.-Nr.</v> 

from serial no.

</v>

: 785 000) 


<v>T - Bestell-Nr.</v> 

Order no.

</v>

: 150 000 122 02 en 


<v>B - Titelbild</v> 

</v> 

18.03.2010 

Summary of Contents for MX 310 GD

Page 1: ...der wagon v T Typ1 v MX 310 GL v v T Typ2 v MX 350 GL v v T Typ3 v MX 310 GD v v T Typ4 v MX 350 GD v v T Typ5 v v v T Typ6 v v v T Typ7 v v v T Typ8 v v v T Typ9 v v v T Typ10 v v v T abMasch Nr v from serial no v 785 000 v T Bestell Nr v Order no v 150 000 122 02 en v B Titelbild v v 18 03 2010 ...

Page 2: ...ry and EC Directive 2004 108 EC EMC The signing Managing Director is authorised to compile the technical documents Spelle 18 03 10 Dr Ing Josef Horstmann Managing Director Design and Development Year of manufacture Machine No Pos 2 BA Vor wort Sehr geehrter Kunde 0 mod_1195626300326_78 doc 905 Dear customer Dear customer You have now received the operating instructions for the KRONE product which ...

Page 3: ...ter er Verlauf Ladewagen 0 mod_1198058134800_78 doc 32768 Note Throughout the remainder of these operating instructions both the short cut loading wagon and the short cut discharge wagon will be referred to by the terms machine and loading wagon Pos 4 4 BA Vor wort Beachten Sie für Maschi ne 0 mod_1195626904076_78 doc 944 Please note The operating instructions are part of your machine Only operate...

Page 4: ...the Operating Instructions 24 4 6 Identification of the hazard warnings 24 4 6 1 Personnel Qualification and Training Fehler Textmarke nicht definiert 25 4 6 2 Dangers in Case of Non compliance with the Safety Instructions 25 4 6 3 Safety conscious work practices 25 4 7 Safety Instructions and Accident Prevention Regulations 26 4 8 Hitched Implements 27 4 9 PTO operation 28 4 10 Hydraulic system 2...

Page 5: ...ydraulic connection option Medium 51 8 Medium Control Unit 53 8 1 Mounting 54 8 2 Control unit 54 8 3 Electrical power supply 55 8 4 Control unit overview 56 8 5 Operational readiness 58 8 6 Switching the working floodlight on off 58 8 7 Swinging cutter in out 59 8 8 Open close tailgate 60 8 9 Raise lower offset drawbar 61 8 10 Raise lower pick up 62 8 11 Floor conveyor supply 63 8 11 1 Activating...

Page 6: ...ges 74 8 21 Displaying the Software Version 74 9 Comfort Control Unit 75 9 1 Mounting the control unit 76 9 2 Electrical power supply 76 9 3 Control unit 77 9 4 Overview 78 9 5 Description of the keys 79 9 6 Operational Readiness 81 9 7 Manual Mode 82 9 7 1 Basic screen loading operation 82 9 7 2 Basic screen image Unloading operation 88 9 8 Buttons on the Machine 94 9 9 Menu Level 95 9 9 1 Short ...

Page 7: ...3 1 With Electronically Controlled Coaster Steering Axle Option Comfort Control Unit 144 10 3 2 Menu 4 6 Diagnostics of Driving Speed Direction of Travel Indicator 145 10 3 3 Menu 1 8 Softkeys ISO terminal 146 10 3 4 Auxiliary Control 148 10 3 4 1 Overview of Auxiliary Functions during the Loading and Unloading Mode 148 10 3 5 Example of a Joystick Assignment for Fendt Default Setting 149 11 Opera...

Page 8: ...eft side of the machine 172 12 6 Setting the inclination of the blade bar 172 12 7 Adjusting the right cylinder to the locking bolt 173 12 8 Adjusting the locking device for individual blades response threshold 174 13 Maintenance 175 13 1 Special Safety Instructions 175 13 2 Test run 175 13 3 Torques 176 13 4 Torques Countersunk Screws 177 13 5 Hydraulics 178 13 6 Load sensing connection 179 13 7 ...

Page 9: ... 13 26 Discharge roller gear front GD 203 13 27 Discharge roller gear rear GD 204 13 28 Chain tension 205 13 28 1 Drive conveyor unit 205 13 28 2 Pick up drive 206 13 29 Floor conveyor feed 207 13 29 1 Shortening of the floor conveyor chain 208 13 30 Discharger 209 13 31 Scraper 209 13 32 Distance from Blade to Drum 210 13 33 Distance from Scraper to Drum 211 13 34 Checking the safety rollers of s...

Page 10: ...6 Placing in Storage 225 16 1 Special Safety Instructions 225 16 2 At the End of the Harvest Season 226 16 3 Before the Start of the New Season 227 16 4 Special Safety Instructions 227 17 Malfunctions Causes and Remedies 228 17 1 Special Safety Instructions 228 Pos 7 BA Seitenumbr uch 0 mod_1196175311226_0 doc 4165 ...

Page 11: ...tained in the other sections Pos 8 2 BA Ei nleitung Gültigkeit Ladewagen MX Baurei he 3 mod_1205851031041_78 doc 73875 3 1 Validity These operating instructions apply to the loading wagons of the following types MX 310 GL MX 310 GD MX 350 GL MX 350 GD Pos 8 3 Ü berschriften Ü berschriften 2 K O Kennzeichnung 0 mod_1195564622099_78 doc 496 3 2 Identification Plate Pos 8 4 BA Ei nleitung Kennzeichnu...

Page 12: ...ng the machine or ordering spare parts be sure to provide type designation vehicle ID number and the year of manufacture To ensure that these data are always available we recommend that you enter them in the fields above Note Authentic KRONE spare parts and accessories authorised by the manufacturer help to ensure safety The use of spare parts accessories and other devices which are not manufactur...

Page 13: ...as hay straw and grass silage Loading wagons are built exclusively for customary use in agricultural work or work of a similar nature intended use Pos 8 8 3 BA Ei nleitung Besti mmungsgemäßer Gebr auch Nicht bestimmungs gemäss 0 mod_1196401324340_78 doc 7690 Any use of the machine for other purposes is deemed not to be in accordance with intended use The manufacturer shall not be liable for any re...

Page 14: ...mm 1450 Track width mm 1950 2000 Tyres 500 55 20 620 40 R22 5 700 45 22 5 DIN volume DIN 11741 about m 3 31 KRONE foreign body safety protection Individual knife retention Chop length for 21 blades 41 blades approx mm approx mm 74 37 PTO speed rpm max 1000 Number of discharge rollers 2 2 3 1 Pick up working width mm 1900 Power consumption approx kW HP 88 120 Permitted gross weight kg 15 500 20 000...

Page 15: ...ty protection Individual knife retention Chop length for 21 blades 41 blades approx mm approx mm 74 37 PTO speed rpm max 1000 Number of discharge rollers 2 3 1 Pick up working width mm 1900 Power consumption approx kW HP 92 125 Permitted gross weight kg 20 000 Permissible supporting load kg 2000 Loading time approx min 6 9 Unloading time approx min 2 3 5 Ground clearance of hydraulic offset drawba...

Page 16: ... Effect Danger to life or serious injuries Immediately replace damaged or illegible adhesive labels Following repair work always attach appropriate adhesive safety stickers to all the replaced modified or repaired components Never clean areas carrying an adhesive safety label using a high pressure cleaner Familiarise yourself with the statement of the warning pictograms The adjacent text and the s...

Page 17: ...fect Adhesion of the label The surface for affixing the adhesive label must be clean and free of dirt oil and grease Pos 10 7 Überschriften Überschriften 3 A E Ansprechpartner 0 mod_1195569394286_78 doc 839 4 2 3 Contact Pos 10 8 Adressen Adresse M aschinenfabri k KRON E Spelle 0 mod_1195568531083_78 doc 734 Maschinenfabrik Bernard Krone GmbH Heinrich Krone Strasse 10 D 48480 Spelle Germany Teleph...

Page 18: ...er M aschine 0 mod_1195634967326_78 doc 1020 4 3 Position of the Adhesive Safety Stickers on the Machine Pos 10 11 BA Sicherheit Aufkleber Ladewagen Sicherheitsaufkl eber MX GL GD 3 mod_1205852762588_78 doc 73955 GL MX000003 7 8 9 7 7 1 2 5 6 6 8 11 4 4 11 9 4 5 3 3 9 4 5 9 GL GD 10 GD GL Fig 2 ...

Page 19: ... the raised tailgate Order No 939 521 1 2x 5 Do not step on the loading surface when the PTO shaft is connected and the engine is running Order No 939 414 2 1 x GD Order No 939 414 2 3 x GL 6 No one is permitted in the swivel range of the tailgate while the tractor motor is running Order No 939 412 2 2x 7 Never reach into the area where there is danger of crushing as long as parts could be moving ...

Page 20: ...Safety 20 MX000003 7 8 9 7 7 1 2 5 6 6 8 11 4 4 11 9 4 5 3 3 9 4 5 9 GL GD 10 GD GL Fig 3 ...

Page 21: ...tractor engine and support the tailgate Order No 939 516 0 2x 10 Close the protective equipment before putting into operation Order No 942 002 4 1 x GD 11 Danger due to rotating machine parts Order No 942 200 1 2 x GD Pos 10 12 BA Seitenumbruch 0 mod_1196175311226_0 doc 4165 ...

Page 22: ...en Hinweisaufkl eber an der M aschine 0 mod_1195635067920_78 doc 1039 4 4 Position of the General Information Labels on the Machine Pos 10 14 BA Sicherheit Aufkleber Ladewagen Hi nweisaufkl eber MX GL GD 35 mod_1256808955673_78 doc 327503 MX000004_1 1 6 9 3 2 4 11 5 10 Fig 4 ...

Page 23: ...Y1 Not Handbetätigung Y6 Y7 Y10 Y11 Y8 Y9 Y5 Y18 Y4 Y3 Fkt 1Fkt 2 27 002 581 0 Y7 Y5 Y18 Y6 Y10 Y11 Y8 Y9 Y1 Y3 Y4 27 002 581 0 1 x with Medium version 7 Magnetventile Funktionen Funktionsschaubild 1 2 3 Y1 Not Handbetätigung Y6 Y7 Y10 Y11 Y8 Y9 Y5 Y18 Y14 Y4 Y3 Fkt 1Fkt 2 27 002 582 0 Y5 Y7 Y18 Y6 Y10 Y14 Y11 Y8 Y9 Y4 Y3 Y1 ON OFF 27 002 582 0 1x with Comfort version 9 Aus Ein 20 052 836 0 20 052...

Page 24: ...ource of the hazard Effect Danger to life or serious injuries Measures for hazard prevention Warning WARNING Type and source of the hazard Effect Injuries serious material damage Measures for hazard prevention Caution CAUTION Type and source of the hazard Effect Property damage Measures for risk prevention Pos 10 18 BA Sicherheit Allgemei ne Funktionshinweise 0 mod_1196869714452_78 doc 15185 Gener...

Page 25: ...the safety instructions are not respected this could result in the forfeiture of any claims for damages Failure to follow the safety instructions could result for example in the following hazards Endangering of persons due to not protected working areas Breakdown of important machine functions Failure of prescribed methods for repair and maintenance Endangering of persons due to mechanical and che...

Page 26: ...Use extreme caution when attaching or detaching implements onto or from the tractor 12 Always attach ballast weights properly to the fixing points provided 13 Observe permitted axle loads gross weight and transport dimensions 14 Check and install transport equipment such as lighting warning devices and protective equipment 15 Actuating mechanisms cables chains linkages etc for remote controlled de...

Page 27: ...lement unless the vehicle has been secured against rolling by means of the parking brake and or wheel chocks Pos 10 20 6 BA Sicherheit Ang ehängte Geräte Ger äte ang ehängt 0 mod_1199699679381_78 doc 33245 4 8 Hitched Implements 1 Secure implements against rolling 2 Observe the maximum supported load on the trailer coupling swing drawbar or hitch 3 If a drawbar coupling is used make certain that t...

Page 28: ...selected PTO speed of the tractor matches the permissible implement speed 9 Before switching on the PTO shaft make sure that no person is in the danger zone of the device 10 Never switch on the PTO if the engine is switched off 11 No one should be in the vicinity of the rotating PTO or PTO shaft when the PTO is in use 12 Always switch off the PTO shaft when the angle is too large or the PTO shaft ...

Page 29: ...f the implement 6 When searching for leaks use suitable aids to avoid the risk of injury 7 Liquids escaping under high pressure hydraulic oil can penetrate the skin and cause serious injury Seek medical help immediately should injuries occur Meaning of the icons 8 Before working on the hydraulic system depressurise the system and switch off the engine Pos 10 20 11 Ü berschriften Ü berschriften 2 P...

Page 30: ... mbau und Ersatzteilherstellung 1 mod_1201937705539_78 doc 55745 4 13 Unauthorised Conversion Modification and Spare Parts Production Conversions or modifications of the machine are permitted only with prior consultation with the manufacturer Original spare parts and accessories authorised by the manufacturer help to ensure safety Use of other parts may void liability for resulting damage Pos 10 2...

Page 31: ...n Bild Titan_AX_ZX 0 mod_1199702167491_78 doc 33345 TR000009 1 4 5 7 3 2 Figure 5 Pos 12 4 BA Ersti nbetriebnahme Ladewagen Aufzähl ung M ontag eteile M X 14 mod_1231427915350_78 doc 172142 Item not shown in figure Pcs 1 PTO shaft 1 Stake 4 2 Control optional 2 End wall 1 3 Electrical cable for lighting 3 Baffle plate 1 4 Can of spray paint 4 Platform gate right 1 5 Operating Instructions Platform...

Page 32: ...sti nbetriebnahme Ladewagen M ontag e der Aufbauten MX Bild 3 mod_1206952606593_78 doc 75046 5 1 Installation of the fittings Fig 6 Pos 12 7 BA Ersti nbetriebnahme Ladewagen M ontag e der Aufbauten MX 3 mod_1206942758952_78 doc 75005 ...

Page 33: ...he stacks 1 with M10x100 screws 10 5 21x2 washers and M10 nuts Screw together the platform gates 4 and side walls with bracket 5 and screw connection M10x30 screw M10x50 square coach bolt 10 5 21x2 washers and M10 nuts Screw together the end wall 2 and platform gate 4 with M12x150 screws A13 washers 13 35x8 washers and M12 nuts Place the 13 35x8 washers between the end wall and the track 1 Place t...

Page 34: ...69_78 doc 172119 5 3 Assembly of automatic loader MX000002_1 3 11 12 2x M10 2x M10x80 4x 10 5 21x2 Fig 7 Screw on sensor support 12 Screw on sensor plate 11 Install sensor 3 on sensor support 12 Adjust the sensor 3 see section Adjusting the Sensors Pos 12 10 BA Seitenumbruch 0 mod_1196175311226_0 doc 4165 ...

Page 35: ...issioning 35 Pos 12 11 BA Diese Seite ist bewusst freigel assen wor den 1 mod_1201783680373_78 doc 54443 This page has been left blank deliberately Pos 12 12 BA Seitenumbruch 0 mod_1196175311226_0 doc 4165 ...

Page 36: ... hitch must only be made by the authorised dealer The hydraulic height adjustment must only be used for unloading on an even section Road travel is only permitted with the offset drawbar lowered Repair work on the hydraulic system may be performed only by trained and authorised personnel When working on the drawbar protect it against being lowered unintentionally Pos 12 15 BA Erstinbetriebnahme La...

Page 37: ...me height X 1 35 1 40 m MX 310 Activate the offset drawbar until the frame height X 1 45 1 50 m MX 350 Remeasure dimension a on the cylinder 3 Park the wagon on the parking jack Loosen the nut 4 Remove the screw 5 Turn the threaded spindle 6 by the remeasured dimension a Note The plunger 7 of the cylinder must not be completely inserted to the stop to allow later adjustments Screw the screw 5 back...

Page 38: ...göse 0 mod_1199709827991_78 doc 33610 KDW02360 B A Figure 9 To ensure the hitch is as horizontal as possible to the trailer coupling when it is positioned and to prevent problems when the drawbar is bent the hitch can be mounted in either of two positions You can use A or B depending on the height of the tractor coupling Tightening torque of fastening bolts 1 450 Nm Pos 12 21 BA Seitenumbruch 0 mo...

Page 39: ...napped in Pos 12 22 3 Ü berschriften Ü berschriften 3 K O Längenanpassung 1 mod_1201687632810_78 doc 53589 5 7 1 Length adjustment Pos 12 22 4 BA Erstinbetriebnahme Ladewagen Längenanpassung Bil d Titan_AX 1 mod_1201688513795_78 doc 53627 RBV01010 1 VP 1 035 1 2 Figure 10 Pos 12 22 5 BA Erstinbetriebnahme Ladewagen Längenanpassung_Text 0 mod_1199710526460_78 doc 33690 The length of the PTO shaft 1...

Page 40: ... Pull the PTO shaft apart Push a PTO shaft half 1 onto the PTO of the tractor Push on a PTO shaft with overload protection 2 on the machine side Measure the overlap and make the length adjustment as described in the enclosed operating instructions of the PTO shaft manufacturer Note The minimum overlap of the PTO shaft must also be ensured when the offset drawbar is raised Pos 13 BA Sei tenumbruch ...

Page 41: ...y and turn off the electrical system on the control box If dangerous situations arise switch off the PTO immediately and bring the machine to a stop Never let the machine run if no operating personnel is on the tractor The following general rules apply to all maintenance assembly repair and adjustment work Bring the machine to a stop switch off the engine and remove the ignition key Secure the tra...

Page 42: ...n Starting up for the first time with self steer Pos 14 8 BA Sicher heit Gefahr enhinweise Ladewag en Stütz und Anhängel asten des Schleppers nicht beachtet 0 mod_1199720048038_78 doc 34118 Danger Support and hitching loads of tractor not observed Effect Danger to life injuries or damage to the machine Observe the maximum permissible support and hitching loads for the tractor Hitch and secure the ...

Page 43: ...oupling of the tractor using the Raise lower offset drawbar function at the electrical control box Connect the trailer hitch Raise the offset drawbar slightly to relieve the load on the support 1 Raise the support 1 and secure it in place Pos 14 12 BA Inbetri ebnahme Ladewag en Hinweis Anhängeöse nach D IN 11026 0 mod_1201012059768_78 doc 49905 Note Trailer hitch as per DIN 11026 The trailer may b...

Page 44: ...heck the hydraulic hose lines at regular intervals and replace them if damaged or worn The replacement hoses must fulfil the technical requirements set by the equipment manufacturer Pos 14 17 BA Inbetri ebnahme Schwader Hi nweis H ydrauli kaufkl eber beachten 9 mod_1219997531785_78 doc 124879 Note Connect the hydraulic lines correctly The hydraulic hoses are identified by coloured hose clips When ...

Page 45: ...hydraulic system Comfort Control unit single action red1 with free return blue1 Connection for the hydraulic system Pressure line red1 nominal width 18 Return line blue1 nominal width 18 If necessary couple load sensing pipe nominal width 12 red3 to the LS connection of the tractor optional for Comfort design further information can be obtained from the operating instructions provided by the manuf...

Page 46: ...ve the user instructions of the tractor manufacturer on parallel operation of the tractor control devices The locking cylinder of the steering axle must be connected before or at the same time as the other hydraulic supply elements of the loading discharge wagon Pos 14 25 Ü berschriften Ü berschriften 2 A E D eichsel feder ung 1 mod_1202194032716_78 doc 57626 6 6 Drawbar Suspension Pos 14 26 Ü ber...

Page 47: ...socket 2 Position the cables so that they will not come in contact with the wheels Note If there is no connection present on the tractor request a socket with connection cables from the spare parts service Part No 0302 068 0 Pos 14 30 BA Inbetri ebnahme Ladewag en Anschluß der Komfortbedienung 0 mod_1199780826044_78 doc 34465 Figure 14 Connection for in cab Comfort kit see section on control unit ...

Page 48: ...1201161230852_78 doc 51084 6 8 1 Special equipment Pos 14 34 BA Inbetri ebnahme Dr uckluftbremse Druckluftanschl üsse bei Dr uckl uftbremse 0 mod_1199781319294_78 doc 34484 1 ZX400003 Figure 15 Insert the coloured compressed air hose couplings 1 into the correspondingly coloured couplings on the tractor Note Always connect the yellow coupling head first then the red one Detach the couplings in rev...

Page 49: ...tructions Secure the PTO shaft guard retaining chains 2 For length adjustment on the tractor see Section on Initial Start up PTO Shaft Make certain the chain connection is ideal The chain guide should be as close as possible to perpendicular to the PTO shaft see view a The chain guide should never be diagonally connected via the guard cone see view b ZX400041 Figure 17 Make certain there is suffic...

Page 50: ...efore driving on public highways Before driving on public highways make certain the entry ladder is folded up and fastened securely together with the entry hole Before starting ensure that you have perfect visibility on and around the tractor and the machine When driving straight ahead at speeds over 30 km h with the wagon loaded the steering axle special equipment must be disabled to improve driv...

Page 51: ...ple on slopes on soil that is not solid enough if load on the first axle has been released by operation with offset drawbar when driving over silos for driving straight ahead at faster speeds above 30 km h with the wagon loaded To do this charge the locking cylinder until the steered wheels are in position for driving straight ahead During forward travel with the steering axle locked leave the pre...

Page 52: ...Driving and Transport 52 Pos 18 BA Sei tenumbruch 0 mod_1196175311226_0 doc 4165 ...

Page 53: ...s especially for welding jobs on the machine disconnect the power supply to the control unit Overvoltage can damage the control unit Pos 19 3 BA Info C enter Ladewag en Medium Allgemeine Beschr eibung AX MX 28 mod_1249967090458_78 doc 272441 1 Figure 18 The electronic equipment of the machine consists essentially of the job computer 1 the control unit 2 and the control and function elements The jo...

Page 54: ... mod_1260363833832_78 doc 336474 Note Install the control unit with the support 1 in that way that the control unit can be operated from driver s seat without any problems Pos 19 7 BA Info C enter Ladewag en Medium Anbau Bedieneinheit 28 mod_1249967781270_78 doc 272466 8 2 Control unit Figure 20 Connect the connecting cable to the socket 3 of the control unit 2 Secure the control unit to the suppo...

Page 55: ...e of the control unit Effect Danger to life injuries or damage to the machine During assembly make certain that the connection cables are not tight or come in contact with the tractor wheels SW1000007 2 1 Figure 21 Connect the power supply cable 12 V to the 3 pin power outlet on the tractor and machine side DIN 9680 Pos 19 10 BA Seitenumbruch 0 mod_1196175311226_0 doc 4165 ...

Page 56: ...Unit 56 Pos 19 11 BA Info Center Ladewagen M edi um Ü bersicht Bedienei nheit 28 mod_1249968230989_78 doc 272491 8 4 Control unit overview AX000033_1 Figure 22 Pos 19 12 BA Seitenumbruch 0 mod_1196175311226_0 doc 4165 ...

Page 57: ...d on Lower offset drawbar 7 Lift offset drawbar 8 7 Offset drawbar is lowered 8 Offset drawbar is lifted Lower pick up 9 Lift pick up 10 9 Pick up is lowered 10 Pick up is lifted GL design Floor conveyor supply 11 Floor conveyor rapid traverse 12 11 Floor conveyor supply active 12 Floor conveyor rapid traverse active GD design Floor conveyor reverse 11 11 Floor conveyor reverse active Floor convey...

Page 58: ...iefly A horn is sounded All LEDs go out and the pilot lamp 1 will light up after a brief period Pos 19 16 BA Info Center Ladewagen M edi um Arbeitsscheinwerfer ei n ausschalten 28 mod_1249969102348_78 doc 272541 8 6 Switching the working floodlight on off Figure 24 By pressing the key 2 once the working floodlight will be switched on pilot lamp 2 is lit By pressing the key 2 again the working floo...

Page 59: ...th the cutters fully swivelled out the pilot lamp 3 will go out and the cutters do not swivel out any further despite the key 3 being activated Moving the cutters into maintenance position Cutters are swivelled out By pressing the key 3 again the cutters swivel out as long as the key is being pressed pilot lamp 3 is lit as long as the key 3 is being pressed The pilot lamp 17 continues flashing unt...

Page 60: ... lamp 20 will go out Open the tailgate only when the PTO has been switched off L GL design only Note With the tailgate being closed the pilot lamp 20 will be lit permanently With the tailgate being open the pilot lamp 20 will go out Open the tailgate By pressing the key 6 the tailgate opens as long as the key is being pressed pilot lamp 6 is lit as long as the key 6 is being pressed Close tailgate...

Page 61: ...offset drawbar By pressing the key 8 the offset drawbar raises as long as the key is being pressed pilot lamp 8 is lit as long as the key 8 is being pressed Lower offset drawbar By pressing the key 7 the offset drawbar lowers as long as the key is being pressed pilot lamp 7 is lit as long as the key 7 is being pressed Pos 19 23 BA Seitenumbruch 0 mod_1196175311226_0 doc 4165 ...

Page 62: ...ssing the key 10 the pick up raises as long as the key is being pressed pilot lamp 10 is lit as long as the key 10 is being pressed Lower pick up By pressing the key 9 once the pick up lowers to the float position pilot lamp 9 is lit By pressing the key 9 again the float position will be deactivated pilot lamp 9 goes out Pos 19 25 BA Seitenumbruch 0 mod_1196175311226_0 doc 4165 ...

Page 63: ...oading mode Pos 19 26 4 BA Info Center Ladewagen M edi um Kratzbodenvorlauf akti vi eren bei m Ladevorgang D GD _Ausführung 28 mod_1249975666598_78 doc 272765 8 11 2 Activating the floor conveyor supply during loading D GD design only Pressing the key 12 activates the floor conveyor supply Keep key 12 pressed until the load column has moved somewhat to the rear The pilot lamp 12 lights up as long ...

Page 64: ...ess D GD design only The setting for the initial speed of the floor conveyor is made with the tailgate closed Use the key or to increase or decrease the speed of the floor conveyor Read off the set value on the bar graph 21 Pos 19 26 11 BA Info C enter Ladewagen Medi um Kr atzbodenvorlauf akti vier en bei m Entladevorgang D GD _Ausführung 28 mod_1249977941067_78 doc 272840 8 11 6 Activating the fl...

Page 65: ...e floor conveyor reverse only briefly to avoid overloading the floor conveyor Fig 30 If the discharge rollers will not turn turn on floor conveyor reverse To do this By pressing the key 11 inching the floor conveyor reverse is activated The floor conveyor reverse will be activated as long as the key 11 is pressed Indicator lamp 11 lit Activate the key 11 only briefly to avoid overloading the floor...

Page 66: ...es Possible sensors depending on how the machine is equipped N Sensor designation Status options 11 PTO shaft sensor 1 2 3 17 Blade sensor 1 2 3 18 Sensor for axle locked 1 19 Sensor wagon full 1 2 3 20 Tailgate sensor 1 2 3 1 Axle locked pilot lamp 18 lit Pressure above 100 bar Axle is not locked pilot lamp 18 off Pressure below 100 bar Status options 1 LED on Alive iron in front of the sensor 2 ...

Page 67: ...gure 32 Note Since the oil capacity may vary from one tractor to another it may be necessary to readjust the maximum speed of the floor conveyor Press the key 4 Pilot lamp 2 goes out and control lamp 4 flashes Activating the tractor hydraulics Increase the engine speed of the tractor to nominal speed By pressing the key 10 increase the current of the floor conveyor supply valve until the floor con...

Page 68: ...ote Since the oil capacity may vary from one tractor to another it may be necessary to readjust the initial speed of the floor conveyor Press the key 3 Pilot lamp 2 goes out and control lamp 4 flashes Activating the tractor hydraulics Increase the engine speed of the tractor to nominal speed By pressing the key 9 or 10 decrease or increase the current of the floor conveyor supply valve until the f...

Page 69: ... unit L GL design or D GD design To do this Turning on sensor test By keeping the key pressed switch on the control unit via the key Press the key 5 Pilot lamp 2 goes out and control lamp 5 flashes D GD design By pressing the key 9 the job computer will be programmed to the control unit D GD design L GL design By pressing the key 10 the job computer will be programmed to the control unit L GL desi...

Page 70: ...test When the key is held down switch on the control unit via the key The control unit switches to the sensor test indicator lamp 2 flashes Press key 6 indicator lamp 2 goes out and indicator lamp 6 flashes Note Bar graph on Parameter Load Sensing activated hydraulic block is load sensing capable Bar graph off Parameter Load Sensing deactivated hydraulic block is not load sensing capable Deactivat...

Page 71: ...en the key is held down switch on the control unit via the key The control unit switches to the sensor test indicator lamp 2 flashes Press key 8 indicator lamp 2 goes out and indicator lamp 8 flashes Note Bar graph on Parameter Cross conveyor activated Bar graph off Parameter Cross conveyor deactivated Deactivating the parameter Cross conveyor Deactivate the parameter Cross conveyor bar graph off ...

Page 72: ...seconds high frequency Pos 19 41 BA Info Center Schwader Bedi eneinheit M edi um Swadro 1000 Al armmeldungen 2 mod_1203324713152_78 doc 65631 8 18 Alarm Messages If a fault occurs in the machine s electronics it will be displayed by an appropriate flashing signal of the LED on the key The buzzer also sounds the same error code for 5 cycles Pos 19 42 BA Info Center Schwader Bedi eneinheit M edi um ...

Page 73: ...weak on the tractor side or not correctly connected with the battery Connect the KRONE connection cable to the tractor battery 13 BUS error The BUS bus was interrupted between the control unit and the machine loose connection to display screen Check the display line 14 Incorrect terminal Connection to incorrect terminal Use the correct terminal for the machine type 15 Incorrect terminal software T...

Page 74: ...273040 Figure 38 Pos 19 50 BA Info Center Ladewagen M edi um Anzeigen der Softwar e Versi on Text Ladewagen 3 mod_1204609973381_78 doc 70965 To display the software version of the machine press the key 10 times I Position I indicates the tens component of the software version For example with software version 20 two LEDs are lit with software version 40 four LEDs are lit II Position II indicates t...

Page 75: ... C enter Ladewag en Allgemeine Beschr eibung 0 mod_1200385494468_78 doc 42882 Figure 39 The electronic equipment of the machine consists essentially of the job computer 1 the electronics for the hydraulic axle suspension 2 optional along with the control unit 3 and the control and function elements The job computer 1 and the electronics for the hydraulic axle suspension 2 optional are located unde...

Page 76: ...5 Überschriften Überschriften 2 P T Spannungsversorgung 28 mod_1250578107003_78 doc 275490 9 2 Electrical power supply Pos 21 3 6 BA Sicherheit Gefahr enhinweise Ausfall der Bedienei nheit 6 mod_1215061997306_78 doc 98196 Danger Failure of control unit Effect Danger to life injuries or damage to the machine Make sure during assembly that the connection cables are not tight and that they do not com...

Page 77: ...77 9 3 Control unit 2 3 Figure 42 Connect the cable included with delivery to the socket 4 on the front metal cover and connect to the socket 3 on the control unit 2 Pos 21 4 BA Seitenumbruch 0 mod_1196175311226_0 doc 4165 ...

Page 78: ... C enter Ladewag en Übersicht 0 mod_1200637601725_78 doc 45891 9 4 Overview 1 5 7 Figure 43 1 On Off key 2 Display 3 Keys 1 8 4 Rotary potentiometer 5 Esc key F 6 Menu key E 7 Keys A D Pos 21 5 2 BA Seitenumbruch 0 mod_1196175311226_0 doc 4165 ...

Page 79: ...ctivate the softkeys located in the right column For the assignment of the keys see the two illustrations If there is no softkey next to the key it has no function Rotary potentiometer The rotary potentiometer has two functions 1 The rotary potentiometer can be turned to change settings and to select the desired menu in the menu level 2 Pressing the rotary potentiometer saves the settings ...

Page 80: ... keys see the illustration If there is no softkey above the key it has no function Key E The key can be used to bring up the menu level Key F You can use the key to go to the previous screen or the menu level above the current one Holding the key down slightly longer takes you back to the basic screen Pos 21 5 4 BA Seitenumbruch 0 mod_1196175311226_0 doc 4165 ...

Page 81: ...46 Press the key After switching the unit on the connection to the job computer is established If it is not possible to set up a connection data connection interrupted the message shown on the right appears in the display If the connection is established the basic screen appears after a brief time see Section Manual Mode Pos 21 6 BA Seitenumbruch 0 mod_1196175311226_0 doc 4165 ...

Page 82: ...8 doc 303326 Status line Current states of the machine depending on how it is equipped are shown in the top line of the display Alarm message is pending Axle suspension off Work lights off Axle suspension on Work lights on Operating hours counter deactivated Loading wagon full Operating hours counter activated Silage agents off Lift axle lowered Silage agents on Lift axle lifted Axle locked Axle r...

Page 83: ...he coaster steering axle Press the key for softkey The symbol appears in the display coaster steering axle released Pressing the key again will relock the coaster steering axle The softkey appears in the bottom line of the display Note As long as the pressure is increasing at the locking cylinder the softkey flashes Once the pressure has been built up softkey stops blinking and the coaster steerin...

Page 84: ...A B Figure 48 Raise and lower pickup floating position The activated mode appears in display A Pick up not in float position Pick up in float position Raise pick up Press the key for softkey The arrow B indicates that the function is executed Lowering pick up floating position Press the key for softkey The arrow B indicates that the function is executed Pos 21 7 9 BA Seitenumbruch 0 mod_1196175311...

Page 85: ...s are in the maintenance position the C symbol will be displayed Swinging blades in Press the key for softkey The arrow B indicates that the function is executed Swinging blades out Press the key for softkey The arrow B indicates that the function is executed Blades in maintenance position If the blades are swung out press the key for softkey again The C symbol for blades in maintenance position a...

Page 86: ...offset drawbar Press the key for softkey The arrow A indicates that the function is executed Pos 21 7 13 BA Info Center Ladewagen Softkey Ladebetri eb rechte Spalten S4 Kratzbodenvorlauf 0 mod_1200647575084_78 doc 46125 ZX000012 A Figure 51 Actuate floor conveyor supply Press the key for softkey The symbol appears in reverse video and the floor conveyor continues running as long as the key is pres...

Page 87: ...appears The automatic loader activates floor conveyor automatically once the conveyor height of the loaded goods has been achieved The remaining run time A appears in the display after the floor conveyor has been automatically activated Once the remaining time has elapsed a message B appears in the display The message indicates that the floor conveyor is running Switching the automatic loader off ...

Page 88: ...on Differences compared to loading operation Pos 21 9 2 BA Info C enter Ladewag en Sofkeys Entl adebetri eb Hauptfenster 0 mod_1200650556521_78 doc 46226 Displays in the main window currently set floor conveyor supply speed as a only for GD Set floor conveyor supply speed Turn the rotary potentiometer to set the required floor conveyor supply speed and save the speed by pressing the potentiometer ...

Page 89: ...ated automatic unloader setting see chapter Automatic unloader and for deactivated weight control setting see chapter Weight control Activated mode is displayed Switching to loading operation Press key for softkey Switching to the menu Weight control save tare with activated weight control Press key for softkey The menu Weight control save tare is displayed Pos 21 9 5 BA Info C enter Ladewag en So...

Page 90: ...lgate automatically to the central position Note The key must be pressed for at least 1 5 seconds before the Open the tailgate function is activated Pressing the key again opens the tailgate as long as the key is held down The arrow A indicates that the function is executed and the status appears Close tailgate Press the key for softkey The arrow A indicates the function is executed and the status...

Page 91: ...gure 55 Open close tailgate Open the tailgate Pressing the key for softkey opens the tailgate as long as the key is held down The arrow A indicates that the function is executed and the status appears Close tailgate Press the key for softkey The arrow A indicates that the function is executed and the status appears Pos 21 9 10 BA Seitenumbruch 0 mod_1196175311226_0 doc 4165 ...

Page 92: ...eyor supply speed can be regulated by turning the rotary potentiometer By pressing the potentiometer down the setting will be saved Switch off the floor conveyor supply speed Press the key for softkey The arrow A is no longer displayed Activate floor conveyor reverse Press the key for softkey The symbol appears in reverse video The floor conveyor continues running as long as the key is pressed The...

Page 93: ...on rapid traverse Press the key for softkey The symbol and the arrow A indicate that the function is executed The floor conveyor operates at maximum supply speed Switching off rapid traverse Press the key for softkey The floor conveyor stops The symbol and the arrow A are no longer displayed Pos 21 9 14 BA Seitenumbruch 0 mod_1196175311226_0 doc 4165 ...

Page 94: ...upkeep maintenance and cleaning work may be performed only when the machine is at a standstill Switch off the engine remove the ignition key and turn off the electrical system on the control box Secure the machine and tractor against the possibility of rolling back L400631 2 Figure 58 The machine has two buttons located externally on the machine that can be used to perform functions on the machine...

Page 95: ...Center Ladewagen M enüebene Kurzüberblick 28 mod_1250070983619_78 doc 273628 9 9 Menu Level 9 9 1 Short overview 1 2 4 5 6 4 2 4 4 4 5 6 1 1 1 1 2 1 3 1 4 1 5 1 6 1 7 1 9 2 1 2 2 Fig 59 Pos 21 11 2 BA Seitenumbruch 0 mod_1196175311226_0 doc 4165 ...

Page 96: ...n M enüebene aufr ufen 0 mod_1200656618584_78 doc 46496 9 9 2 Bringing up a Menu Level 1 2 Fig 60 Press the 1 key The menu level is shown in the display You can exit the menu level again with the 2 key Pos 21 11 4 BA Seitenumbruch 0 mod_1196175311226_0 doc 4165 ...

Page 97: ...tings Main menu 2 Counters Main menu 4 Service Main menu 5 Information Main menu 6 Technician You can use the rotary potentiometer to select the main menus The selected icon is shown in reverse colours Pressing the rotary potentiometer brings up the menu level of the main menu that is selected Use the key to close the menu currently displayed Pos 21 11 6 BA Seitenumbruch 0 mod_1196175311226_0 doc ...

Page 98: ...otentiometer The symbol is displayed inversely Press the rotary potentiometer The display shows menu level 1 Settings Menu level 1 Settings is divided into eight menus depending on how the machine is equipped menu 1 1 Automatic loader menu 1 2 Silage agents Menu 1 3 Axle suspension menu 1 4 Contrast Menu 1 5 Floor conveyor speed Menu 1 6 Cross conveyor optional AX MX series Menu 1 7 Automatic unlo...

Page 99: ...ry potentiometer The icon is shown in reverse colours Press the rotary potentiometer The display shows menu 1 2 Total counters The bar display and time show the set time delay The icon in the upper line indicates that the displayed value is saved Setting and saving the time delay Set the time delay with the rotary potentiometer The icon in the top line goes out Press the rotary potentiometer The s...

Page 100: ...rs Press the rotary potentiometer The display shows menu 1 2 Silage The current status is displayed as an icon Silage agents off Silage agents on continuous operation Silage automatic mode silage on if the pick up is in float position The icon in the upper line indicates that the displayed status is saved Change and save status Set the appropriate status with the rotary potentiometer The symbol in...

Page 101: ...t position or an error has occurred Additionally the following message will appear Error axle suspension Displaying the menu Bring up main menu 1 Settings You can select menu 1 3 with the rotary potentiometer The icon is shown in reverse colours Press the rotary potentiometer The display shows menu 1 3 Axle suspension Status state Axle suspension in automatic mode Axle suspension inactive manual m...

Page 102: ...lue Press the key for softkey Axle suspension switches to manual mode and the wagon can be raised by pressing the key There is no readjustment due to load changes Press the key for softkey Axle suspension switches to manual mode and the wagon can be raised by pressing the key There is no readjustment due to load changes Use the key to close the menu currently displayed The display shows menu level...

Page 103: ...splay shows menu 1 4 Contrast The progress bar indicates the contrast value set The icon in the upper line indicates that the displayed status is saved Setting and saving the contrast The higher the bar the stronger the contrast in the display Set the time delay with the rotary potentiometer The icon in the top line goes out Press the rotary potentiometer The set contrast value is saved and the ic...

Page 104: ...in reverse video Press the key for softkey The display appears in reverse video To reset the display Press the key for softkey Display will reset Use the key to close the menu currently displayed Pos 21 11 20 BA Info C enter D urch länger es Dr ücken der Taste ESC wird das Gr undbild aufger ufen 36 mod_1263280455028_78 doc 338584 Pressing the key and holding it down brings up the basic screen Pos ...

Page 105: ...main menu 1 Settings You can select menu 1 5 with the rotary potentiometer The icon is shown in reverse colours Press the rotary potentiometer The display shows menu 1 2 Total counters The progress bar indicates the set sensitivity of the floor conveyor The icon in the upper line indicates that the displayed value is saved Adjusting the floor conveyor speed Activate the tractor hydraulics Increase...

Page 106: ... appears in the upper line Press the key for softkey to deactivate the floor conveyor The icon is shown in reverse video Press the key for softkey DEF The factory setting values are applied The icon disappears Press the rotary potentiometer The set contrast value is saved and the icon appears in the upper line Use the key to close the menu currently displayed Pressing the key and holding it down b...

Page 107: ...atus is displayed as an icon Unloading operation without cross conveyor Unloading operation with cross conveyor The icon in the upper line indicates that the displayed status is saved Change and save status Set the appropriate status with the rotary potentiometer The symbol in the top line goes out Press the rotary potentiometer The set time delay is saved and the icon appears in the upper line Us...

Page 108: ...lgate Open the tailgate with the control unit by pressing the key for softkey hold the key at the same time the coaster steering axle will be locked by the system optional GD version key for opening the tailgate Open the tailgate with the control unit by pressing the key for softkey by pressing once at the same time the coaster steering axle will be locked by the system optional and the tailgate w...

Page 109: ...utomatic unloader active The icon in the upper line indicates that the displayed status is saved Pos 21 11 26 5 BA Info C enter Ladewagen Hauptmenüs H auptmenü 1 Ei nstellungen M enü 1 7 Entl adeautomati k Status ändern und speicher n 36 mod_1258988341675_78 doc 336022 Change and save status Set the appropriate status with the rotary potentiometer The symbol in the top line goes out Press the rota...

Page 110: ...ct menu 1 9 with the rotary potentiometer The icon is shown in reverse colours Press the rotary potentiometer The display shows menu 1 9 Weight control The current status is displayed as an icon weight control not activated weight control activated The icon in the upper line indicates that the displayed status is saved The current payload of the wagon is displayed in line 1 With key or for softkey...

Page 111: ... points must be followed The offset drawbar cylinders must be unfolded for at least 1 3 cm Release the brakes on loading wagon and tractor Always save the weight at first in loaded status With a possibly existent Tridem axle the lift axle needs to be lowered Select customer counter see menu 2 1 Customer counter The weight control shows the current payload in the first line 1 Pos 21 11 33 BA Info C...

Page 112: ...de possibly without saving Leaving the weight control for the basic screen unloading mode possibly without saving Pos 21 11 37 BA Info C enter Ladewagen Gewichtserfassug Leergewicht speicher n 25 mod_1242280196773_78 doc 250759 ZX000016 Fig 75 The tare must be saved after carried out unloading of the wagon To do this By pressing the key for softkey call the menu weight control from basic screen un...

Page 113: ...the key for softkey the menu 2 1 Customer counter is displayed for selection of the customer counter which should save the weight Pressing the key for softkey calls the calibration menu see chapter Calibration By pressing the key for softkey for about 0 5 seconds the weight will be saved and the load sensing equipment will be reset to zero After pressing the key for softkey the load weight of the ...

Page 114: ...n values for the sensors supported load 1 and axle load are being adopted to the loading wagon ZX400085 1 2 Fig 77 The supported load 1 sets the value which affects the drawbar see Fig above The axle load 2 sets the value which weighs on the axles see Fig above With a change of the values the displayed total weight changes Procedure for calibration Filling the loading Call the menu Weight control ...

Page 115: ...ng the key you get back to the weight control without saving the correction value Setting the correction value of the supported load 1 Press the rotary potentiometer until the icon is in front of the correction value of the supported load 1 Set the determined difference value in the display by turning the rotary potentiometer Save the new correction value by pressing the key for softkey By pressin...

Page 116: ...ure 79 Calling the main menu Call the menu level with the key You can select main menu 2 with the rotary potentiometer The icon is shown in reverse colours Press the rotary potentiometer The display shows menu level 2 Counters Menu level 2 Counters is divided into two menus menu 2 1 Customer counters menu 2 2 Total counters Pos 21 13 2 BA Seitenumbruch 0 mod_1196175311226_0 doc 4165 ...

Page 117: ... Press the rotary potentiometer The display shows menu 2 1 Customer counter Meaning of the icons Total number of wagonloads the counting of one wagonload is depending on the set counter mode Operating hours counter The operating hours counter is running when the electronics is turned on and the operating counter is activated t Total of all weights with option weight control Customer counter 1 20 T...

Page 118: ...ted if the tailgate is closed the floor conveyor supply is activated for at least 5 sec and then the floor conveyor supply runs for at least 5 sec Cutting mode when using the loading wagon as silage transport wagon grass and maize silage A wagonload is counted if after the opening of the tailgate the floor conveyor supply will be activated for at least 5 seconds In case the tailgate will be closed...

Page 119: ... and press the rotary potentiometer The desired customer counter in this case customer counter 4 is displayed inversely The old activated customer counter in this case customer counter 3 is no longer displayed inversely Activate deactivate the operating hours counter Meaning of the icons Operating hours meter activated Operating hours meter deactivated Press the key for softkey to activate or deac...

Page 120: ... to be deleted between the two crossbars A Press the key for softkey The selected customer counter is set to zero Deleting all customer counters Press the key for softkey and hold it for about 2 seconds All customer counters are set to zero Use the key to close the menu currently displayed The display shows menu level 2 Counters Pressing the key and holding it down brings up the basic screen Pos 2...

Page 121: ...ung 31 mod_1252315741744_78 doc 303635 Total number of wagonloads Operating hours counter Total wagonload counter cannot be deleted Season counter 1 can be deleted Daily counter 2 can be deleted Pos 21 13 13 BA Info C enter Ladewagen H auptmenüs H auptmenü 2 Zähl er Menü 2 2 Gesamtzähler Saisonzähl er Tageszähl er 31 mod_1252314670666_78 doc 303580 Deleting season counter 1 or daily counter 2 Pres...

Page 122: ...in menu Call the menu level with the key You can select main menu 4 with the rotary potentiometer The icon is shown in reverse colours Press the rotary potentiometer The display shows menu level 4 Service Menu level 4 Service is divided into three menus Menu 4 2 Manual sensor test Menu 4 4 Manual actuator test Menu 4 5 Sensor actuator test axle suspension Pos 21 15 2 BA Seitenumbruch 0 mod_1196175...

Page 123: ...sensor test There is no guarantee the machine is working correctly until after the sensors have been adjusted Caution The PTO must not be turning during the sensor test Displaying the menu Main menu 4 Service is called You can select menu 4 2 with the rotary potentiometer The icon is shown in reverse colours Press the rotary potentiometer The display shows menu 4 2 Manual sensor test Selecting the...

Page 124: ...tomatic loader top B10 B10 Lift axle B3 Floor conveyor stop B11 Load bolt drawbar B4 Metering rollers GD B12 Load bolt axle B5 P T O speed GD B13 B13 Hand lever for metering roller coupling optional cross conveyor B6 Tailgate closed B14 Lock the switching valve of the tailgate Titan series with cross conveyor only B8 Tailgate open GD Pos 21 15 6 BA Info Center Sensor en Statusanzeigen Sensor 1 2 3...

Page 125: ...sbolzen 28 mod_1250080387213_78 doc 273835 State of load bolt Sensor OK Cable break short circuit on sensor Connection to force measurement amplifier KMV interrupted Failure of communication with force measurement amplifier KMV Pos 21 15 9 BA Seitenumbruch 0 mod_1196175311226_0 doc 4165 ...

Page 126: ...the bar display The current setting value actual value is displayed under the bar display The distance from the sensor to the metal must be adjusted so that in the alive state the bar is in the upper mark Next check whether the bar is in non alive state in the lower marked area Pressure sensor diagnostics Possible sensors depending on how the machine is equipped State No Sensor icon Description B1...

Page 127: ...pending on how the machine is equipped No Sensor icon Description S1 S1 Button Swinging blades in B2 S2 Button Swinging blades out State Broken cable Short circuit 5 Pressed 6 Not pressed Setting values When the button is pressed the bar must be in the lower marked area of the bar display When the key is released it should be in the upper area Pos 21 15 13 BA Seitenumbr uch 0 mod_1196175311226_0 d...

Page 128: ... 89 No Sensor icon Description U1 supply voltage Nominal voltages 12 V tot 12 14 5 V 12 V term 12 14 5 V SS_5V 4 5 5 5 V 8 V ana 8 5 9 1 V 8 V dig 8 5 9 1 V 12 V Pow2 12 14 5 V 12 V Pow3 12 14 5 V Press the key to close the menu currently displayed The display shows menu level 4 Service Pressing the key and holding it down brings up the basic screen Pos 21 15 15 BA Seitenumbr uch 0 mod_11961753112...

Page 129: ...er to life or serious injuries Only persons familiar with the machine are permitted to perform the actuator test The person performing the test must know which machine parts are moved by controlling the actuators The actuator test must only be performed from a safe position outside the area that is affected by machine parts moved by the actuators Make certain there are no persons animals or object...

Page 130: ...ort time to be able to determine if there are any errors in the actuator system Caution The PTO must not be turning during the actuator test The tractor hydraulics must be deactivated L400251 DL400270 Figure 90 Displaying the menu Main menu 4 Service is called You can select menu 4 4 with the rotary potentiometer The icon is shown in reverse colours Press the rotary potentiometer The display shows...

Page 131: ...ate the floor conveyor Possible digital actuators depending on how the machine is fitted DL400270 Fig 91 N Icon Description N Icon Description Y01 Y05 Floor conveyor SUPPLY GL Y11 Blade bar 2 Y02 Floor conveyor REVERSE GD Y12 Rapid traverse Y03 Function valve 1 Y13 Y13 Tailgate safety valve Titan GL 5XL 6XL R GL Y04 Function valve 2 Y14 Discharge roller coupling GD Y05 Y05 1 Pick up 1 Y15 Axle loc...

Page 132: ...uld be between 500 mA and 3000 mA depending on the valve that is used Press the key for softkey PWM is increased Press the key for softkey PWM is decreased Possible analogue actuators No Icon Description Y01 Y05 Floor conveyor SUPPLY State Actuator on Actuator off No power supply fuse is probably defective Press the key to close the menu currently displayed The display shows menu level 4 Service P...

Page 133: ...aying the menu Main menu 4 Service is called You can select menu 4 5 with the rotary potentiometer The icon is shown in reverse colours Press the rotary potentiometer The display shows menu 4 5 Sensor actuator test axle suspension State No fault axle suspension Fault axle suspension left BSL Fault axle suspension right BSR Fault valve axis up down YWK Fault valve axis left right YWS1 YWS2 Press th...

Page 134: ...Figure 94 Calling the main menu Call the menu level with the key You can select main menu 5 with the rotary potentiometer The icon is shown in reverse colours Press the rotary potentiometer The display shows menu 5 Information Page 5 1 SW Complete software version of the machine Version of the job computer ISO ISO software Version Pos 21 18 BA Seitenumbruch 0 mod_1196175311226_0 doc 4165 ...

Page 135: ...nu 6 Technician Calling the main menu L400320 L400340 Figure 95 Call the menu level with the key You can select main menu 6 with the rotary potentiometer The icon is shown in reverse colours Press the rotary potentiometer Main menu 6 Technician is password protected The display shows the password query Pos 21 20 BA Seitenumbruch 0 mod_1196175311226_0 doc 4165 ...

Page 136: ...y are shown in Chapter alarm messages Note All functions in the menu that is covered over are still active The softkeys that are covered by the alarm message are disabled Stop audio signal Press the key for softkey To reset alarm Briefly press the key for softkey The alarm is reset and the audio signal stops If the malfunction occurs again the alarm message will appear again To delete an alarm Pre...

Page 137: ...in job computer defective Short circuit at electrical outputs 12V3FU_L Check the connection for short circuit The fuse resets itself after the unit has cooled down A03 CAN error The CAN bus was interrupted between the control unit and the machine loose connection to display screen Check the display line A14 Undervoltage Tractor battery defective Tractor dynamo too weak 12 V power supply too weak o...

Page 138: ...as opened and the steering axle was not locked Lock the steering axle before opening the tailgate lock the steering axle on the silo pile 11 Blades have not been turned on blade monitoring Blades have moved out of the Blade on position Switch blade back on 12 P T O shaft sensor not correctly set or defective The metering rollers are turning but the P T O shaft sensor is not generating any pulses C...

Page 139: ...ly line for damage 102 Automatic loader sensor top Sensor or line defective Perform a sensor test Check the sensor and supply line for damage 103 Floor conveyor switch off unit sensor Sensor or line defective Perform a sensor test Check the sensor and supply line for damage 104 Metering roller monitor sensor Sensor or line defective Perform a sensor test Check the sensor and supply line for damage...

Page 140: ...0 Lift axle sensor Sensor or line defective Perform a sensor test Check the sensor and supply line for damage 111 For ZX optional Load bolt drawbar Sensor or line defective Perform a sensor test Check the sensor and supply line for damage 112 For ZX optional Load bolt axle Sensor or line defective Perform a sensor test Check the sensor and supply line for damage 113 Sensor for hand lever metering ...

Page 141: ...ng range Perform a sensor test Check the sensor and supply line for damage Check mechanical setting 118 Axle valve up down Broken cable or valve plug not plugged in or overload Check the valve and supply line for damage 119 Axle valve left right Broken cable or valve plug not plugged in or overload Check the valve and supply line for damage 121 Fold up blade bar key Button or line defective Perfor...

Page 142: ...units to communicate to each other Simple adaptable control components which are separated from the actual display can be used by the display as a performance monitor for the tractor as well as a monitor for an ISO 11783 accessory unit 10 2 Mounting Figure 97 Caution Make sure during assembly not to tighten the connection cables or allow them to come in contact with the tractor wheels Installing t...

Page 143: ... left rotate to the right as well as pressing the rotary potentiometer down are replaced by the following softkeys KRONE In cab Comfort kit Corresponds to the softkey for the ISO terminal Rotary potentiometer Rotate to the right Rotate to the left in order to page up or down Scroll up or scroll down Rotary potentiometer Rotate to the right Rotate to the left in order to increase or reduce the valu...

Page 144: ...ving above 30 km h the coaster steering axle is automatically locked by the electronic system This is true even if the Release steering axle function has been selected in the display If the travelling speed is reduced to less than 30 km h the electronic system automatically enables the steering axle again if the Release steering axle function has been selected in the display If the Steering axle l...

Page 145: ... 0 25 5 km h 540 UPM 1 2 3 Figure 99 Call up main menu Maintenance with the key You can select menu 4 6 with the keys The icon is shown in reverse colours Call up the menu with the OK key The display shows menu 4 6 Driving speed and direction of travel indicator Explanation of symbols 1 0 Driving forward 0 Reversing 2 25 5 km h Speed driving forward 25 5 km h Reversing speed 3 540 RPM PTO speed Po...

Page 146: ... for ISO terminals with less than 10 keys is set to 5 or 10 softkey buttons During the change over to 10 softkey buttons additional softkeys will be virtually included and can be reached by scrolling Note For ISO terminals with less than 10 keys an additional ISO joystick is recommended for the convenient operation of the attached machines For the assignment of the joystick please refer to Section...

Page 147: ...ws menu 1 8 Softkeys ISO terminal The current status is displayed as an icon Change of the basic screen to 5 softkey buttons Change of the basic screen to 10 softkey buttons The icon in the upper line indicates that the displayed status is saved Change and save status Set the desired status with the key The icon in the top line goes out Press the OKkey the set status is saved and the icon appears ...

Page 148: ... 3 4 1 Overview of Auxiliary Functions during the Loading and Unloading Mode Auxiliary functions Function in loading mode Function in unloading mode Graphic display Raise pick up Increase floor conveyor speed Lower pick up Decrease floor conveyor speed Raise offset drawbar Raise offset drawbar Lower offset drawbar Lower offset drawbar Raise blade bar Raise blade bar Lower blade bar Lower blade bar...

Page 149: ...Default Ei nstellung Ladewagen 0 mod_1200982723909_78 doc 49570 10 3 5 Example of a Joystick Assignment for Fendt Default Setting Caution For the remainder of the procedure refer to the operating instructions of the operating terminal manufacturer Figure 101 Pos 24 BA Sei tenumbruch 0 mod_1196175311226_0 doc 4165 ...

Page 150: ... Set the desired number of blades and the chop length as well see section on Settings Cutting System Setting for pick up working height see Section on Settings Pick up Default setting for roller crop guide see section on Settings Roller Crop Guide Pos 25 3 BA Bedi enung Ladewagen Lade Entl adevorgang Vorbereiten des Ladevorgangs Hi nweis 1 mod_1201788295639_78 doc 54501 Note The swath should be un...

Page 151: ...ss material and number of blades installed Pos 25 5 3 BA Bedi enung Ladewagen Lade Entl adevorgang Überladung ver mei den ZX 13 mod_1225890912828_78 doc 164737 11 2 2 Avoiding Overloading Make certain when loading the loading wagon that all materials in the load have the same density To avoid overloading the loading wagon when forage is heavy follow these steps Pos 25 5 4 BA Bedi enung Ladewagen L...

Page 152: ...y substance of loaded goods Pos 25 5 7 BA Bedi enung Ladewagen Lade Entl adevorgang Zul ässiges Ladevol umen errechnen ZX 13 mod_1225890762968_78 doc 164671 3 Calculating the Permitted Loading Volume Max permissible loading volume loading weight Specific weight of the loaded goods Note The loading volume of the relevant machine type DIN classification can be found in the chapter in the Foreword en...

Page 153: ...tal loading height turn on the floor conveyor feed and move the floor conveyor load column back by approx 0 5 m This will prevent the load column from tipping over For the subsequent loading process switch on the floor conveyor once the loading height has been reached or when the loading unit becomes unstable due to heavy loads To do this switch the floor conveyor switch to On Keep the floor conve...

Page 154: ...Lower The pick up can be moved in this position during the entire loading process making it possible to adjust the pick up to the ground Switch on the PTO and start loading Note As soon as the first load column has reached about 3 4 the total loading height turn on the floor conveyor feed and move the floor conveyor load column back approx 0 5 m This will prevent the load column from tipping over ...

Page 155: ...osition during the entire loading process Switch on the automatic loader the time delay should be adjusted to the loading material see Section Menu 1 1 Automatic Loader optional Dry longer time delay Moist shorter time delay Switch on the PTO and start loading Note As soon as the first load column has reached about 3 4 the total loading height turn on the floor conveyor feed and move the floor con...

Page 156: ...r Driving over silos Effect Danger to life injuries or damage to the machine Steering axle must be locked while driving over No persons may remain in the danger zone Pos 25 14 3 BA Bedienung Ladewag en Lade Entl adevorgang Vor ber eiten des Entladevorgangs Text 0 mod_1199795425591_78 doc 34977 Before starting the unloading process switch on the hydraulics on the tractor Switch on the on board elec...

Page 157: ...wagen H eckl appe Hi nweis Heckklappe öffnen GD 0 mod_1199797369763_78 doc 35053 Note As the tailgate opens the switching cylinder for the discharge roller switch is actuated automatically To ensure the discharge rollers switch reliably hold down the key for opening the tailgate for another 1 2 seconds after the tailgate is completely open Pos 25 14 13 BA Bedi enung Ladewagen Zapfwelle einschalten...

Page 158: ... 9 After unloading GL GD Switch off the floor conveyor GL GD Switch off the PTO shaft GD design only Pos 25 14 19 BA Sicher hei t Gefahrenhi nweise Ladewag en Schalten der Zapfwelle 0 mod_1199797830763_78 doc 35091 Caution Switching of the PTO shaft Effect Material Damages Switching of the PTO shaft during the unloading process only when operating on idle and the tailgate is open Pos 25 14 20 BA B...

Page 159: ...hen the engine has been switched off and the ignition key has been removed Secure the tractor against rolling Use extreme caution when attaching implements to or detaching them from the tractor The accident prevention regulations must be complied with absolutely When connecting the hydraulic hose to and disconnecting it from the hydraulic system of the tractor the tractor system as well as the mac...

Page 160: ... it in place Carefully lower the offset drawbar until the support 1 rests on the ground Pos 25 16 6 BA Bedienung Ladewag en Abstellen Abstellen_2 1 mod_1201182692606_78 doc 51877 Relieve all pressure from the hydraulic system Disconnect the hydraulic hoses 4 from the tractor Disconnect the compressed air hoses 5 Note Insert the disconnected hydraulic hoses 4 into the designated receiving pieces on...

Page 161: ...schinen 0 mod_1199717011038_78 doc 33980 Danger Unexpected movements of the machine Effect Danger to life or serious injuries Setting tasks must only be performed when the drive is switched off and the engine is at a standstill Switching off the engine Remove the ignition key Secure the machine against the possibility of rolling back Pos 27 3 BA Seitenumbruch 0 mod_1196175311226_0 doc 4165 ...

Page 162: ... 104 The working height can be adjusted on the guide wheels 3 on either side of the pick up In order to carry out the adjustment lift and secure the pick up Pull the linch pin 2 and move the guide wheels into the desired position on the perforated bar 1 Secure the guide wheels in place with the linch pin Note Make certain that the guide wheels on either side of the pick up are in the same position...

Page 163: ...e wheels The guide wheels are adjusted with hole link 5 left and right Pos 27 4 7 Überschriften Überschriften 2 P T R ollenni eder halter 0 mod_1201163046930_78 doc 51122 12 2 Roller crop guide Pos 27 4 8 BA Einstell ung en Ladewagen R ollenni ederhalter R ollenni ederhalter_Bild_Titan_AX 1 mod_1201792593623_78 doc 54624 XXL00001 Figure 106 Pos 27 4 9 BA Einstell ung en Ladewagen R ollenni ederhal...

Page 164: ... off and the engine is at a standstill Switching off the engine Remove the ignition key Secure the machine against the possibility of rolling back Pos 27 6 3 BA Sicherheit Gefahr enhinweise Ladewagen Gefahr M essermontage 0 mod_1199871898737_78 doc 36361 Danger Risk of injury when attaching or removing the cutters Blades are pre tensioned with spring force The blades should be touched with suitabl...

Page 165: ...st theoretical chop length is 37 mm Longer lengths can be achieved by swinging aside blade groups with the central adjustment see table Chop length Number of blades Cutting system Group front 1 Group rear 2 0 0 Off Off 74 mm 20 On Off 74 mm 21 Off On 37 mm 41 On On Pos 27 6 6 BA Einstell ung en Ladewagen M odulgruppen Hinweis Verstopfung 0 mod_1201165202149_78 doc 51317 Note The cutting system has...

Page 166: ...control box By using the multi purpose key 4 turn the blade groups on or off until the desired number of blades and thus the required chop length has been achieved Properly attach the multi purpose key again to the transport bracket Switch the electrical system on again Pos 27 6 9 BA Einstell ung en Ladewagen Schneidwer k Hinweis M esserzahl anwäl bar wenn Schneidwer k eingefahren ist AX 14 mod_12...

Page 167: ...to maintenance position Comfort Version see chapter Info Centre Medium version see chapter Medium operation Note Remove the ignition key and switch off the electrical system on the control panel Release the locking device of the individual blades With the multi purpose key 4 turn both control shafts 7 in such a way that their cams 8 and 9 point downwards in the OFF position Place the cylinder 3 in...

Page 168: ...orce is required during loading when the cutting blades are sharp this in turn lowers fuel consumption If at all possible use the KRONE grinding mechanism for grinding The Part No for the blade holder for the KRONE blade grinding tool is 940 003 0 Avoid allowing the blades to heat up too much when grinding them The cutting blades are too hot if you can see discolouration in them Excessive heat red...

Page 169: ...aned in area 3 to remove any solid dirt deposits that may adhere to the cutters The safety rollers 2 turn with ease during the tensioning of the safety levers with the multi purpose key 4 This will ensure that Only little effort is needed for switching with the multi purpose key 4 The response threshold of the locking device for the individual blades is working properly see chapter maintenance Ins...

Page 170: ...203586735283_78 doc 66935 1 2 AX000010 3 5 4 6 7 Figure 112 Inserting cutters 5 Swivel in the cutting system Note Make sure that the cutting system is locked properly Retract lever 2 and secure with spring 1 Connect the cylinder 3 to the cutting system and secure it with the linch pin 4 Note Before the cutting system is retracted check to make certain all the cutters 5 are correctly installed They...

Page 171: ...the pick up This extends the feed area of the conveyor channel making it easier to eliminate blockages by turning on the PTO shaft Lower the cutting system using the control panel Eliminate blockage by switching in the PTO In addition the floor conveyor feed should be turned on briefly to reduce the load on the conveyor unit Pos 27 7 BA Seitenumbruch 0 mod_1196175311226_0 doc 4165 ...

Page 172: ... left side of the machine Completely lower the blade bar via the control unit maintenance position Uncouple the left and right cylinder 4 By turning the screw 3 right and left hand side of the machine on the swivel head adjust the fork pieces in such a way that dimension a 2 3 mm between the fork piece 1 and the bearing journal 2 Pos 27 8 3 BA Einstell ung en Ladewagen N eigung des M esserbal kens...

Page 173: ...der to the locking bolt 1 7 4 8 Figure 114 The fork pieces 1 of the blade bar must be swivelled all the way forward and be held in this position By means of the screw 7 adjust the hydraulic cylinder 4 in such a way that the locking bolt 8 properly snaps into the bolt holder of the cylinder Pos 27 8 6 BA Seitenumbruch 0 mod_1196175311226_0 doc 4165 ...

Page 174: ...reduced by swivelling the rear half of the blade bar 1 To do this Loosen the screws 2 slightly Loosen the screw 3 slightly pivot point Swivelling the rear half of the blade bar increases or reduces the response threshold Increasing measurement A stronger response threshold Reducing measurement A weaker response threshold Pos 27 8 8 BA Einstell ung en Ladewagen Hinweis Anspr echschwell e verändert ...

Page 175: ...ils greases cleaning agents and solvents In the event of injuries or burns due to oils cleaning agents or solvents contact a physician immediately All other safety instructions must also be followed to avoid injuries and accidents Pos 31 4 Überschriften Überschriften 2 P T Probel auf 0 mod_1196782963921_78 doc 14908 13 2 Test run Pos 31 5 BA Sicher heit Gefahr enhinweise M ähwer ke Ver wendung von...

Page 176: ... M14x1 5 145 215 255 M 16 160 210 310 365 M16x1 5 225 330 390 M 20 425 610 710 M 24 730 1050 1220 M 24x1 5 350 M 24x2 800 1150 1350 M 27 1100 1550 1800 M 27x2 1150 1650 1950 M30 1450 2100 2450 A KR 1 130 Note The table above does not apply to countersunk screws with a hexagonal socket head if the countersunk screw is tightened with the hexagonal socket head Pos 31 9 BA Wartung M uttern und Schr au...

Page 177: ...4 7 7 8 M 6 8 12 15 M 8 20 29 35 M 10 23 39 58 67 M 12 34 68 100 116 M 14 108 160 188 M 16 168 248 292 M 20 340 488 568 A BM 400 0234 Note The table above applies only to countersunk screws with hexagonal socket heads and metric threading that are tightened by the hexagonal socket head Pos 31 12 BA Wartung Muttern und Schrauben 50h anzi ehen 0 mod_1196949864530_78 doc 15293 Note Regularly check th...

Page 178: ... barely be seen Because of this you should use a piece of cardboard or something similar when searching for leaks Protect your hands and body If any fluid penetrates the skin it must be removed immediately by a doctor who is familiar with this kind of injury serious infections could otherwise result Physicians who are not familiar with this area should consult appropriate information from a compet...

Page 179: ...ad sensing capable The oil supply comes through the Power Beyond system of the tractor hydraulics for use of the load sensing system For additional information please refer to the tractor manufacturer s operating instructions The message line must be connected between the message connection LS on the control block of the loading wagon and the message connection of the tractor Note With closed cons...

Page 180: ... wagon under the protective box Note The adjustment depends on the hydraulic system of the tractor and must be made while there is no pressure in the loading wagon Unscrew the system screw 1 as far as it will go for Tractor with an open constant current hydraulic system for additional information please refer to the tractor manufacturer s operating instructions Tractors with LS pump and non activa...

Page 181: ...en Funktionsschaubild 1 2 3 Y1 Not Handbetätigung Y6 Y7 Y10 Y11 Y8 Y9 Y5 Y18 Y14Y15 Y4 Y3 Fkt 1Fkt 2 27 005 706 0 Y5 Y7 Y18 Y6 Y10 Y15 Y14 Y11 Y8 Y9 Y4 Y3 Y1 ON OFF Figure 118 Y1 Floor conveyor supply Y6 Y7 Tailgate Y3 raise lower Y8 Y9 Drawbar Y4 raise lower Y10 Y11 Cutter Y5Y18 Pick up Y14 Discharge roller coupling Y15 Steering axle locked Pos 31 14 13 BA Seitenumbr uch 0 mod_1196175311226_0 doc...

Page 182: ...vent the electrical system should fail completely the valves are equipped with an Emergency manual activation Medium version The valves Y5 to Y18 are activated by turning in the starwheel screw The valves Y1 Y3 and Y4 can be activated with a pointed object by turning the valve in Comfort version The valves Y5 to Y18 are activated by turning in the starwheel screw The valves Y1 Y3 and Y4 can be act...

Page 183: ...onding valves must be activated to perform a function for example raise pick up The respective diagrams show which valves must switch hydraulic block Medium hydraulic block Comfort A few examples below based on the Medium version serve for clarification For the Comfort version proceed as shown in the combination diagrams Raise pick up Turn in the starwheel screw on valve Y18 Pick up Using a pointe...

Page 184: ...dr uckfilter bei Komfor t_H ydrauli k Bild_Ladewagen 26 mod_1245842017257_78 doc 264230 1 2 5 3 4 EIN AUS TRD00067 Figure 119 Pos 31 14 20 6 BA Wartung H ochdr uckfilter H ochdr uckfilter Text 26 mod_1245842560960_78 doc 264255 Relieve all pressure from the hydraulic system Note Place a container underneath sufficiently large to collect the oil that drains out Loosen the bottom of the filter 4 wit...

Page 185: ...ance 185 Pos 31 14 22 BA Di ese Seite ist bewusst fr eigelassen worden 1 mod_1201783680373_78 doc 54443 This page has been left blank deliberately Pos 31 14 23 BA Seitenumbr uch 0 mod_1196175311226_0 doc 4165 ...

Page 186: ...ance 186 Pos 31 14 24 BA Wartung Ladewag en H ydr aulikschaltpläne 150 000 172 00 H ydrauli kschal tpl an Medium AX M X 14 mod_1231323637911_78 doc 171775 13 12 Hydraulic system circuit diagram Medium Fig 120 ...

Page 187: ...onal 5 Boogie 14 t optional 6 Floor conveyor 7 Function 8 Tailgate 9 Pick up 10 Blade control system 11 Offset drawbar 12 Medium valve block 13 Self steer optional 14 Discharge rollers 15 Floor conveyor drive 15 1 Rapid traverse 15 2 Reversing valve block Y2 for GD D only Pos 31 14 25 BA Seitenumbr uch 0 mod_1196175311226_0 doc 4165 ...

Page 188: ...ance 188 Pos 31 14 26 BA Wartung Ladewag en H ydr aulikschaltpläne 150 000 173 00 H ydrauli kschal tpl an Komfort AX MX 14 mod_1231323880598_78 doc 171798 13 13 Hydraulic system circuit diagram Comfort Fig 121 ...

Page 189: ...8 Tailgate 9 Pick up 10 Blade control system 11 Offset drawbar 12 Comfort valve block 13 14 Discharge rollers 15 Floor conveyor drive 15 1 Rapid traverse 16 Reverse valve block 17 Cross conveyor optional 18 Parallel operation to floor conveyor drive possible 19 Alternatively to one single action control unit Pos 31 15 BA Seitenumbruch 0 mod_1196175311226_0 doc 4165 ...

Page 190: ... serious injury If you do not have sufficient experience of fitting tyres have tyres fitted by the KRONE dealer or a qualified tyre specialist When fitting tyres on the wheel rims the maximum pressure given by the tyre manufacturer must not be exceeded The tyre or even the wheel rim could explode and or burst If the tyre heels do not fit properly when the maximum permitted pressure is reached let ...

Page 191: ...y After that check them every 50 operating hours to make certain they are tight Check the tyre pressure at regular intervals and refill if necessary The tyre pressure depends on the size of the tyres The values are listed in the table Pos 31 16 6 BA Wartung Reifen Anzi ehdr ehmoment 0 mod_1199955905460_78 doc 37340 Tightening Torque Threading Key size in mm Number of bolts per hub pieces Max tight...

Page 192: ...on applies especially to the typical mixture of operation field road If necessary the tyre air pressure can be reduced to the minimum air pressure In that case however the change in the dynamic behaviour of the tyres must be noted especially for road travel Pos 31 17 BA Wartung Zug ösen a 41 5 an der D eichsel 0 mod_1199957816506_78 doc 37406 13 15 Hitches on the drawbar KDW02330 a Figure 123 Caut...

Page 193: ... Figure 124 Item Sensor designation Tightening torque 1 Automatic loader B2 Comfort optional 10 Nm 2 Floor conveyor switch off unit B3 10 Nm 3 Tailgate B6 right optional 10 Nm 4 Buttons blade bar raise lower Comfort optional 10 Nm 5 Cutter active inactive B1 10 Nm 6 Job computer Comfort optional 7 Axle locked B7 optional 10 Nm Pos 31 19 2 BA Seitenumbruch 0 mod_1196175311226_0 doc 4165 ...

Page 194: ...67253 13 17 Position of sensors D GD left hand side of the machine 2 3 AX000011 4 1 Figure 125 Item Sensor designation Tightening torque 1 Axle locked B7 optional 10 Nm 2 Automatic loader B2 Comfort optional 10 Nm 3 Buttons blade bar raise lower Comfort 10 Nm 4 PTO speed 10 Nm Pos 31 19 4 BA Seitenumbruch 0 mod_1196175311226_0 doc 4165 ...

Page 195: ... Position of sensors GD right hand side of the machine AX000012 2 5 1 4 3 Figure 126 Item Sensor designation Tightening torque 1 Tailgate B6 right 10 Nm 2 Discharge roller control B4 Comfort 10 Nm 3 Job computer Comfort 4 Cutter active inactive B1 10 Nm 5 Floor conveyor switch off unit B3 Pos 31 19 6 BA Seitenumbruch 0 mod_1196175311226_0 doc 4165 ...

Page 196: ...he sensor 1 must be a 2 mm Setting Loosen the nuts on either side of the sensor Turn the nuts until dimension a 2 mm is reached Tighten the nuts again Pos 31 19 9 BA Wartung Sensor en Namursensor d 30 mm 0 mod_1199962520100_78 doc 37673 13 18 1 2 Namur sensor d 30 mm a BPXC0172 2 1 3 Figure 128 The dimension between the encoder 2 and the sensor 1 must be a 5 mm Setting Loosen the nuts on either si...

Page 197: ... 2 Figure 129 Pos 31 23 BA Wartung Ladewagen Sensoren Sensors Kratzbodenabschal tung 2 0 mod_1199966426163_78 doc 37818 When the wagon is filled a sensor shuts off the floor conveyor feed if the loaded crop is pressing the feeler plate into the rear wall This switch off must be checked before and during the first time it is used and after 250 operating hours for functionality The distance A betwee...

Page 198: ...arge roller is movably mounted The motion sensor 1 is located on the bottom of the bearing It records the offset of the discharge roller Movement of the support The switch off movement of the sensor is determined by a tension spring 2 Tighten tension spring 2 longer switch off delay more force acting on the discharge rollers Loosen tension spring 2 shorter switch off delay less force acting on the...

Page 199: ... MX 350 GD SAE90 Metering roller front MX 310 GD 0 7 l Discharge roller gear rear GD 0 8 l SAE90 integrated into conveyor drum Pos 31 29 3 BA Wartung Zei tinter valle an den Getri eben 0 mod_1196951919921_78 doc 15373 13 21 1 Oil Level Check and Oil Change Intervals Gearboxes Note Oil level check and oil change gearboxes and lubricating the machine Effect Long expected service life of machine Firs...

Page 200: ...A Wartung Öl kontrolle_Wechsel Öl wechsel Versi on1 Bel üftungsfilter 0 mod_1197010026283_78 doc 15747 Oil change For time intervals see Chapter Oil Level Check and Oil Change Intervals Gearboxes Screw out the screw plug 2 Collect the used oil in a suitable drip pan Screw in the screw plug 2 Fill oil 3 oil level up to hole 1 Screw the inspection screw 1 and ventilation filter 3 back in Pos 31 29 5...

Page 201: ...2 Pos 31 29 7 6 BA Wartung Öl kontrolle_Wechsel Öl kontr olle SAE 90 0 mod_1197008973815_78 doc 15649 Oil level check For time intervals see Chapter Oil Level Check and Oil Change Intervals Gearboxes Unscrew the inspection screw 1 Oil level up to bore hole 1 If necessary top up the oil SAE 90 Screw the check screw 1 back in Pos 31 29 7 7 BA Wartung Öl kontrolle_Wechsel Öl wechsel Versi on3 1 mod_1...

Page 202: ...Wechsel Öl wechsel Schauglas X Disc 6200 12 mod_1224837898010_78 doc 153785 Oil change For time intervals see Chapter entitled Oil Level Check and Oil Change Intervals Gearboxes Screw out the oil drain plug 2 Collect the used oil in a suitable drip pan Screw in the oil drain plug 2 Top up the oil 3 the oil level must be visible at least halfway up the inspection window 1 Pos 31 29 9 5 BA Wartung Ö...

Page 203: ... screw 1 Oil level up to bore hole 1 If necessary top up the oil SAE 90 Screw the check screw 1 back in Pos 31 29 11 5 BA Wartung Öl kontr olle_Wechsel Öl wechsel Version2 0 mod_1197016258486_78 doc 15884 Oil change For time intervals see Chapter Oil Level Check and Oil Change Intervals Gearboxes Screw out the screw plug 2 Collect the used oil in a suitable drip pan Screw in the screw plug 2 Fill ...

Page 204: ...the oil SAE 90 Screw the check screw 1 back in Pos 31 29 13 4 BA Wartung Öl kontr olle_Wechsel Öl wechsel Version2 0 mod_1197016258486_78 doc 15884 Oil change For time intervals see Chapter Oil Level Check and Oil Change Intervals Gearboxes Screw out the screw plug 2 Collect the used oil in a suitable drip pan Screw in the screw plug 2 Fill oil 1 oil level up to hole 1 Pos 31 29 13 5 BA Wartung Öl...

Page 205: ...rtung Ladewagen Antrieb Förderaggregat 14 mod_1231314279520_78 doc 171633 13 28 1 Drive conveyor unit TR000005_1 X Figure 136 The drive of the conveyor unit is located on the front left side of the machine Length of spring under tension X 85 90 mm Note Measured up to the top of the washer Pos 31 33 BA Seitenumbruch 0 mod_1196175311226_0 doc 4165 ...

Page 206: ...ve AX000031 a 1 Figure 137 Check the chain tension Length of spring under tension a 70 75 mm Note Measured up to the top of the washer To correct the chain tension Increase or reduce the spring tension of the compression spring 1 until distance a 65 70 mm is set Pos 31 35 BA Seitenumbruch 0 mod_1196175311226_0 doc 4165 ...

Page 207: ...f necessary Checking the chain tension for the floor conveyor Check the chain tension for the floor conveyor by pressing in The pretension is correct if the depth of pressing is a approx 30 60 mm If it is not correct the pretension Correct the chain tension for the floor conveyor To do this Loosen the nuts 1 Increase the floor conveyor tension by screwing in the screws 2 Note The floor conveyor ch...

Page 208: ...chain by 2 or 4 links Connect the chain with the chain connecting link 3 Secure the locking piece 2 and cotter pin 1 Note Both chains of the floor conveyor must be shortened by the same length On the dual floor conveyor the relevant chair pairs belonging together must be shortened Re tension the tension spring 3 until the screw 5 can be pushed through again Remove the threaded spindle and screw fr...

Page 209: ...pring If the chain tension reduces loosen the counter nut 1 and tighten the tension spring with the nut 2 until the chain tension is sufficient Tighten the counter nut 1 again Pos 31 41 BA Wartung Ladewagen Abstreifer 0 mod_1200035326185_78 doc 38896 13 31 Scraper KLW09030 1 Figure 141 Check the back of the scraper 1 after every season for wear and replace if necessary Note The scrapers are locate...

Page 210: ...and must therefore not be changed Pos 31 44 BA Wartung Ladewagen Anschl agleiste AX M X 14 mod_1231400723366_78 doc 171871 XXL00004 Fig 143 At the end of the season the stop bar 1 must be checked for wear Pos 31 45 BA Wartung Ladewagen Anschl agleiste Hi nweis MX 14 mod_1231400999897_78 doc 171917 Note If the thickness of the material t 6 mm of the stop bar Part No 20 052 676 0 has been reduced by...

Page 211: ...e of A from the rotating conveyor drum 3 Setting distance between scraper and drum Disconnect all screw couplings 1 from the scraper bar on right and left Loosen the screw coupling 4 on the wedge plate 5 right and left sides Using the wedge plate 5 turn the entire scraper bar until dimension A 12 15 mm is reached Tighten screw couplings 1 and 4 Pos 31 48 BA Seitenumbruch 0 mod_1196175311226_0 doc ...

Page 212: ...ng of safety springs with multipurpose key after blades are installed If they do not the result will be an increased amount of force applied to select blades The individual knife retention will not work properly increased blade breakage To prevent this lubricate the safety rollers 1 if they no longer turn easily but in any case once a year Pos 31 50 BA Wartung Ladewagen Hi nweis EP Langzei tfett N...

Page 213: ...Maintenance 213 ...

Page 214: ... completed mount all protective coverings and safety devices properly again Avoid skin contact with oils greases cleaning agents and solvents In the event of injuries or burns due to oils cleaning agents or solvents contact a physician immediately All other safety instructions must also be followed to avoid injuries and accidents Pos 31 52 4 BA Wartung Ladewagen Schmi erung Allgemein 0 mod_1200042...

Page 215: ...199781879794_78 doc 34542 14 2 PTO shaft Pos 31 52 7 BA Wartung Ladewagen Abschmi eren der Gel enkwell e 0 mod_1200048739138_78 doc 39029 Figure 146 All other lubrication points on the PTO shafts must be lubricated as shown in the illustration Pos 31 52 8 BA Seitenumbruch 0 mod_1196175311226_0 doc 4165 ...

Page 216: ... Wartung Ladewagen Schmi erpl äne Schmierpl an MX GL 14 mod_1232003507301_78 doc 172859 14 3 Lubrication chart GL MX000005 Fig 147 Pos 31 52 10 BA Wartung Ladewag en Schmier pläne Schmi erstellen Tabelle Titan_MX GL 14 mod_1232004141051_78 doc 172930 ...

Page 217: ...itional equipment 4 4 Locking cylinder of the steering axle optional additional equipment 2 5 Floor conveyor rear 4 6 Compensatory swing right left for longitudinal control unit only 2 7 Tandem axle brake shaft automat linkage setter 8 4 8 Floor conveyor front 4 9 Guide wheel arm for pick up 2 10 Guide wheel for pick up 2 11 12 Main drive PTO shaft 8 13 Hitch for revolving hitch only 1 14 Chain lu...

Page 218: ...Maintenance lubrication chart 218 14 5 Lubrication chart GD MX000006 Fig 148 ...

Page 219: ...onal equipment 4 4 Locking cylinder of the steering axle optional additional equipment 2 5 Chain lubrication system discharge rollers 1 6 Bearing for lower discharge roller floor conveyor switching 1 7 Floor conveyor rear 4 8 Compensatory swing right left for longitudinal control unit only 2 9 Tandem axle brake shaft automat linkage setter 8 4 10 Floor conveyor front 4 11 Guide wheel arm for pick ...

Page 220: ...oil reservoir was completely empty the lubricating feed mechanism 1 must be vented Venting of the lubricating feed mechanism must be done with the pick up lowered i e with a depressurised pick up hydraulic line To do this screw off one lubrication line from the lubricating feed mechanism 1 and loosen the threaded socket 2 until the lubricating oil is emerging without bubbles Note Carefully capture...

Page 221: ...lfunctions in the brake system must be eliminated immediately No changes may be made to the brake system without the approval of KRONE Have the brakes checked regularly by a specialist workshop Replace worn or damaged brake hoses immediately KRONE is not responsible for natural wear defects caused by overload or changes made to the brake system Pos 31 54 3 BA Wartung Br emsanlag e Bremsenei nstell...

Page 222: ...sanlag e Einstell ung am Gestängestell er_Ladewagen 0 mod_1200291352133_78 doc 39223 Adjusting the linkage setter TRD00071 Figure 150 Every 200 operating hours Activate the linkage setter manually in the pressure direction The wheel brake must be readjusted with a clear path of max 35 mm for the long stroke diaphragm cylinder pressure rod The setting is made on the readjustment hexagon of the link...

Page 223: ...reby protecting the brake system from malfunctions Note The brake system is ready for operation even when the filter insert is clogged in both direction of flow Removing the air filter Unscrew the nut 2 Rotate the air filter 1 Loosen the clasp locking ring 3 Remove the filter insert Maintenance of the air filter Clean the air filter before the beginning of the season Installation of the air filter...

Page 224: ...ain valve has a heavy accumulation of dirt or is leaking it must be replaced by a new one Pos 31 55 BA Wartung Ladewagen Pfleg e nach der täglichen Benutzung 0 mod_1200294132476_78 doc 39362 15 4 Upkeep after Daily Use Note After daily operation the areas around the conveyor and cutting system and adjacent areas must be cleaned and preserved regularly Pos 31 56 BA Wartung Ladewagen Wartungs und R ...

Page 225: ...lements may start moving Effect Danger to life injuries or damage to the machine Switch off the tractor engine and remove the ignition key Secure the machine and tractor against the possibility of rolling back Switch off the PTO and disengage it After the repair maintenance and cleaning work or technical interventions are completed mount all protective coverings and safety devices properly again A...

Page 226: ...sary remove clean grease and remount If necessary replace with new parts Use only original KRONE replacement parts Disassemble the PTO shaft Lubricate the inner tubes and the guard tube with grease Grease the lubrication points on the cross joint and grease the bearing rings of the guard tube Park the machine in a dry location but not in the vicinity of artificial fertilisers or livestock building...

Page 227: ...entions are completed mount all protective coverings and safety devices properly again Avoid skin contact with oils greases cleaning agents and solvents In the event of injuries or burns due to oils cleaning agents or solvents contact a physician immediately All other safety instructions must also be followed to avoid injuries and accidents Pos 33 11 BA Ei nlag erung Ladewagen Vor der Saisaon 0 mo...

Page 228: ...s due to oils cleaning agents or solvents contact a physician immediately All other safety instructions must also be followed to avoid injuries and accidents Pos 35 4 BA Störungen Ursachen und Behebung Ladewagen Tabellarische Auflistung Ladewagen 36 mod_1258716401209_78 doc 335661 Malfunction Possible cause Remedy Blockages in the feed area Swaths are of uneven height or too large Pick up smaller ...

Page 229: ...ve block not set correctly Check the setting and change if necessary Power supply interrupted Check the connections of the electromagnetic valves and perform a function test of valves with hydraulic emergency activation Bad chop quality Dull blades Regrind or replace blades P T O speed too high Reduce P T O speed Swath size too small Increase swath or increase driving speed The crop is lying in th...

Page 230: ... conveyor supply is not activated by pressing key 12 once but the key 12 is inching The setting of parameter Cross conveyor is wrong Call up the sensor test check the parameter Cross conveyor and set if necessary Pressure builts up with activated hydraulic but there are no functions carried out when pressing the medium keys The setting of parameter Load Sensing is wrong Call up the sensor test che...

Page 231: ...8 7 E8 7 E6 7 E7 7 E5 7 E4 7 E3 7 E4 7 E1 7 E2 6 E6 1 frei ws 2 LIN br 3 12V_SW Term gn 4 12V Term ge 5 CAN L gr 6 GND Term rs 7 CAN H bl 8 frei rt Stift 8 2 3 4 5 1 6 7 Buchse 8 2 3 4 5 1 6 7 5 AX MX Medium Jobrechner 150 100 241 A B C 13 03 2008 Albers D24 00 A8 Ladewagen Bedienung_20080235 1 2 3 4 5 6 7 8 X3_03 X3_02 X3_01 X3_04 X2_01 X2_02 X4_16 X4_17 X4_30 X4_31 X4_32 X4_23 X4_24 X4_1 X4_25 X...

Page 232: ... Kratzbodenabschaltung E2 5 D6 A4 X4_20 B6 Heckklappe E4 5 D6 A4 X4_34 B7 Achse gesperrt E3 5 D6 A4 33 KB1X4 35 KB1X4 19 KB1X4 20 KB1X4 34 KB1X4 1 XB6a 1 XB7a 2 XB6a 2 XB7a B01_1X4 30 B05_1X4 32 B03_1X4 16 B06_1X4 17 B07_1X4 31 X4_3 A7 Y12 Eilgang H5 5 D8 A4 X4_14 A2 H1 Arbeitsscheinwerfer H13 5 D7 A4 14 KB1X4 3 KB1X4 1 XH1b 2 XH1b 1 X12a 1 X12b 1 XY12b 2 XY12b 2 X12b 2 X12a X6a_1X4 38 H01_1X4 01 ...

Page 233: ...enken H9 5 D8 A4 X4_8 A4 Y06 Y07 Heckklappe H12 5 D7 A4 X4_9 X4_12 A3 Y08 Y09 Knickdeichsel H11 5 D7 A4 X4_13 X4_10 A1 Y10 Y11 Messerbalken H10 5 D7 A4 X4_11 4 KB1X4 5 KB1X4 7 KB1X4 8 KB1X4 9 KB1X4 12 KB1X4 13 KB1X4 10 KB1X4 11 KB1X4 X4_2 A6 Y18 Pickupheben H4 5 D8 A4 2 KB1X4 1 XY03b 1 XY04b 2 XY04b 2 XY03b 1 XY05b 2 XY05b 1 XY18b 2 XY18b 1 XY06b 1 XY07b 2 XY06b 2 XY07b 1 XY08b 1 XY09b 2 XY08b 2 X...

Page 234: ...150 100 242 A B C 13 03 2008 Albers 16 D24 00 4 3 2 1 8 7 6 5 A1 1 2 3 4 5 6 7 8 X5Bb 1 2 X5a 3 4 5 6 7 3 4 5 6 1 7 2 X5b 1 X06Ba 2 A X06b B A X06a B 1 X14 1b 2 3 4 5 1 X14a 2 3 4 5 12V_1X1 28 GND_1X1 29 CAN 1 H CAN 1 L GND Termi 12VFU Termi SS 5V CAN 2 H CAN 2 L 31 15 30 X06Bb 1 XF1 2 1 XF1 1 F1 30A X42 X41 X36 Splice GND X37 Splice 12V Batterie Masse Batterie 12V Rot Schwarz braun Braun blau Bla...

Page 235: ...nnung 0 1A Analogspannung 0 1A GND Analogsensoren GND Analogsensoren Versorgung Versorgung Digitalsensoren Versorgung Analogsensoren CAN 1 1 15 29 2 16 30 3 17 31 4 18 32 5 19 33 6 20 34 7 21 35 8 22 36 9 23 37 10 24 38 11 25 39 12 26 40 13 27 41 14 28 42 Eingänge Ausgänge X2 X2_35 X2_37 X2_33 X2_2 X2_19 X2_26 X2_4 X2_8 X2_10 X2_12 X2_30 X2_39 X2_22 X2_42 X2_1 X2_18 X2_16 4 E8 4 F8 4 C8 4 C8 4 B8 ...

Page 236: ...30 X3_32 X3_6 X3_34 X3_36 7 A1 7 A3 9 E4 9 E3 9 E6 9 E5 9 E1 8 E6 8 E5 8 E4 9 E2 Anschluss I O Modul Anschluss I O Modul R160 R510 R160 R510 6 AX und MX Komfort Jobrechner X3 150 100 242 A B C 13 03 2008 Albers 16 D24 00 X3_14 X3_42 X3_15 X3_29 X3_9 X3_11 X3_13 X3_5 X3_41 X3_20 X3_24 X3_27 X3_16 X3_25 X3_38 X3_39 X3_28 X3_1 X3_18 X3_22 X3_7 X3_35 X3_37 X3_17 DIGFRQ_13 DIG_20 MULTI_2 MULTI_3 STROM_...

Page 237: ...2 X1_24 Kratzbodenabschaltung DIG_3 5 D3 A2 X1_12 Dosierwalzen Kontrolle DIGHFRQ_6 5 D3 A2 X1_10 Drehzahl Zapfwelle DIGHFRQ_1 5 D2 A2 X1_18 Heckklappe DIGFRQ_11 5 D3 A2 22 X1 24 X1 2 XB02a 1 XB02a 12 X1 2 XB04a 2 XB03a 10 X1 2 XB05a 18 X1 2 XB06a 1 XB03a 1 XB04a 1 XB05a 1 XB06a B02_1X1 23 B03_1X1 25 B04_1X1 13 B05_1x1 11 B06_1X1 19 1 XB01a 2 XB01a X3_23 Messer MULTI_2 6 D2 A2 B01_1X3 16 23 X3 1 2 ...

Page 238: ...Pickup 2 LA_4 6 D4 A2 X2_16 Pickup 1 PWMLA_10 5 D8 A2 X3_2 Kratzbodenvorlauf PWMLA_2 6 D3 A2 2 X3 4 X3 8 X3 10 X3 36 X3 16 X2 1 XY01b 3 X4a 3 X4b 1 XY02b 2 XY02b 2 XY01b 4 X4b 4 X4a 1 XY03b 1 XY04b 1 XY05b 1 XY18b 1 X03a 1 X03b 2 XY03b 2 XY04b 2 XY05b 2 XY18b 2 X03a 2 X03b XY18_1X2 17 XY05_1X3 05 XY04_1X3 13 XY03_1X3 11 X3_3 Kratzbodenvorlauf STROM_2 6 D2 A2 3 X3 X3_31 Kratzbodenrücklauf STROM_3 6...

Page 239: ...rbalken 1 LA_2 6 D3 A2 X3_34 Messerbalken 2 LA_3 6 D3 A2 X3_30 Knickdeichsel 1 PWMLA_11 6 D3 A2 X3_32 Knickdeichsel 2 PWMLA_12 6 D3 A2 32 X3 30 X3 34 X3 6 X3 1 XY10b 1 XY11b 1 XY08b 1 XY09b 2 XY09b 2 XY08b 2 XY11b 2 XY10b XY10_1X3 35 XY11_1X3 37 XY08_1X3 22 XY09_1X3 07 X3_21 Heckklappe 1 PWMLA_7 6 D3 A2 X3_12 Heckklappe 2 PWMLA_9 6 D3 A2 21 X3 12 X3 1 XY06b 1 XY07b 2 XY06b 2 XY07b XY07_1X3 09 XY06...

Page 240: ... Modul I O Anschluss Anschluss I O Modul 10 AX und MX Komfort Optionen Achse Siliermittel 150 100 242 A B C 13 03 2008 Albers 16 D24 00 X1_16 Achse gesperrt DIGFRQ_10 5 D3 A2 16 X1 2 XB07a 1 XB07a 2 XB7b 1 XB7b 1 XB7a 4 XB7a B07_1X1 17 X1_42 Achse gesperrt HBPWMSTR_2 5 D4 A2 42 X1 1 XY15b 2 XY15b XY15_1X1 27 1 2 Y15 Achse gesperrt X1_40 Siliermittel PWMLA_1 5 D4 A2 40 X1 1 XA1a 2 XA1a X1_41 Silier...

Page 241: ...aulic block Comfort 183 Displaying the Software Version 74 Distance from Scraper to Drum 213 Driving and Transport 50 E Electrical power supply 55 Examples of Emergency Manual Activation 185 F Filling Quantities and Lubrication Designations for Gearboxes 201 H High pressure filter 186 Hitched Implements 27 Hydraulic brake Export 46 Hydraulic Connection to Block the Coaster Steering Axle Special Eq...

Page 242: ...the Adhesive Safety and Information Labels 17 Roller crop guide 164 S Safety 16 Safety Instructions and Accident Prevention Regulations 26 Safety Instructions on the Machine 30 Safety conscious work practices 25 Setting the Transfer Mechanism 223 Settings 162 Start up 41 T Technical data 14 Test run 177 Torques 178 Torques Countersunk Screws 179 Tyres 29 192 U Unauthorised Conversion Modification ...

Page 243: ......

Page 244: ...abrik Bernard Krone GmbH Heinrich Krone Straße 10 D 48480 Spelle Postfach 11 63 D 48478 Spelle Phone 49 0 59 77 935 0 Fax 49 0 59 77 935 339 Internet http www krone de eMail info ldm krone de konsequent kompetent ...

Reviews: