background image

2

 INSTALLATION 

OPTICHECK

www.krohne.com

06/2014 - 4003706601 - QS OPTICHECK R01 en

2.3  Storage

Store the device in a dry and dust free location.

Avoid lasting direct exposure to the sun.

Store the device in its original packaging.

Storage temperature:  -20 ...+60

°

C/-4...+140

°

F

Humidity; 0%-90% non-condensing

2.4  Transport and usage

Use the included suitcase to transport the OPTICHECK.

Notes on handling the device

Do not carry the device by the connected wires.

Avoid heavy vibrations.

Avoid heavy mechanically shocks or impacts on the device.

2.5  General notes on installation

Installation of the OPTICHECK verification tool & tablet, mechanically and electrically, together 
with the use of software and installation of special drivers, is only permitted to specially trained 
personal.

The service engineer and/or operator have to know the correct handling of the OPTICHECK tool, 
as well as servicing and operating flow sensor/signal converter combinations.

Please contact the manufacturer or your local supply office, for the availability of training and 
information tools.

INFORMATION!

The installation of the OPTICHECK verification tool always have to be done on the signal 
converter side.

CAUTION!

Avoid extensive humidity and/or direct entry of rain, when measuring / working with the 
OPTICHECK, during the verification process or when the housing of the signal converter is open.

Summary of Contents for OPTICHECK

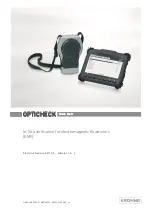
Page 1: ...tion for electromagnetic flowmeters EMF Electronic Revision ER 1 0 0_ Version 1 0 _ OPTICHECK OPTICHECK OPTICHECK OPTICHECK Quick Start Quick Start Quick Start Quick Start KROHNE 06 2014 4003706601 QS OPTICHECK R01 en ...

Page 2: ...2 5 General notes on installation 6 2 5 1 Magnetic field 7 2 5 2 Impacts and vibration 7 2 5 3 Electro Static Discharge 8 2 5 4 Installation Software 8 2 5 5 Converter specific information 8 3 Electrical connections 9 3 1 Safety instructions 9 3 2 Connection of tablet 9 3 3 Device variants and connections 10 4 Start up 11 4 1 Start tablet notebook 11 4 2 Starting measuring 11 4 3 Connect flowmeter...

Page 3: ...gs must be observed without fail Even partial disregard of this warning can lead to serious health problems and even death There is also the risk of seriously damaging the device or parts of the operator s plant WARNING Disregarding this safety warning even if only in part poses the risk of serious health problems There is also the risk of damaging the device or parts of the operator s plant CAUTI...

Page 4: ... Please note that on site verification with OPTICHECK is not intended to replace a full wet calibration on a calibration rig INFORMATION The manufacturer is not liable for any damage resulting from improper use or use for other than the intended purpose DANGER OPTICHECK is not Ex certified and must not be used in areas with an explosive atmosphere Do not connect OPTICHECK to a flow sensor or a con...

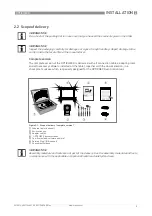
Page 5: ...list to make sure that you have all the elements given in the order INFORMATION Inspect the packaging carefully for damages or signs of rough handling Report damage to the carrier and to the local office of the manufacturer Figure 2 1 Scope of delivery complete version 1 Ordered tablet optional 2 Verification box 3 Adapter cables 4 OPTICHECK documentation 5 Certificates add software and info 6 Par...

Page 6: ... the OPTICHECK verification tool tablet mechanically and electrically together with the use of software and installation of special drivers is only permitted to specially trained personal The service engineer and or operator have to know the correct handling of the OPTICHECK tool as well as servicing and operating flow sensor signal converter combinations Please contact the manufacturer or your lo...

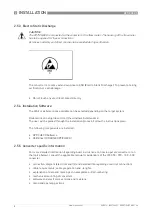
Page 7: ...cial care of Grounding conditions of the flowmeter No solid particles or air content in the media Compatibility wetted materials of sensor wrt media 2 5 1 Magnetic field 2 5 2 Impacts and vibration Figure 2 2 Avoid magnetic fields Figure 2 3 Avoid high impacts or vibration CAUTION The OPTICHECK setup has been designed to be as robust as possible To ensure reliable accurate and long life time the f...

Page 8: ...CHECK Software USB driver KROHNE OPTICHECK 2 5 5 Converter specific information For more detailed information regarding basic instructions on how to operate converter or on the topics below consult the applicable manual or addendum of the IFC 050 070 100 300 converter connection diagram electrical and I O and detailed info regarding electrical connection cable requirements cable preperation and le...

Page 9: ...gulations for electrical installations DANGER For devices used in hazardous areas additional safety notes apply please refer to the Ex documentation WARNING Observe without fail the local occupational health and safety regulations Any work done on the electrical components of the measuring device may only be carried out by properly trained specialists INFORMATION Look at the device nameplate to en...

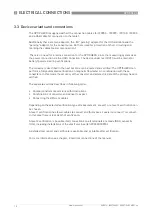
Page 10: ...ified The OPTICHECK can perform a fully automated verification on magnetic flowmeters in combination with these converters In this mode the accuracy of the converter and all electric data of the primary head is verified The separate sections describes in following order Compact and remote versions with illustrations Combinations of converter and sensor to expect Connecting the different cables Dep...

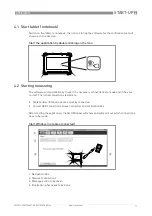
Page 11: ...ry connections are made and if they are correct The initial connections tested are Tablet and verification box are correctly connected Correct GDC connection between converter and verification box After starting the application the Start Window will show and will point out which connections have to be made 1 Navigation tabs 2 Status of connections 3 Message action to be taken 4 Illustration what n...

Page 12: ...step of the connection 4 3 Connect flowmeter After a correct connection of the tablet and the verification tool the ID and calibration information will be shown on the left side of the window 1 by pressing the button Connect For electrical connections of a specific flowmeter see Information refer to Device variants and connections on page 10 Verify if all connections are correctly made before star...

Page 13: ...PTICHECK verification tool and the system checkup both ready messages will follow for OPTICHECK and flowmeter All information will be shown in the window eg ID name SW ER version calibration and manufacturing date The system is now ready to be configured for verification measurements see information refer to Overview verification process on page 14 1 Ready messages with detailed info 2 Illustratio...

Page 14: ...guration select converter properties which cannot be automatically detected select the verification level select process conditions manually selection for some converters types all these data have influence on the verification all these data have influence on the verification all these data have influence on the verification all these data have influence on the verification OPTICHECK shows the ins...

Page 15: ...the initial installation condition After finishing the test remove GDC connection and close the converter housing Step Description Result OPTICHECK shows the completion of the above steps and three buttons Factory settings flowmeter calibration data are compared to factory calibration data Create report the certificate and the detailed report are generated as pdf History pressing this button shows...

Page 16: ...rs Analysis products Products and systems for the oil gas industry Measuring systems for the marine industry Head Office KROHNE Messtechnik GmbH Ludwig Krohne Str 5 47058 Duisburg Germany Tel 49 203 301 0 Fax 49 203 301 103 89 info krohne com KROHNE 06 2014 4003706601 QS OPTICHECK R01 en Subject to change without notice The current list of all KROHNE contacts and addresses can be found at www kroh...

Reviews: