background image

Connecting the VA-1DVIN Virtual EDID 


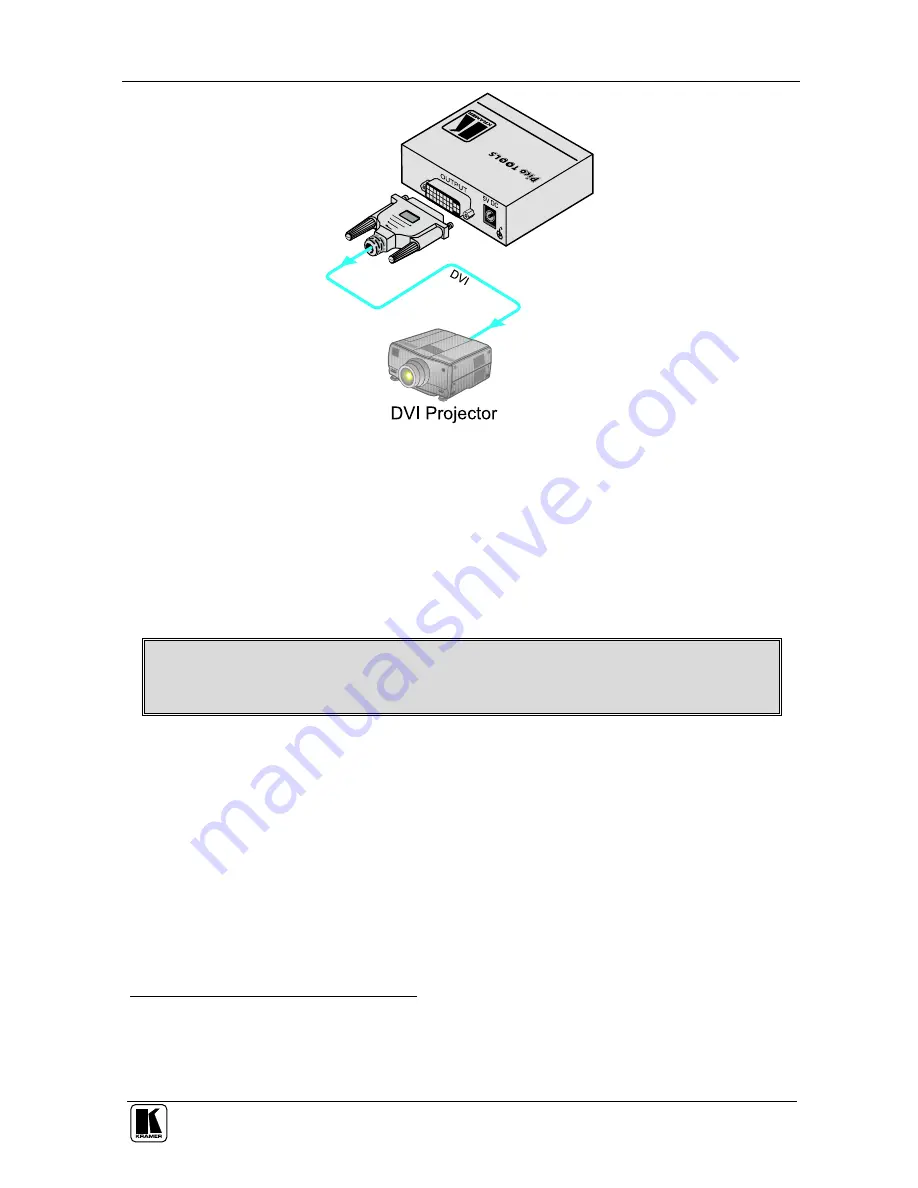
Figure 2: VA-1DVIN – Acquiring the EDID from the Display Device 

5.2  Reconnecting the Projector 

To reconnect the projector at a distance from the PC, as illustrated in the 

example in 

Figure 3

, do the following

1

1.  Connect a DVI source (for example, a DVI computer graphics source) to 

the INPUT DVI connector on the 

VA-1DVIN

Turn on the DVI source only after connecting the VA-1DVIN, so it can acquire 

the EDID properly 

2.  If required

2

, connect the 5V DC power adapter to the power socket and 

connect the adapter to the mains electricity. 

3.  When installation is complete

3

, connect the OUTPUT DVI connector of the 

VA-1DVIN

 to the projector, using the required cable length. 


1 Switch OFF the power on each device before connecting it to your VA-1DVIN 
2 Usually, the PC can supply power to the unit 
3  The  EDID  is  transmitted  to  the  PC  via  the  VA-1DVIN,  so  the  PC  gets  the  EDID  information  even  if  the  projector  is 
temporarily disconnected. When installing the display again at a distance, there is no need to reboot the PC 

Summary of Contents for VA-1DVIN

Page 1: ...Kramer Electronics Ltd USER MANUAL Model VA 1DVIN Virtual EDID...

Page 2: ...al EDID 4 5 1 Acquiring the EDID 4 5 2 Reconnecting the Projector 5 6 Technical Specifications 6 Figures Figure 1 VA 1DVIN Virtual EDID 3 Figure 2 VA 1DVIN Acquiring the EDID from the Display Device 5...

Page 3: ...e includes the following items VA 1DVIN Virtual EDID Power adapter 5V DC Input This user manual2 2 Getting Started We recommend that you Unpack the equipment carefully and save the original box and pa...

Page 4: ...To achieve the best performance Connect only good quality connection cables thus avoiding interference deterioration in signal quality due to poor matching and elevated noise levels often associated...

Page 5: ...a supported by the display the display size luminance data and for digital displays only the pixel mapping data 4 Your VA 1DVIN Virtual EDID Figure 1 and Table 1 define the VA 1DVIN Virtual EDID Figur...

Page 6: ...2 The projector can now be reconnected at a distance to the PC via the VA 1DVIN 5 1 Acquiring the EDID To use the VA 1DVIN to acquire the EDID information as illustrated in the example in Figure 2 do...

Page 7: ...an acquire the EDID properly 2 If required2 connect the 5V DC power adapter to the power socket and connect the adapter to the mains electricity 3 When installation is complete3 connect the OUTPUT DVI...

Page 8: ...emale connector DDC signal 5Vpp TTL OUTPUT 1 x DVI 2 Dual Link DVI 1 0 1 2Vpp on a DVI Molex 24 pin female connector DDC signal 5Vpp TTL BANDWIDTH 3 3Gbps CONTROLS Capture EDID button POWER SOURCE 5V...

Page 9: ...sof nature ii Product modification or failuretofollowinstructions supplied with the product iii Repair or attemptedrepair by anyonenot authorized byKramer iv Anyshipment oftheproduct claims mustbepres...

Page 10: ...or the latest information on our products and a list of Kramer distributors visit our Web site www kramerelectronics com where updates to this user manual may be found We welcome your questions commen...

Reviews: