


Kramer Electronics Ltd.
TP-873XR / TP-874XR
– Connecting TP-873XR/TP-874XR
7
Connecting TP-873XR
/
TP-874XR
Always switch off the power to each device before connecting it to your
TP-
873XR
/
TP-874XR
. After connecting your
TP-873XR
/
TP-874XR
, connect its power and then
switch on the power to each device.
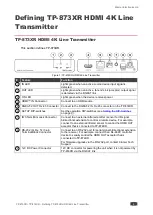
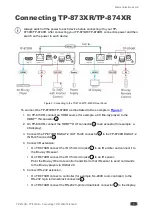
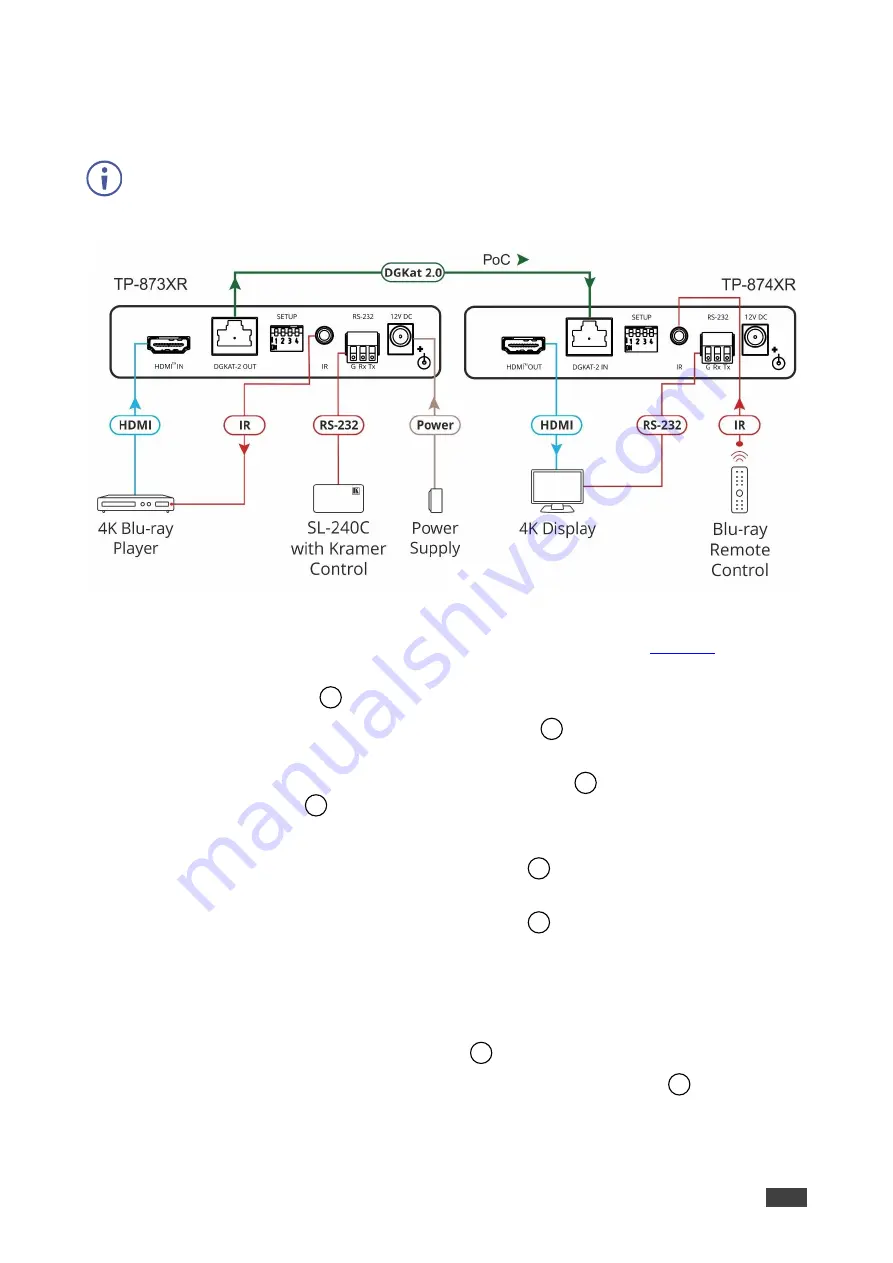
Figure 3: Connecting to the TP-873XR/TP-874XR Rear Panel
To connect the TP-873XR/TP-874XR as illustrated in the example in
1. On
TP-873XR
, connect an HDMI source (for example, a 4K Blu-ray player) to the
HDMI™ IN connector
.
2. On
TP-874XR
, connect the
HDMI™ OUT connector
to an acceptor (for example, a
4K display).
3. Connect the
TP-873XR
DGKAT-2 OUT RJ-45 connector
to the
TP-874XR
DGKAT-2
IN RJ-45 connector
.
4. Connect IR extension:
▪
On
TP-873XR
connect the IR 3.5mm mini jack
to an IR emitter and connect it to
the Blu-ray IR sensor.
▪
On
TP-874XR
connect the IR 3.5mm mini jack
to an IR sensor.
Point the Blu-ray IR remote control transmitter to that IR sensor to send commands
to the Blu-ray player via DGKat 2.0.
5. Connect RS-232 extension:
▪
On
TP-873XR
connect a controller (for example,
SL-240C
room controller) to the
RS-232 3-pin terminal block connector
.
▪
On
TP-874XR
connect the RS-232 3-pin terminal block connector
to the display.
4
13
5
14
7
16
8
17


