STAGEMAN 80 Owner's manual
18
2. Adjust the playback audio and the mic or instrument
recording level.
Set the volume of the playback audio by turning the
RHYTHM/PLAY knob to the 3 o’clock position. Use the
MIC knob and the (INPUT) 1 and 2 knobs to adjust the
volume level of your mic or instrument accordingly.
If you want the previously-recorded sound to be recorded
at the same volume as when it was recorded, turn the
RHYTHM/PLAY knob all the way to the right.
Note:
In the record-standby state or during recording
(when the [
] button is blinking or lit), the three LEDs at
the left of the display operate as the recording level meter.
Adjust the knobs listed above so that the top LED flickers
occasionally.
Note:
To check the recording level of the audio playback
that is being recorded, press the
[
]
button and make
adjustments while you record.
When you’ve finished making adjustments, press the
[VAR] button to return to the beginning of the song.
After you’ve recorded and adjusted the level, press the
[Undo] button to return to the state prior to recording.
Note:
The VOLUME knob does not affect the recording
level. If acoustic feedback occurs, use this knob to lower
the overall volume.
3. To start overdubbing, press the [
] button and then the
[
] button.
Tip:
If you press the [Count Start] button to turn on the
count start function, overdubbing starts after a two-
measure count is sounded.
4. Play your instrument.
5.
When you’ve finished performing, press the
[
]
button to stop recording.
Using punch-in to overdub onto a
recorded song
You can play back a song and then start recording by
pressing the [
] button at the moment you want to begin
overdubbing.
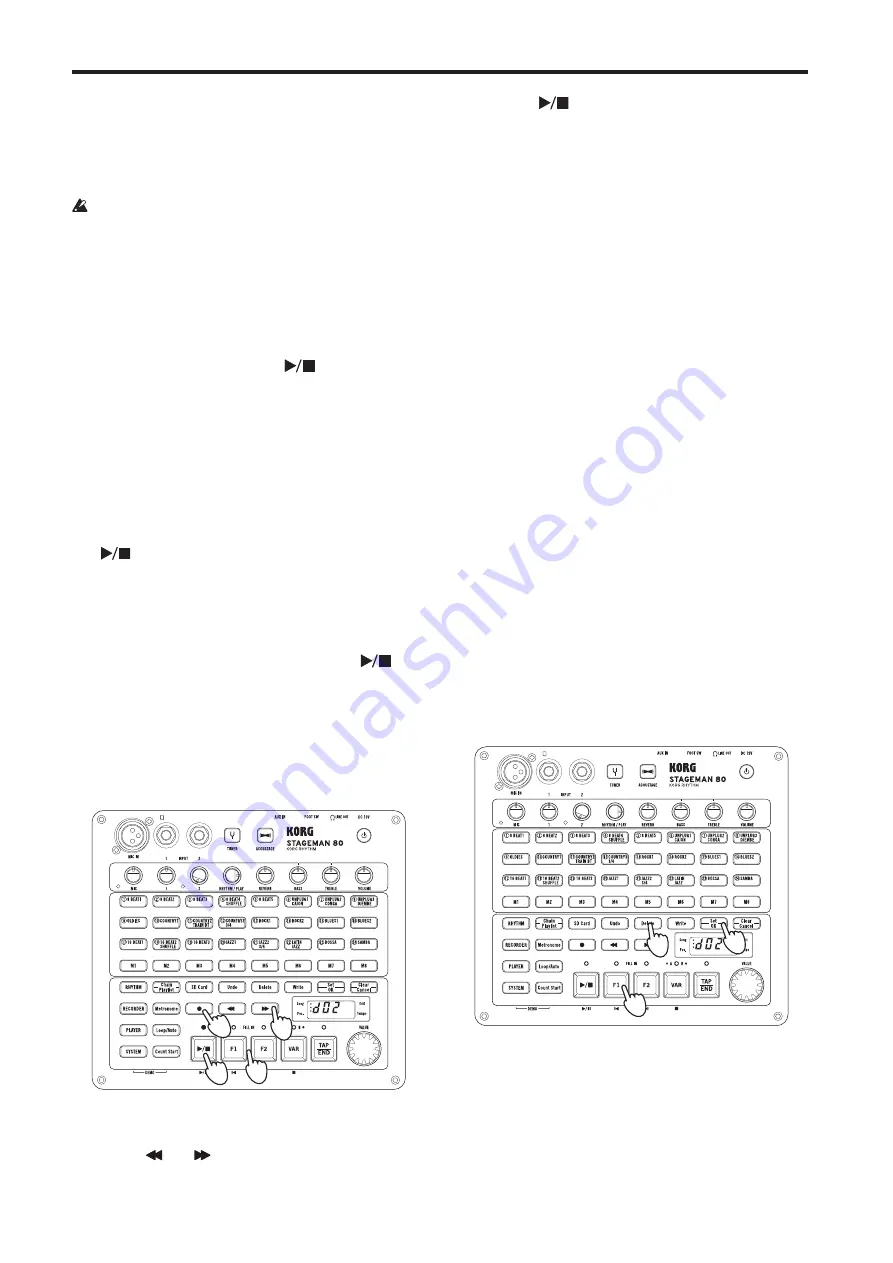
3
4,6
1
2
1.
Use the [F1] or [F2] button to select the song where you
want to add an overdub.
2. Use the [ ] or [
] button to move to a location slightly
earlier than the point where you want to punch-in.
The display indicates the song position.
3. Press the [
] button to start playback.
4. Just before the point where you want to overdub, press
the [
] button to start recording (the button lights up).
5. Play your instrument.
6.
When you’ve finished performing, press the [
] button
to stop overdubbing.
The song switches from recording to playback (the button
goes dark).
Tip:
If you’re using a VOX VFS5 foot switch, you can use the
foot switch to control punch-recording.
Tip:
You can also use the mark function to record a specific
region. (see page 23 “Mark function”).
Returning to the state prior to recording
(Undo)
You can use the [Undo] button if you’re not satisfied with the
recording you made.
Note:
The Undo function is available only for recording in
Recorder mode.
1.
After recording, press the [Undo] button to return to the
state prior to recording (the button will light up).
2.
If you press the button once again, you’ll return to the
state after recording (button unlit).
Deleting a recorded song
Up to 50 songs can be recorded on one SD card. However in
some cases, the number of songs that can be recorded might
be less than 50 depending on the length of the recorded songs
and on the capacity of the SD card.
If there is insufficient free capacity on the SD card, you’ll need
to either provide another SD card or delete data from the SD
card.
1
3
2
1.
Use the [F1] or [F2] button to select the song that you
want to delete.
2.
Hold down the [Delete] button until it lights.
The [Set/OK] and [Clear/Cancel] buttons blink.
3.
Press the [Set/OK] button.
If you decide to cancel the deletion, press the [Clear/
Cancel] button.
When the [Delete] button goes dark, deletion is complete.
Summary of Contents for STAGEMAN 80
Page 1: ...EFGSJ 3 ...
Page 2: ......


