background image

50

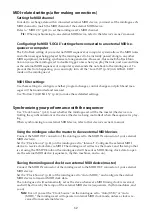
Making connections with the CV IN jacks

Connect these jacks to a external device that can output CV signals to control the minilogue xd. 

Connect the CV IN jack of the minilogue xd to the CV OUT jack of the external device using a 

monaural mini cable (or a stereo mini cable).

Configure the CV IN jack settings on the minilogue xd from “Button 5 (CV INPUT)” (p.33).

See the owner’s manuals of each respective external device to synchronize.

Connecting to a MIDI device or a computer

MIDI stands for Musical Instrument Digital Interface, and is a worldwide standard for exchanging 

various types of musical data between electronic musical instruments and computers.

When MIDI cables are used to connect two or more MIDI devices, performance data can be ex-

changed between the devices, even if they were made by different manufacturers.
MIDI data can also be exchanged between the minilogue xd and your personal computer using 

a single USB cable. The minilogue xd lets you assign MIDI control change numbers (CC#) to the 

major parameters that affect the sound, and control these parameters from an external MIDI se-

quencer while you play the tone generator. You can also use the front panel knobs or buttons to 

transmit these control change messages, in order to control an external MIDI device.

You can also synchronize the minilogue xd’s tempo to the MIDI clock of an external MIDI se-

quencer or other device, so that the minilogue xd will play in time with the external device and 

with any changes you make.

Controlling an external MIDI tone generator from the minilogue xd

If you want to use the minilogue xd’s keyboard, controllers, and sequencer to play sounds on or 

control an external MIDI tone generator, connect the minilogue xd’s MIDI OUT connector to the 

external MIDI tone generator’s MIDI IN connector using a MIDI cable.

CV IN

Monaural mini cable

CV OUT

minilogue xd

MIDI OUT

MIDI IN

Tone generator

minilogue xd

Summary of Contents for Minilogue XD

Page 1: ...E 1 ...

Page 2: ... VCO 1 VCO 2 MULTI ENGINE section 16 MIXER section 20 FILTER section 21 EG LFO section 22 EFFECTS section 24 Sequencer 25 Edit mode 30 How to enter the Edit mode 30 Edit mode parameter list 31 PROGRAM EDIT mode 32 SEQ EDIT mode 37 GLOBAL EDIT mode 39 Other functions 45 Tuning 45 Restoring the factory settings 47 Shortcuts using the SHIFT button 47 Using with other devices 49 Making connections wit...

Page 3: ... analog synthesizer Each voice includes a MULTI ENGINE providing a noise generator a VPM oscillator and the possibility to load user programmed oscillators This instrument combines two VCOs making it possible to create a wide variety of sounds The FX section is equipped with high quality digital effects MODULATION REVERB DE LAY 500 programs 200 preset programs and 300 user programs as the factory ...

Page 4: ...AW SQR PITCH PITCH LFO EG LFO VCO 2 WAVE SHAPE OSC SYNC SAW EG Int keytrack PITCH EG int SQR TRI TRI FM LFO WAVE SHAPE RING MOD VCA VCF AMP EG EG int velocity velocity VCO1 level VCO2 level MULTI level CROSS MOD depth gate gate 0 100 wave shape amount EG USR VPM NOISE MULTI ENGINE EG LFO NOISE VPM SHAPE LFO LFO LFO PITCH USR ...

Page 5: ...OCTAVE switch PITCH knob SHAPE knob SYNC switch RING switch CROSS MOD DEPTH knob MULTI ENGINE p 17 NOISE VPM USR switch Display TYPE knob SHAPE knob 3 MIXER section p 20 VCO 1 knob VCO 2 knob MULTI knob 4 FILTER section p 21 VCF CUTOFF knob RESONANCE knob DRIVE switch KEYTRACK switch 5 AMP EG EG LFO section AMP EG p 22 ATTACK knob DECAY knob SUSTAIN knob RELEASE knob EG p 22 ATTACK knob DECAY knob...

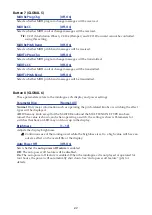
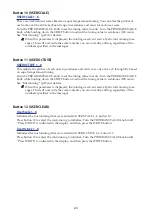
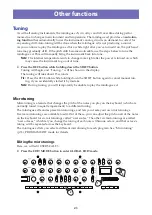
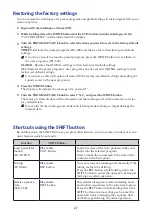
Page 6: ...llows the minilogue xd to exchange MIDI messages with your computer 5 MIDI IN OUT connectors p 50 Connect these to an external MIDI device so that MIDI data can be transmitted and re ceived 6 SYNC IN OUT jacks p 49 Connect these jacks to the SYNC IN OUT jacks on the Korg volca series to synchronize with the pulses and steps that are outputted The SYNC OUT jack outputs a 5 V pulse 15 ms long at the...

Page 7: ...o device To output monaural sound use the OUTPUT L MONO jack To use headphones connect the plug on your headphones to the headphones jack Tip Adjust the volume levels for the OUTPUT jacks and headphones jack using the MASTER knob Turning the power on off Turning the minilogue xd on Make sure that both the minilogue xd and any external output devices such as powered monitor speakers are turned off ...

Page 8: ... feature that can automatically turn the minilogue xd off after 4 hours have elapsed with no operation of the knobs switches buttons or keyboard By default the factory setting for auto power off is enabled The auto power off can be disabled us ing the steps below 1 Press the EDIT MODE button The minilogue xd will enter Edit mode and the display will look like the illustration shown below 2 Turn th...

Page 9: ...tion to showing the program name the display can also be used as an oscilloscope to show the waveform created by the electrical signals of the sound 3 Play the keyboard and try using the joystick and OCTAVE switch and other controls on the front panel You can use the OCTAVE switch to transpose the playing area of the key board by 2 octaves The joystick mainly controls the pitch when moved from lef...

Page 10: ...ill be shown in the display Registering your favorite programs 1 In Play mode turn the PROGRAM VALUE knob to select the program you like The display will indicate the program name 2 Hold down one of the buttons from 1 16 while keeping the SHIFT button pressed The program will be registered as a favorite program and Registered to Favorite will be shown in the display Tip The favorite programs that ...

Page 11: ... button in the SE QUENCER section The sequence data that is recorded in the current program will begin playing The 1 16 buttons will light up to show the current step while the sequencer is playing Tip The sequencer tempo is set individually in each program You can change the tempo in SEQ EDIT mode BPM p 37 You can also adjust the tempo from 56 0 to 240 0 BPM beats per minute by turning the TEMPO ...

Page 12: ...f On MOD FX Type Sub Type SHIFT TypeSELECT DELAY Off On DELAY Sub Type TIME DEPTH Wet Dry SHIFT DEPTH REVERB Off On REVERB Sub Type TIME DEPTH Wet Dry SHIFT DEPTH JOYSTICK X Bend Range X Bend Range Y Assign Y Range Y Assign Y Range CV INPUT CV IN Mode CV IN1 Assign CV IN1 Range CV IN2 Assign CV IN2 Range PITCH SETTING Microtuning Scale Key Program Tuning Transpose LFO LFO Target Osc LFO Key Sync L...

Page 13: ...er to Basic parameters p 15 We recommend that you save the program on the minilogue xd after editing the sound Any edits that you make will be lost if you turn off the power or recall a different program See Saving a program p 14 for details Creating a program from scratch To create a program from scratch we recommend that you use the panel load function This will load the current settings of each...

Page 14: ... for details 2 Press the WRITE button The minilogue xd will enter write standby mode and the WRITE button will blink The display will indicate the message Where to write 3 Turn the PROGRAM VALUE knob to select the program number where your new sound will be saved Tip Press the EXIT button to cancel the operation 4 Press the WRITE button once more The display will indicate the message Complete Neve...

Page 15: ...r voices By chang ing the Voice mode you can combine and allocate the voices in different ways There are four voice modes Use the VOICE MODE TYPE switch to select a voice mode Turning the VOICE MODE DEPTH knob adds different effects for each Voice mode Voice mode list Type Action VOICE MODE DEPTH knob effect POLY Used for basic playing as a 4 voice polyphonic synth POLY DUO 0 1023 Turn the knob to...

Page 16: ...TI ENGINE section VCO 1 VCO 2 VCO Voltage Controlled Oscillator There are two oscillators in the minilogue xd Here we will adjust the basic settings for the sound including pitch OC TAVE PITCH waveform WAVE SHAPE and so on WAVE switch SQR TRI SAW This sets the waveforms for oscillators 1 and 2 SQR square wave This waveform is used for electronic and wind instrument sounds TRI triangle wave This wa...

Page 17: ...llator 2 Turning the knob to the right results in stronger modulation MULTI ENGINE The MULTI ENGINE is a digital sound generation en gine This engine operates as a noise generator a VPM os cillator or a user oscillator to make a wide range of sounds not possible with analog oscillators You can load your own oscillator programs into the user oscilla tor to make sounds NOISE VPM USR switch NOISE VPM...

Page 18: ...m A decimator will be used SHAPE knob Set the noise generator parameter to make changes to the sound The parameters differ depending on the noise generator that you select using the TYPE knob with the following effects SHAPE knob effects Type Parameter Effect High CUTOFF SHAPE knob 10 0Hz 21 0kHz Adjusts the cutoff frequency of the HPF Low CUTOFF SHAPE knob 10 0Hz 21 0kHz Adjusts the cutoff freque...

Page 19: ...tooth carrier basic type Saw2 Carrier using a sine wave to simulate a sawtooth Squ1 Square wave carrier type Squ2 Carrier using a sine wave to simulate a square wave Fat1 1 4 subharmonic modulator with self feedback and driven carrier output emphasizing the lower harmonics Fat2 3 4 subharmonic modulator with self feedback and driven carrier output emphasizing the lower harmonics Air1 Noise modulat...

Page 20: ...can be changed in detail with six param eters in PROGRAM EDIT mode See When the VPM oscillator is selected p 36 for details USR You can load your own oscillator programs into a user oscillator to make sounds on the minilogue xd Up to 16 user oscillators can be saved One factory set default user oscillator is included with the minilogue xd for demo purposes See the logue SDK www korg com for detail...

Page 21: ...ust the CUTOFF knob while adjusting the RESONANCE knob When emphasizing the overtones in this way the sound may distort depending on the cutoff frequency or the input audio DRIVE switch 0 50 100 Sets the distortion effect produced by the drive circuit in three stages 0 switch in the lower position no drive effect 50 switch in the center position drive effect will be set at half strength 100 switch...

Page 22: ...released note off EG EG Envelope Generator The envelope generator EG is used to change the pitch and cutoff frequency over time ATTACK knob 0 1023 The ATTACK specifies the time required for the EG to reach its maximum level once a new note is played DECAY knob 0 1023 The DECAY specifies the time required for the EG to fall to the preset sustain level once the attack portion of the EG is complete E...

Page 23: ...e LFO frequency to the sequencer s BPM beats per minute set in each program RATE knob 0 1023 4 2 1 0 3 4 1 64 The RATE knob adjusts the frequency of the LFO Turning the knob to the right will increase the LFO frequency INT knob 0 511 The INT knob adjusts the intensity of the LFO Turning the knob to the right will increase the LFO intensity Tip When turning the INT knob while holding down the SHIFT...

Page 24: ...t When MOD is selected using the DEL REV MOD switch flip the switch to SELECT to switch be tween the effect types CHORUS ENSEMBLE PHASER FLANGER USER CHORUS When switching between sub types flip the switch to SELECT while holding the SHIFT button down Tip USER user effects are not installed as factory set default effects so they cannot be select ed but you can load them into the minilogue xd to ma...

Page 25: ...r to record that note and to move to the next step The note that you played just before releasing your fingers from the keys will be recorded If you play a wrong note do not release the key instead keep your finger on the wrong note while playing the right note Check the note indicated in the display and take your finger off the keyboard to move to the next step The Default Gate Time p 37 value fr...

Page 26: ...art of the sequence and recreate those motions automatically during playback Up to four motion sequences can be recorded which includes changes to the knobs and switches Note The knobs switches for which you cannot record motions are as follows MASTER knob TEMPO knob OCTAVE switch MASTER MULTI ENGINE TYPE USR DRIVE switch FILTER DEL REV MOD switch SELECT setting of the OFF ON SELECT switch 1 Press...

Page 27: ...1 4 p 38 in SEQ EDIT mode Tip To delete all motion sequences at once use Motion Clear p 38 in SEQ CLEAR SEQ EDIT mode 1 Press the EDIT MODE button a number of times to select SEQ EDIT mode 2 Press button 10 to enter MOTION CLEAR Tip While the SHIFT button is pressed the MOTION VIEW screen will be displayed where you can see the graphics for the motion sequences you have recorded 3 Press button 10 ...

Page 28: ...ple buttons next to each other and playing a note on the keyboard will connect the notes inputted in these steps with a tie If you turn the PROGRAM VALUE knob while playing buttons 1 16 the gate time for only the step s you played will be changed See Default Gate Time p 37 for details on setting the gate time Input a motion sequence Doing so will make the MOTION MODE button light up Tip When the M...

Page 29: ...you cannot enable that step 3 After you finish step editing press the PLAY button to check your sequence data The PLAY button will light Other editing functions Use the SEQ EDIT mode when setting the step length step resolution and other parameters dur ing sequence step recording as well as for deleting sequence data or for editing or deleting mo tions See SEQ EDIT mode p 37 for details ...

Page 30: ...to delete sequence data and so on GLOBAL EDIT mode Use this mode to set how the knobs and switches should function as well as settings such as MIDI for the entire synthesizer 3 Press one of the lit buttons from 1 to 16 The minilogue xd will enter the selected edit mode and the parameter names will be indicated in the display You can go to the page at right by pressing the same button Press the sam...

Page 31: ...ge Program Level Parameter 6 Mod Key Track SEQ EDIT mode BPM p 37 SEQ PARAMETER p 37 SEQ CLEAR p 38 MOTION CLEAR p 38 MOTION ENABLE p 38 MOTION SMOOTH p 38 BPM Step Length All Clear MOTION CLEAR 1 4 MOTION ENABLE 1 4 MOTION SMOOTH 1 4 Step Resolution Motion Clear Swing Default Gate Time GLOBAL EDIT mode GLOBAL 1 p 39 GLOBAL 2 p 39 GLOBAL 3 p 41 GLOBAL 4 p 41 GLOBAL 5 p 42 GLOBAL 6 p 42 USER SCALE ...

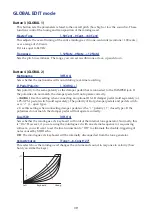
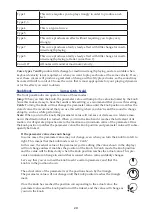
Page 32: ...ODE DEPTH VCO1 PITCH VCO1 SHAPE VCO2 PITCH VCO2 SHAPE CROSS MOD MULTI SHAPE VCO1 LEVEL VCO2 LEVEL MULTI LEVEL CUTOFF RESONANCE A EG ATTACK A EG DECAY A EG SUSTAIN A EG RELEASE EG ATTACK EG DECAY EG INT LFO RATE LFO INT MOD TIME MOD DEPTH REVERB TIME REVERB DEPTH DELAY TIME DELAY TIME Y Range 100 0 100 This sets how much the parameters are changed when the joystick is moved upwards Y Assign GATETIM...

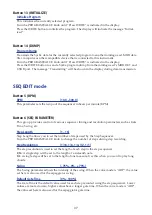
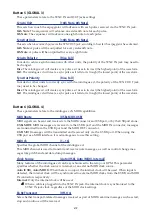
Page 33: ...e parameters that are controlled by the CV inputted to the CV IN2 jack The parameters that can be assigned are the same as those for Y Assign See Y Assign p 32 for details Note The parameters cannot be set when CV IN Mode is set to CV Gate CV IN2 Range 100 0 100 This sets the degree of change to the parameters by the CV inputted to the CV IN2 jack Button 6 PITCH SETTINGS Microtuning EqualTemp Reve...

Page 34: ...nt to use a different key For example set the scale key to 2 Note if you want to use the key of D Note This setting will have no effect if microtuning is set to Equal Temp equal temperament tuning ProgramTuning 50 Cent 0 Cent 50 Cent This adjusts the tuning of the program in one cent units 1 semitone 100 cents over a range of 50 cents Transpose 12 Note 0 Note 12 Note Sets the pitch for the program...

Page 35: ...ing the VCF or whether to bypass the VCF and mix Note When this is set to Post VCF the VCF will not affect the MULTI ENGINE EG Legato Off On When the voice mode is set to UNISON or CHORD this sets what happens with the EG when a key is played in legato while another key is being pressed Off The EG will be retriggered On The EG will not be retriggered Portamento Mode Auto On Auto When playing in a ...

Page 36: ...pth of the modulator feedback Parameter 2 Noise Depth 100 0 100 Adjusts the depth of the noise modulation Parameter 3 Shape Mod Int 100 0 100 Adjusts the depth of the internal EG effect Parameter 4 Mod Attack 100 0 100 Adjusts the attack time of the internal EG Parameter 5 Mod Decay 100 0 100 Adjusts the decay time for the internal EG Parameter 6 Mod KeyTrack 100 0 100 Adjusts the depth of the mod...

Page 37: ...inute BPM Button 6 SEQ PARAMETER This group provides control of various sequencer timing and resolution parameters such as Gate Time Swing etc Step Length 1 16 Step Length allows you to set the number of steps used by the Step Sequencer Turn the PROGRAM VALUE knob to change the number of steps during step recording Step Resolution 1 16 1 8 1 4 1 2 1 1 The step resolution is used to set the length ...

Page 38: ...sequences you have recorded Button 11 MOTION ENABLE MOTION ENABLE 1 4 OFF ON Use this to enable or disable motion 1 4 OFF The motion sequence will be disabled and the parameters will not change the recorded mo tion sequence will not be deleted Press button 11 to select the motion sequence to configure and turn the PROGRAM VALUE knob to select either OFF or ON Tip While the SHIFT button is pressed ...

Page 39: ...perate correctly KORG Use this setting when connecting an optional DS 1H damper pedal sold separately or a PS 3 PS 1 pedal switch sold separately The polarity of Korg damper pedals and pedal switch es is open type Use this setting when connecting damper pedals with a polarity closed type If the polarities do not match the damper pedal will not operate correctly Local SW Off On Sets whether the min...

Page 40: ...ommend that you use this setting when you don t want the sound to change abruptly such as while performing Scale When you turn the knob the parameter value will increase or decrease in a relative man ner in the direction that it is turned When you turn the knob and it reaches the full extent of its motion it will operate proportionate to the maximum or minimum value of the parameter Once the knob ...

Page 41: ...the waveform Button 6 GLOBAL 4 These parameters relate to the minilogue xd s MIDI capabilities MIDI Route USB MIDI USB MIDI signals can be sent and received via the MIDI connector and USB port or by the USB port alone USB MIDI MIDI messages are received via the USB B port and the MIDI IN connector messages are transmitted from the USB B port and the MIDI OUT connector USB MIDI messages will be tra...

Page 42: ...play and power settings Parameter Disp Normal All Normal Only major information such as operating the pitch related knobs or switching the effect types will be displayed All When any knob except for the MASTER knob and the MULTI ENGINE TYPE knob are turned the value is shown and when operating a switch the setting is shown Parameters for switches that have an LED may not show up in the display Bri...

Page 43: ...n equal temperament tuning Turn the PROGRAM VALUE knob to set the tuning value in cents Turn the PROGRAM VALUE knob while holding down the SHIFT button to adjust the tuning value in semitones 100 cents See Microtuning p 45 for details When this parameter is displayed the minilogue xd can receive SysEx microtuning mes sages This will overwrite the scale contents you are currently editing regardless...

Page 44: ...ms live set and global SysEx data of this instrument to another minilogue xd MIDI data filer computer or other compatible device that is connected All Dump USB Turn the PROGRAM VALUE knob until Press WRITE is indicated in the display Press the WRITE button to transmit the MIDI data dump via the USB B port The data will take around 10 seconds to transmit and the message Transmitting will be shown i...

Page 45: ...he tuning will take about 15 seconds Tip Press the REC button while holding down the SHIFT button again to cancel manual tun ing if you accidentally started it by mistake Note During tuning you will temporarily be unable to play the minilogue xd Microtuning Microtuning is a feature that changes the pitch of the notes you play on the keyboard which are normally tuned in equal temperament to a diffe...

Page 46: ...ently editing Tip You can play up to four notes at the same time to edit their tunings together 4 Turn the PROGRAM VALUE knob to set how many cents you want to detune the note com pared to equal temperament tuning You can also turn the PROGRAM VALUE knob while holding down the SHIFT button to have the note you are playing sound a different note When editing the USER OCTAVE use step 2 above to disp...

Page 47: ...sure 5 Turn the PROGRAM VALUE knob to select Yes and press the WRITE button The factory set default data will be reloaded and the minilogue xd will be restored to its fac tory default state Never turn off the minilogue xd while data is being loaded Doing so might damage the internal data Shortcuts using the SHIFT button By holding down the SHIFT button as you press other buttons you can access a n...

Page 48: ...ng DEL or REV using the DEL REV MOD switch DEPTH knob Adjust the wet dry mix for the delay or reverb Select a program Play mode PROGRAM VALUE knob Selects a program either 10 programs before or after the currently selected program Select a favorite program Play mode Buttons 1 16 Press a button from 1 16 while holding the SHIFT button to recall a favorite program previ ously registered to that butt...

Page 49: ...h respective external device to synchronize Starting the sequencer on the minilogue xd will make the sequencer of the connected device syn chronize with the minilogue xd Controlling the minilogue xd from an external device In order to synchronize this instrument to external devices use a stereo mini cable to connect the SYNC OUT jack of the external device to the SYNC IN jack of the minilogue xd U...

Page 50: ...nged between the minilogue xd and your personal computer using a single USB cable The minilogue xd lets you assign MIDI control change numbers CC to the major parameters that affect the sound and control these parameters from an external MIDI se quencer while you play the tone generator You can also use the front panel knobs or buttons to transmit these control change messages in order to control ...

Page 51: ...s a MIDI tone generator In either case you ll need to connect the MIDI OUT connector to the MIDI IN connector on both the minilogue xd and the external MIDI sequencer or computer Some MIDI interface devices may be unable to transmit or receive MIDI SysEx messages to or from the minilogue xd Tip It s convenient to use the USB port when connecting the minilogue xd to a computer Connecting the minilo...

Page 52: ...nce with the sequencer Use Clock Source p 41 to set whether the minilogue xd will be the master the device con trolling the synchronization or the slave the device being controlled when the sequencer is play ing When synchronizing to an external MIDI device refer to that device s owner s manual Using the minilogue xd as the master to slave external MIDI devices Connect the MIDI OUT connector of th...

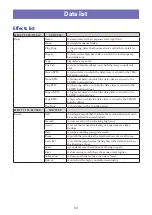
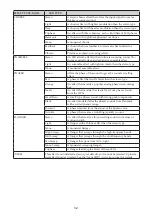
Page 53: ... high pass delay on which the delay time is synced to the TEMPO button settings Tape BPM A tape echo on which the delay time is synced to the TEMPO button settings Doubling A short delay with a doubling effect EFFECT TYPE REVERB SUB TYPE Reverb Hall A hall type reverb that simulates the reverberations of a mid size concert hall or ensemble hall Smooth A clear reverb with a sustaining high end Aren...

Page 54: ...hat swells faster than the stereo type Orange An effect that models a popular analog phaser in an orange box Small An effect that models the classic New York phaser sound from the 1970s Small Reso A small type phaser sound with strong peak components Black An effect modeled after the phaser sounds from Denmark with a wide dynamic range Formant A phaser derived from the sound of the human voice Twi...

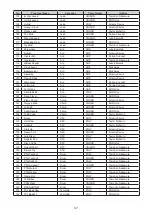
Page 55: ...LY Luke Edwards 24 Harp xd Poly Synth POLY Tomohiro Nakamura 25 Future Pulse Poly Synth POLY Luke Edwards 26 Atk Rel Poly Synth POLY Tomohiro Nakamura 27 Prolly800mk2 Poly Synth POLY Nick Kwas 28 Kawaii Chord Poly Synth POLY Nick Kwas 29 Creep Lights Poly Synth POLY Tomohiro Nakamura 30 Trill Synth Poly Synth POLY Tomohiro Nakamura 31 LapisLazuli Poly Synth POLY Tomohiro Nakamura 32 Claymate Poly ...

Page 56: ...G Bass Bass CHORD KORG Inc 74 Octava Bass Bass CHORD Taylor McFerrin 75 PWM Bass Bass CHORD Artemiy Pavlov 76 Cutie Bass Bass CHORD KORG Inc 77 Anchor Bass Bass CHORD KORG Inc 78 TriKO Bass Bass CHORD Tomohiro Nakamura 79 Pluck Bass Bass CHORD Artemiy Pavlov 80 Sharp Teeth Bass CHORD Artemiy Pavlov 81 Hypno Acid Bass CHORD Artemiy Pavlov 82 Spike Bass Bass UNISON KORG Inc 83 Pure Vintage Bass CHOR...

Page 57: ...D KORG Inc 126 Piano Chord Chord CHORD Artemiy Pavlov 127 Gxyexp Stab Chord CHORD KORG Inc 128 Lush m7 Chord CHORD Artemiy Pavlov 129 SpiralNebula Chord CHORD KORG Inc 130 Third Code Chord CHORD Taylor McFerrin 131 Sirens SFX POLY Artemiy Pavlov 132 Halo Pad SFX POLY Taylor McFerrin 133 Antidote SFX CHORD Taylor McFerrin 134 Starship SFX POLY Artemiy Pavlov 135 Space Acid SFX CHORD Artemiy Pavlov ...

Page 58: ... ARP KORG Inc 174 TPL PingPong Template POLY KORG Inc 175 TPL Downpour Template POLY KORG Inc 176 TPL 100 Wet Template POLY KORG Inc 177 TPL Doubling Template POLY KORG Inc 178 TPL Parroted Template POLY KORG Inc 179 TPL PumpNois Template CHORD KORG Inc 180 TPL DownSmpl Template CHORD KORG Inc 181 TPL ThruVCF Template POLY KORG Inc 182 TPL 2Sines Template POLY KORG Inc 183 TPL Reversed Template PO...

Page 59: ...dshaw Luke Edwards Nick Kwas Taylor McFerrin Tomohiro Nakamura and KORG Inc For more information about the authors please visit Artemiy Pavlov https www sinevibes com Dorian Concept https www dorianconcept com Taylor McFerrin https www taylormcferrin com Tomohiro Nakamura aka ghostradioshow http www youtube com user ghostradioshow ...

Page 60: ...e Input output jacks Headphones jack 6 3mm stereo phone jack OUTPUT L MONO and R jacks 6 3mm monaural phone jack unbalanced DAMPER jack half damper not supported SYNC IN jack 3 5 mm stereo mini phone jack 20V maximum input level SYNC OUT jack 3 5 mm stereo mini phone jack 5V output level CV IN 1 and 2 jacks 3 5 mm monaural mini phone jack input voltage 5V to 5V in modulation mode 3V to 5V in CV ga...

Page 61: ...O X X X X O O O O O O 123 127 O X 5 Memorized 1 1 When the Global setting is MIDI Rx Pitch Bend On the prologue will receive signals and when the Global setting is MIDI Tx Pitch Bend On the prologue will transmit signals 2 When the Global setting is MIDI Rx CC ON the prologue will receive signals and the when Global setting is MIDI Tx CC On the prologue will transmit signals 3 When the Global sett...

Page 62: ...www korg com Published 1 2019 2018 KORG INC ...

Reviews: