


13
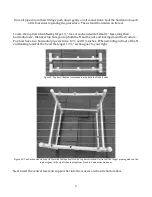
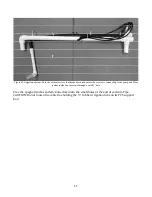
Put the support board on its support pipes (Figure 20) and place the reservoir on the board all the
way to the West (right) with sidewall holes to the left (Figure 17 above). Center the Level Control
Valve stem inside the 3” circle cutout in the board. The reservoir extends beyond the N End for
easy access when you need to change out the nutrient solution, clean the filter, replace the pump,
or adjust the Level Control Valve.
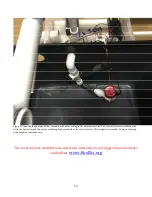
The Level Control Valve can be damaged in shipping and this is the best time to test it for leaks.
Leaks cannot be tolerated because, although water is easily replaced especially with Autofill, lost
nutrients are not replaced until the next nutrient solution change out. Place a paper under the
base of the Valve and put 4 gallons of water in the reservoir to check for leaks. If you see no drips,
you’re good, continue with assembly. If the Valve does drip (rare) turn it over and carefully
tighten the large white nut. If dripping persists (very rare) you’ll have to unscrew it and add more
rope putty (included) to its base before replacing and tightening the nut.
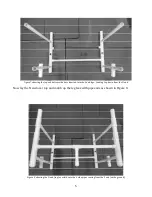
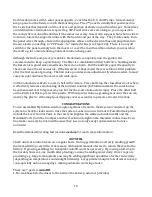
Figure 20. Note the correct positioning of the reservoir support board at the N end of the Garden. The 3” diameter
circle holds the base of the Autofill Level Control Valve.
Download a separate short document for Autofill installation details
Summary of Contents for My Garden
Page 21: ...21 ...


