


Using Scan to E-mail Operations
4
IF-118
4-7
4.1.4
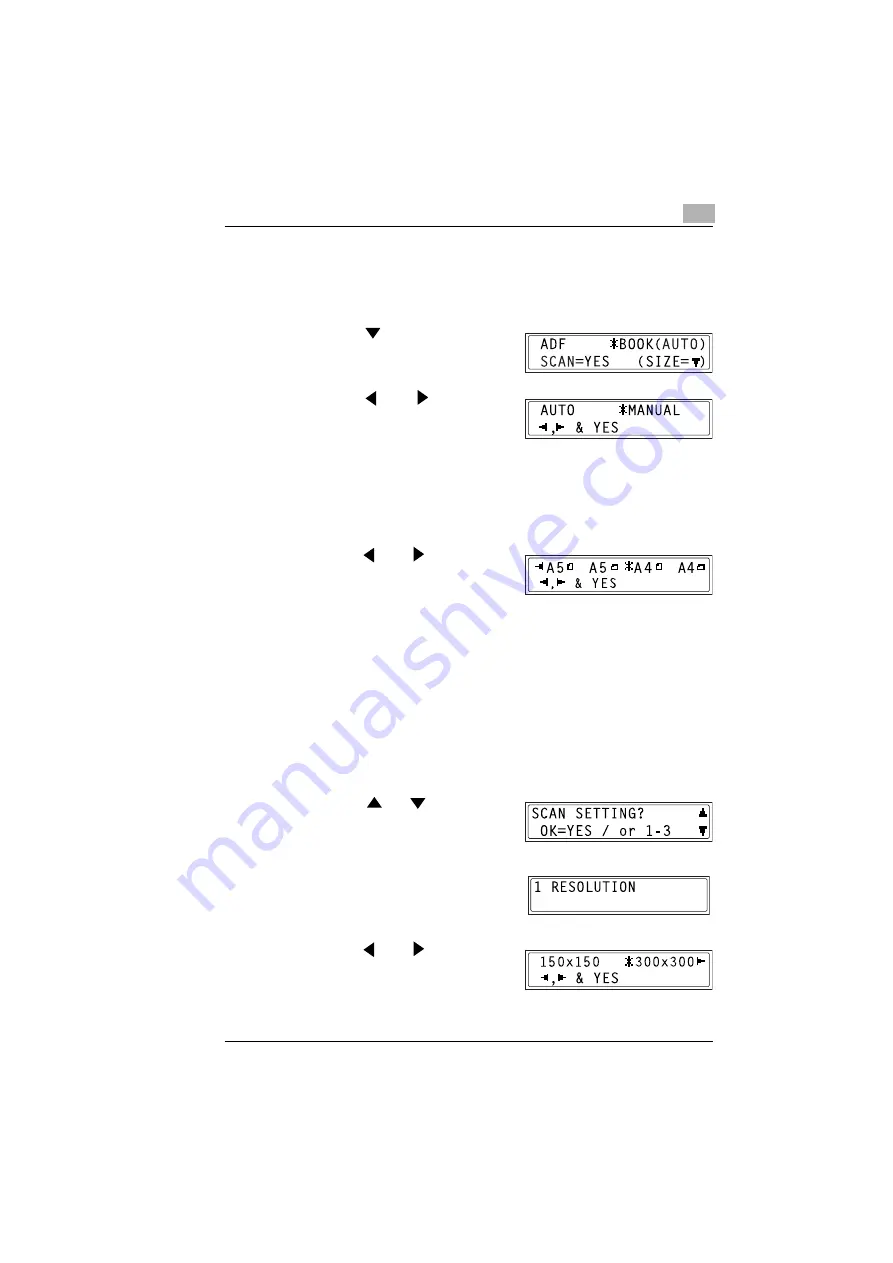
Changing the Scanned Image Size
The setting for the size of the scan image can be changed from the screen
for selecting the document mode (“BOOK”).
1
Press the
key in the screen for
selecting the document mode
(“BOOK”).
2
Press the
and
keys to
specify whether to automatically
detect the document size (“AUTO”),
or specify the scanning size
manually (“MANUAL”), and then press the [YES] key.
❍
If “AUTO” is selected, the document mode selection screen
appears again.
❍
If “MANUAL” is selected, go to step 3.
3
Press the
and
keys to select
the scan size, and then press the
[YES] key.
The document mode selection screen appears again.
4.1.5
Specifying the Default Settings for the Scan Settings
The default settings for resolution, data format, and encoding method
used by the Scan to E-mail and Scan to Server (FTP) functions can be
specified.
Specifying the Resolution
1
Press the [UTILITY] key.
2
Press the
or
key until
“SCAN SETTING” appears.
3
Press the [1] key on the 10-key pad
to select “RESOLUTION”.
4
Press the
and
keys to select
the resolution (150
×
150 dpi, 300
×
300 dpi, or 600
×
600 dpi), and then
press the [YES] key.
The SCAN SETTING screen appears.
Summary of Contents for IF-118
Page 1: ...IF 118 User s Guide...
Page 7: ...Contents vi IF 118...
Page 27: ...2 Overview 2 18 IF 118...
Page 77: ...3 Getting Ready 3 50 IF 118...
Page 93: ...4 Using Scan to E mail Operations 4 16 IF 118...
Page 121: ...6 Using Internet Faxing Operations 6 22 IF 118...
Page 123: ...7 Direct Fax Transmission 7 2 IF 118...
Page 125: ...8 Checking the Transmission Reception Results 8 2 IF 118...
Page 133: ...10 Appendix 10 2 IF 118...
Page 139: ...11 Index 11 6 IF 118...
Page 140: ...2004 02 1 MANUFACTURER TOKYO JAPAN Printed in China 4508 7797 01 91264C051H018...


