background image

AccurioPress C3080/C3080P/C3070, AccurioPrint C3070L

5-3

5.1

Replenish and Replace Consumables

5

5

Troubleshooting

5.1

Replenish and Replace Consumables

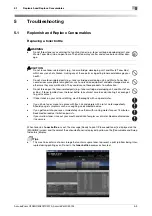
Replacing a toner bottle

7

WARNING

-

Do not throw toner or a container that contains toner (e.g., toner cartridge, developing unit, and 
Waste Toner Box) into an open flame. The hot toner may scatter and cause burns or other dam-
age.

7

CAUTION 

-

Do not leave toner-related parts (e.g., toner cartridge, developing unit, and Waste Toner Box) 
within easy reach of children. Licking any of these parts or ingesting toner could damage your 
health.

-

Do not store toner-related parts (e.g., toner cartridge, developing unit, and Waste Toner Box) 
near devices susceptible to magnetism, such as precision equipment and data storage devices, 
otherwise they may malfunction. They could cause these products to malfunction.

-

Do not force open the toner-related parts (e.g., toner cartridge, developing unit, and Waste Ton-
er Box). If toner tumbles from the toner bottle, take utmost care to avoid inhaling it or even get-
ting skin contact.

-

If toner lands on your skin or clothing, wash thoroughly with soap and water.

-

If you inhale toner, move to a place with fresh air and gargle with a lot of water repeatedly. 
Should you get symptoms such as coughing, seek medical advice.

-

If you get toner into your eyes, immediately rinse them with running water for over 15 minutes. 
Seek medical advice if irritation persists.

-

If you swallow toner, rinse out your mouth and drink a few glasses of water. Seek medical advice 
if necessary.

When toner in a 

toner bottle

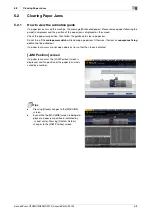
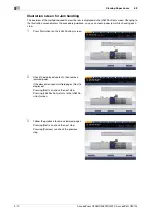
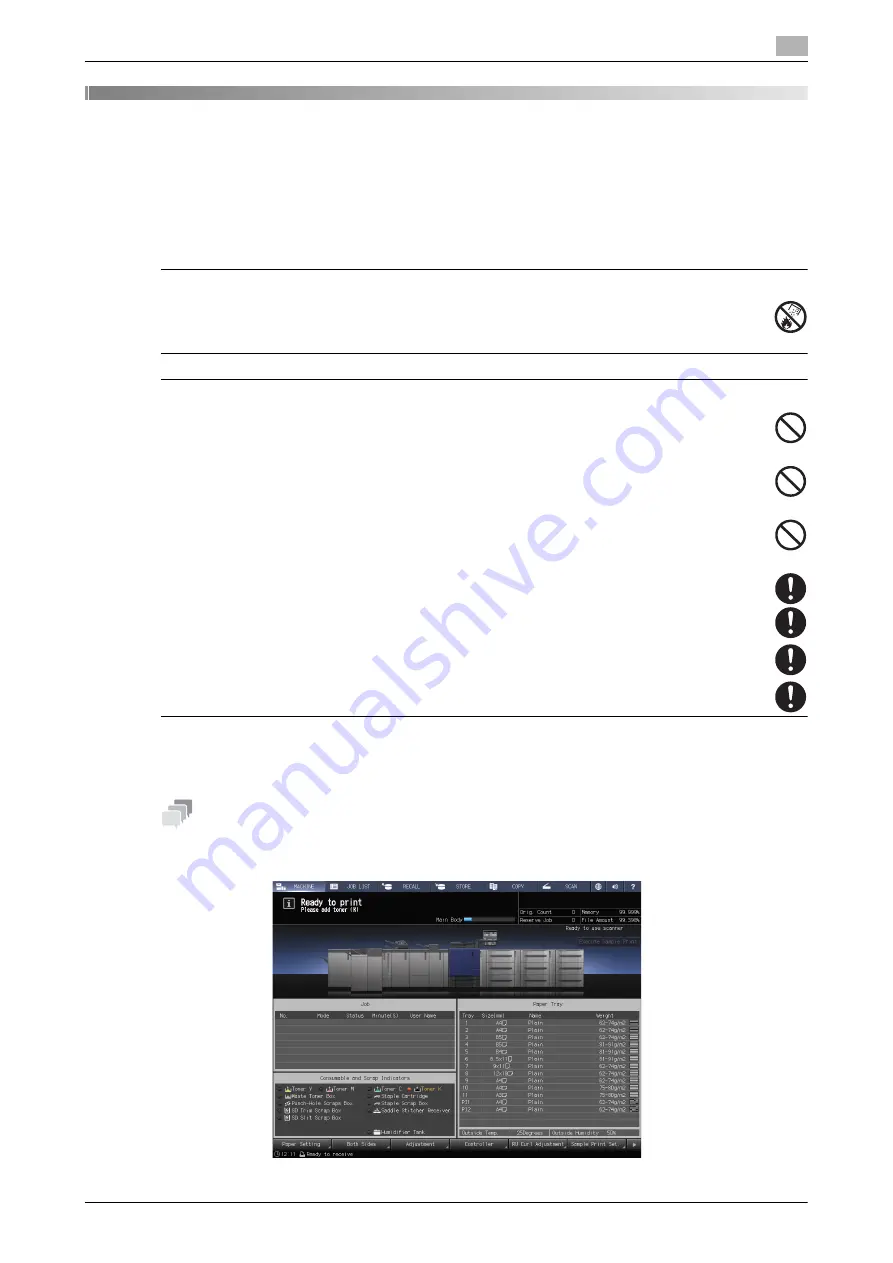
 runs out, the message [Ready to print / Please add toner] is displayed on the 

[MACHINE] screen, and the color of the exhausted toner is displayed in yellow on the [Consumable and Scrap 
Indicators] display.

Tips

-

This machine contains a toner storage that contains spare toner to prevent a print job from being inter-
rupted during printing even if toner in the 

toner bottle

 becomes exhausted.

Summary of Contents for AccurioPress C3070

Page 1: ...AccurioPress C3080 C3080P C3070 AccurioPrint C3070L Colour production printing system Quick GUIDE...

Page 2: ......

Page 3: ...IC 313 2 15 2 2 4 Application functions Image Controller IC 314 2 16 3 Let s Make Prints 3 1 Printing Flow 3 3 3 1 1 Step 1 Prepare the printer driver and applications 3 3 3 1 2 Step 2 Load paper int...

Page 4: ...ress C3080 C3080P C3070 AccurioPrint C3070L 6 Appendix 6 1 Good Use of the HTML User s Guide 6 3 6 2 Name of each Component 6 4 6 2 1 External components 6 4 6 2 2 Internal components 6 9 6 2 3 Contro...

Page 5: ...1 Introduction...

Page 6: ......

Page 7: ...egligence of the instructions may lead to mishandling that may cause injury or property damage NOTICE This symbol indicates a risk that may result in damage to this machine or originals Follow the ins...

Page 8: ...adhered to General national and company safety provisions are observed 1 3 2 Impermissible operating conditions The system may not be operated if Errors or damage have been discovered Maintenance inte...

Page 9: ...k that JavaScript of your Web browser is enabled The HTML User s Guide uses JavaScript for the page display or search function Note that some of the functions may not work normally depending on your s...

Page 10: ...ller IC 314 is not compatible with the AccurioPrint C3070L Product name Conventions used in this guide AccurioPress C3080 AccurioPress C3080P AccurioPress C3070 AccurioPrint C3070L This machine Indica...

Page 11: ...2 Before Getting Started...

Page 12: ......

Page 13: ...ing the power on 1 Open the front door of the main body then turn the main power switch on When the main power switch is turned on the Power LED on the control panel lights up in orange 2 Turn on the...

Page 14: ...14 turn the image controller on NOTICE After this machine has started completely turn the image con troller on For Image Controller IC 417 turn the power switch in the rear side on then press the butt...

Page 15: ...05 1 Turn off the sub power switch The touch panel display is cleared and the Power LED on the control panel is changed from blue to orange NOTICE While the following message is displayed do not turn...

Page 16: ...the password 4 Press Waiting Jobs 5 Press the Tools tab 6 Press Restart Server 7 Press Shut Down System 8 Press Exit NOTICE While the following message is displayed do not quit the system Otherwise a...

Page 17: ...wer switch off then on be sure to wait for 10 seconds or longer before turning the main power switch on again If the main power switch is turned on again within 10 seconds the machine may not function...

Page 18: ...Power is turned off automatically Power off in progress Please do not turn the main power off 2 Turn off the main power switch NOTICE When turning the main power switch off then on be sure to wait for...

Page 19: ...e User s Guide for the Fiery Color Server Turning the power off Image Controller IC 314 1 Turn off the sub power switch The touch panel display is cleared and the Power LED on the control panel is cha...

Page 20: ...nel has been pressed for a second or more If the Auto Shut OFF mode is kept for a long time it may take a while to warm up this machine upon restart This mode is available when Auto Shut OFF is select...

Page 21: ...bled To enable either function select Administrator Setting System Setting Power Save Setting Power Save Function Setting dReference For details about how to configure and use the above functions refe...

Page 22: ...troller You can print data on this machine via the printer driver using the application software installed on your com puter You can configure a layout or finish setting by implementing a simple actio...

Page 23: ...work to import the scan data to your computer Tips Sending to a WebDAV server and saving to a USB flash drive are functions available only when Image Controller IC 605 is installed on this machine To...

Page 24: ...eck the status of this machine or configure various settings remotely from PageScope Web Connection Image Controller IC 417 Image Controller IC 313 WebTools WebTools is a device control utility progra...

Page 25: ...erator You can check the job status that is being processed by the controller or that is being printed and check an overview of the processed job You can also search or print a job calibrate the contr...

Page 26: ...80 C3080P C3070 AccurioPrint C3070L Available Operations in this Machine 2 2 2 2 2 4 Application functions Image Controller IC 314 workspace workspace is an application that manages jobs and image con...

Page 27: ...3 Let s Make Prints...

Page 28: ......

Page 29: ...tep 3 1 1 Step 1 Prepare the printer driver and applications Install the printer driver and applications in your computer After installation is completed configure information of the mounted devices u...

Page 30: ...u can select a tray to load paper to be printed into For information about other functions of the printer driver refer to the user s guide supplied with Fiery Color Server Image Controller IC 314 Chec...

Page 31: ...4 Basic Operations...

Page 32: ......

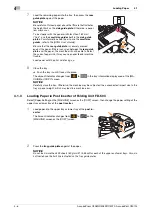
Page 33: ...into NOTICE Be sure to pull out the tray fully until a blue label shows on the rear left side of the tray Otherwise the feed roller may not open or another machine trouble may occur 2 Open the feed ro...

Page 34: ...7 Pushing the side guide lock release lever align the side guide plate to the paper 8 Turn two side guide lock knobs in the front and rear sides clockwise and fix them 9 Load the remaining paper into...

Page 35: ...ile pressing the side guide lock release lever slide the side guide plates to any positions Determine their locations based on the size indicator of the bottom plate of the tray NOTICE When moving the...

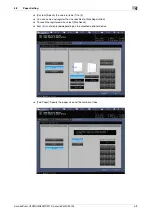
Page 36: ...ouble Load paper with the print side facing up 8 Close the tray Push the tray in until it locks into place The amount indicator changes from to in the tray information display area of the MA CHINE or...

Page 37: ...alues for the paper loaded into a paper tray If standard size paper is loaded its size is recognized automatically To load custom size paper specify the required size 1 Press Paper Setting on the MACH...

Page 38: ...cify the size Standard Recognized automatically In Detect Size Setting you can select the size to be detected There is however a group of sizes having subtle distinctions so that the machine cannot di...

Page 39: ...Custom Specify the value in items 1 to 3 You can name and register the size specified in Size Registration To recall the registered size select Size Recall Item 3 is not displayed depending on the mou...

Page 40: ...t Detect Size Setting in Standard press OK This returns to the Size Setting screen This step is not required if you select Cus tom or Tab Paper 8 Press OK This returns to the Change Individual Set scr...

Page 41: ...COPY screen to specify the paper size the screen re turns to the COPY screen Paper setting is then completed Tips For details about setting items refer to the HTML User s Guide To register paper cond...

Page 42: ...4 12 AccurioPress C3080 C3080P C3070 AccurioPrint C3070L Paper Setting 4 4 2...

Page 43: ...5 Troubleshooting...

Page 44: ......

Page 45: ...elated parts e g toner cartridge developing unit and Waste Ton er Box If toner tumbles from the toner bottle take utmost care to avoid inhaling it or even get ting skin contact If toner lands on your...

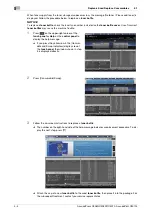
Page 46: ...ess on the upper right corner of the touch panel or Help on the control panel to display the help message If you press the yellow row in the Consum able and Scrap Indicators display area of the touch...

Page 47: ...Scrap In dicators display dReference The following describes how to replace a staple cartridge in the left hand side stapler of the Saddle Stitch er SD 506 For information about how to replace staple...

Page 48: ...he help message indicates a replacement procedure To dis play the next step press NOTICE The Saddle Stitcher SD 506 contains two staple cartridges Check the message then be sure to pull out the empty...

Page 49: ...ner Box indicator changes to yellow in the Con sumable and Scrap Indicators display 1 Press on the upper right corner of the touch panel or Help on the control panel to display the help message If you...

Page 50: ...eplenish and Replace Consumables 5 5 1 3 Press the Waste Toner tab then follow the on screen instructions to replace the waste toner box The number on the right hand side of the help message indicates...

Page 51: ...e to clear a paper jam Do not turn off the main power switch while clearing a paper jam Otherwise the trays or conveyance fixing unit cannot be pulled out If a paper jam occurs do not open doors or tr...

Page 52: ...procedure guidance so you can clear a paper jam while checking each step 1 Press Illustration on the JAM Position screen 2 Check the displayed contents then remove jammed paper If the description spa...

Page 53: ...other places not displayed on the touch panel again In particular check the following points Check whether a slip of paper is left on the back of the part indicated by the number on the touch pan el...

Page 54: ...on the screen To address this problem load the specified paper into a tray or you can forcibly print on the currently loaded paper of a different size If you use Image Controller IC 417 Image Controll...

Page 55: ...ss C3080 C3080P C3070 AccurioPrint C3070L 5 13 5 3 If the Specified Paper is not Found 5 4 Replace paper into the tray then press Close 5 Press Start on the control panel Printing starts using the sel...

Page 56: ...Specified Paper is not Found 5 5 3 Forcibly printing using the loaded paper 1 Press Confirm Details on the MACHINE screen 2 Select a tray with print paper loaded then press Forced Output 3 Press Star...

Page 57: ...starts using the selected tray If using Image Controller IC 314 Job information is displayed on the workspace screen 1 Right click a job on hold and select Job parameters 2 Confirm the information an...

Page 58: ...ope Web Connection The user mode screen of PageScope Web Connection is displayed For details refer to the HTML User s Guide 5 Click Device Information and then click Option 6 Check Remain in HDD Pre R...

Page 59: ...stment flow High Precision dReference For details about the Image Controller IC 605 refer to the HTML User s Guide For details about the Image Controller IC 417 and Image Controller IC 313 refer to th...

Page 60: ...5 18 AccurioPress C3080 C3080P C3070 AccurioPrint C3070L If you forget the administrator password 5 5 7...

Page 61: ...6 Appendix...

Page 62: ......

Page 63: ...in the entry field and click The search results are displayed in the order in which the matching percentage is higher You can enter multiple keywords separated with spaces to narrow down the informati...

Page 64: ...6 4 AccurioPress C3080 C3080P C3070 AccurioPrint C3070L Name of each Component 6 6 2 6 2 Name of each Component 6 2 1 External components...

Page 65: ...AccurioPress C3080 C3080P C3070 AccurioPrint C3070L 6 5 6 2 Name of each Component 6...


Page 66: ...ng Table WT 511 optional Provides a convenient workspace for documents before and after copying 14 Multi Bypass Tray MB 506 option al Opens to use copy paper other than that which is loaded in the mac...

Page 67: ...Controller IC 313 This is the server when Image Controller IC 313 is equipped Required to use this machine as a printer or scanner 30 Row selection button 1 2 3 4 Enables to select a menu at the targe...

Page 68: ...scription 38 Image Controller IC 314 This is the server when Image Controller IC 314 is equipped Required to use this machine as a printer or scanner 39 Power controller button Turns the sub power of...

Page 69: ...t for removal of paper jam For handling levers and knobs of the conveyance fixing unit follow the in struction on the screen to be displayed when paper jam occurs 5 Drum unit Forms the copy image 6 Le...

Page 70: ...dangerous situation NEVER throw the waste toner box into a fire CAUTION High temperature Bum You may get burned DO NOT touch the fusing part of the conveyance fixing unit Be especially careful when wi...

Page 71: ...s ready for the Interrupt mode the Interrupt LED turns steady 6 Stop Suspends the current output job or stops the machine op eration 7 Proof Copy Outputs a sample set to check the result of adjustment...

Page 72: ...nnect from the power socket Contact your service representative and inform them of the report code 12 Mode Check Used to check settings of the print job in progress or those currently made 13 Utility...

Reviews: